about us | links | permit info
Subscribe to Hiking With My Brother Email Subscribe Follow Hiking With My Brother on Facebook Follow Hiking With My Brother on Twitter Hiking With My Brother Picasa Hiking With My Brother YouTube
Showing posts with label waterfall. Show all posts

Licorice Fern Trail (S6) to Far Country Falls

Our Hiking Time: 2h
Total Ascent: 200ft
Highest Point: 700ft
Total Distance: 3.8 miles
Location: N 47° 31.26, W 122° 7.7033
Required Permit: None
Difficulty: Easy

Nathan's PhotoOver the years we have spent many an afternoon tromping up and down Cougar Mountain. Still, with many miles of official, “unofficial” and abandoned trails, there are still areas we have yet to explore. Recently we had a chance to check out the often-overlooked Licorice Fern Trail, which offers a quiet alternative approach to Far Country Falls.
We’ve covered much of Cougar Mountain’s past on previous hikes. From the early coal mining days to the area’s more recent military history, the nearly 30-year-old park contains and preserves a rich cultural legacy. Envisioned by Harvey Manning and first proposed in 1979, the Cougar Mountain Regional Park concept eventually managed to block planned residential development in the park and gain enough voter support to pass a bond measure. Today the park is the largest “urban wildland” in the United States with over 3,000 acres of forest riddled with 38 miles of hiking trails.

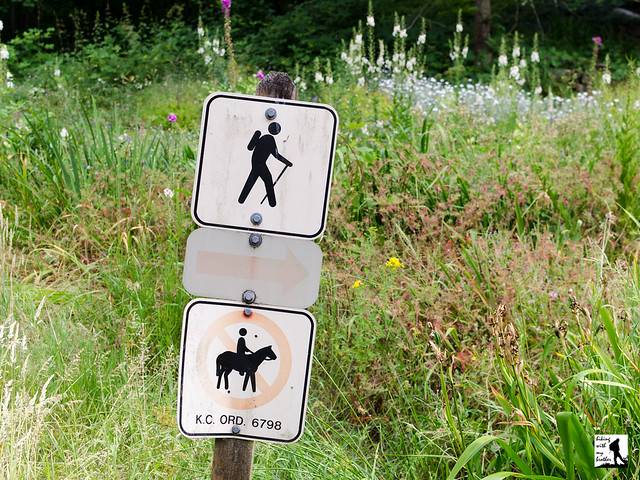
The trail begins directly from 169th Street and is largely unmarked. Only a small sign picturing a hiker gives any indication of a trailhead. Once you find roadside parking, be sure to avoid the paved driveway leading uphill to the left and the grassy yard to the right as you begin the hike. Instead stay on the wide gravel path leading into the trees. From here the trail angles uphill, winding beneath mossy alders and through a thick understory of vine maple and fern. After a mile of hiking, the trail crosses SE Licorice Way before continuing to climb another third of a mile to the junction with the Indian Trail (W7).

Head left at the junction, following the Indian Trail for a half-mile to the Far Country Trail (S1). Continue straight ahead to reach the Far Country Falls overlook. The seasonal multi-tiered cascade drops about 20 feet through a field of moss-covered boulders. While not necessarily spectacular, the falls are interesting enough to make a good destination for those looking for a short hike. You can add some mileage by hiking another third of a mile down the Far Country Trail, to the Far Country Lookout, though this somewhat overgrown peek-a-boo view of the surrounding suburban landscape is unlikely to hold your attention for long.

This trail is a great alternative to the more popular Cougar Mountain trailheads, offering the same outdoor experience with a little less foot traffic. Easy and approachable for any hiker, this easily accessible trail is also a good option during the off-season or just a rainy day as Far Country Falls is fueled entirely by rain or snow melt. Next time you head out for jaunt up Cougar Mountain, consider trying something a little different and exploring the Licorice Fern Trail.

To get there, take I-90 out to Exit 10A, merging onto I-405 South. Stay to the right to take Exit 10 onto Coal Creek Parkway. Follow Coal Creek Parkway four miles to May Valley Road. Take a left onto May Valley Road and continue 2.2 miles to a sharp bend in the road and veer left, continuing to stay on May Valley Road. In .1 miles keep left as the road splits, merging onto SE 112th Street. Continue another .4 miles to the first big curve in the road. As you turn left up the hill the road becomes 169th Ave and the trailhead is here. Find parking along the roadside. -Nathan

Print Google Directions >>

Licorice Fern Trail

Coal Creek Trail - Red Town Trailhead

Our Hiking Time: 1h 45m
Total Ascent: 500ft Out
Highest Point: 650ft
Total Distance: 5.6 miles
Location: N 47° 32.694, W 122° 09.098
Required Permit: None
Difficulty: Easy

Nathan's Photo
With winter now in full swing and the snow beginning to creep down from the mountaintops, our hiking destinations are largely confined to lower elevations. Not long ago we found time to explore Coal Creek Park, an urban greenway that connects Cougar Mountain to Lake Washington. Accessible year-round and steeped in the mining history of the area, this rail-to-trail hike makes for excellent winter hiking.

Coal Creek Park’s friendly greenery gives little indication that nearly all the landscape along the trail has been altered and reshaped by mining activity. Back in 1863, coal was discovered along Coal Creek and over the next 100 years, miners would pull 11 million tons of coal from the slopes of Cougar Mountain before the mines were sealed in 1963. All that coal prompted folks to dub the area "Newcastle Hills," after England's coal-rich city of Newcastle. In 1870, Newcastle Hills coal drove the creation of Seattle's first railroad, the Seattle & Walla Walla, which hauled coal from Cougar Mountain out to Elliot Bay. At that time, horses pulled coal cars along the track down to Lake Washington and a series of barges shuttled to coal out to Elliot Bay to be shipped down to San Francisco. Over time, waste rock from the mining process built up, and much of it was used for fill or piled up near the rail line. Today, most of Coal Creek Park travels through the forests that grew over these piles of waste rock.

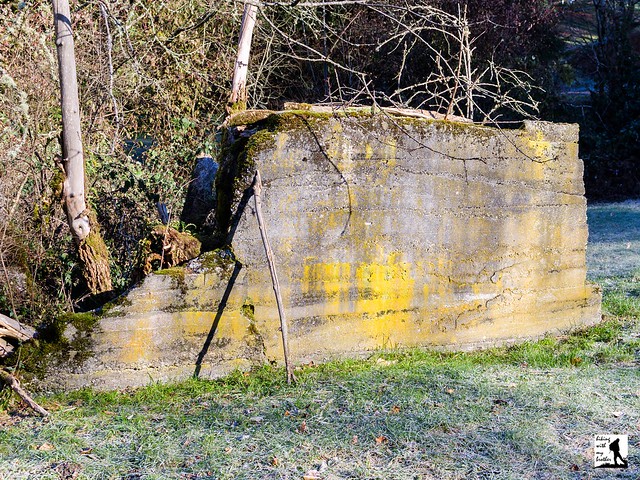
The trail begins from the Red Town Trailhead, named for the mining settlement of Red Town that was built in this area. The name was a reference to the red paint that was used on most of the buildings. From the trailhead, cross Lakemont Boulevard to a grassy meadow, following a wide trail toward the sound of a splashing creek. Note the concrete foundation here, which is all that remains of the former Coal Creek Hotel (later known as the Newcastle Hotel). The trail quickly descends past a mine shaft and down to Coal Creek and the old railroad grade. After .25 miles you’ll reach North Creek Falls, a small but pleasant waterfall that flows year-round. As you leave the waterfall, keep an eye on the creek as you will soon see the water flowing over wooden boards. These boards are all that remain of the wooden box that miners built to enclose the creek and build tracks over it.

As you push onward through a forest of alder and Douglas fir, watch for other remnants of the mining past peeking out from beneath a sea of sword fern. At around the .5 mile pass a concrete platform on your left that is the remains of a locomotive turntable. Soon find yourself climbing an elaborate series of wooden bridges and steps before reaching a mining road at the .7 mile mark. Head right and downhill, following the road for another half-mile to a junction with the Primrose Trail, named for the former Primrose Mine. We recommend taking a right and following this trail as it descends deeper into the valley and passes Sandstone Falls in a few tenths of a mile. Continue following the Primrose Trail until it reconnects with the Coal Creek Trail. From here you can head back to the Red Town Trailhead via the Coal Creek Trail to make something of a loop, or continue almost another mile out to the Coal Creek Trailhead where a fish ladder can be found complete with a viewing area. Either way, enjoy this unexpectedly quiet walk through a young forest.

To get there, take I-90 to Exit 13. Head right up the hill on Lakemont Boulevard just over three miles. Look for the entrance to the Red Town Trailhead on the left side of the road. - Nathan

Print Google Directions >>

Coal Creek Trail

Spray Park and Spray Falls

Our Hiking Time: 5h 30m
Total Ascent: 1600ft
Highest Point: 6400ft
Total Distance: 8.0 miles
Location: N 46° 55.297, W 121° 49.135
Required Permit: National Park Pass
Difficulty: Moderate

Nathan's Photo
One of our longer overnights this summer involved a visit to the the Mowich Lake area. Popular and easily accessible, Mowich Lake serves as a jumping off point for a variety of adventures ranging from multi-day backpacks to short day hikes. Perhaps the most impressive destination is a sprawling series of alpine meadows on the northern flanks of Mt. Rainier known as Spray Park. Complete with a stunning waterfall, fields of wildflowers, and the mountain’s sparkling glaciers, this is a hike you will never forget.

Around 105,000 years ago, vents opened on the northern side of Mt. Rainier, which spewed a layer of hard lava into the surrounding area and formed the foundation of Spray and Mist Park. Today we know those vents as Echo Rock and Observation Rock. Around 1881, the Northern Pacific Railroad became interested in the northwest portion of Mt. Rainier and sent a geologist named Bailey Willis to look for coal and to see if the area was suitable for tourism. Part of Willis’s expedition involved cutting a trail from Wilkerson to Mowich Lake that became known as the Grindstone Trail. From Mowich Lake, Willis explored the region and by 1883 he had built a route to Spray Park, the Bailey Willis Trail, and led visitors up into the alpine wonderland.

It was likely during the construction of the Bailey Willis Trail that Spray Falls was first found. At the falls, Spray Creek tumbles hundreds of feet down steep cliffs to break into a misty spray of water. The creek, falls, and park are all named for this display. Over time, the Bailey Willis Trail to Spray Park was eventually replaced by the Spray Park Trail used today, though there are still a few sections that follow the old route.

From the Mowich Lake camping area, the well-signed trail begins by descending into a forest of cedar and fir rising out of a blanket of greenery. After a few switchbacks and .2 miles of hiking find yourself at a junction with the Wonderland Trail. Veer right, following the sign that points toward Spray Park and Eagle’s Roost Camp. Legions of boot steps keep this trail clear and easy to navigate as it crosses over creeks and traverses forested ridges. After another 1.2 miles arrive at the Eagle Cliff Viewpoint, a small area where trees have been cleared to offer a lovely view of Mt. Rainier. This is a good place to drop your pack for a short rest before continuing onward.

From Eagle Cliff, continue another .5 mile past Eagle’s Roost Camp to the spur trail leading out to Spray Falls. This short side trip is not to be missed, and adds less than a half-mile of hiking. Descend down to Spray Creek and crane your neck to take in the tumbling falls. Slightly better views are possible if you can find an easy way to cross the creek. After you’ve taken in the namesake falls, head back up to the main trail and get ready for a climb. The trail begins a series of tight switchbacks straight up the mountainside.

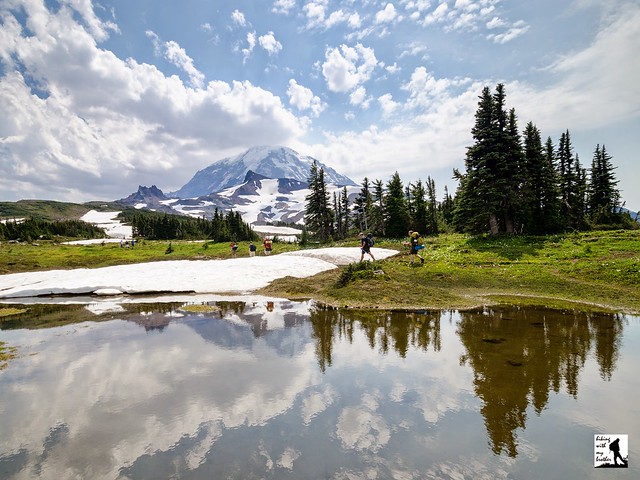
After .7 miles of climbing, cross Spray Creek and enter the edge of Spray Park. Wander through a meadow and follow the trail as it continues to open up, getting that much better with every step. While it is hard to find a stopping point that isn’t stunning, we recommend you continue to climb and leave the crowds behind. Press on to the high point of the trail that divides Spray Park and Seattle Park, roughly 4 miles from the trailhead. Here you’ll find big views of both parks and a side trail that leads out to Observation Rock. No need to follow that trail too far -- a short scramble will get you face-to-face with the mountain.

Whether you’re visiting Spray Park for the day or just passing through on your way to your next campsite, the experience is sure to linger. For that reason, you can expect a lot of company during the summer months, though the crowds thin the further you press into the park. This hike should be approachable for most hikers, though the elevation gain may put it out of reach for very young or inexperienced hikers. If you haven’t been, make a trek through Spray Park’s meadows part of your next backpacking excursion.

To get there, take I-5 South to I-405. From I-405 take SR 167 south toward Auburn. In 20 miles take the SR 410 Exit toward Sumner/Yakima. Follow SR 410 for 12 miles to SR 165. Take a right and continue on SR 165 for about 10 miles through Wilkeson and Carbonado to the Carbon River Road/Mowich Lake Road junction. Veer right onto the Mowich Lake Road and follow for 16.2 miles to the end of the road and the trailhead. -Nathan

Print Google Directions >>

Spray Park

Chenuis Falls

Our Hiking Time: 3h 30m
Total Ascent: 400ft
Highest Point: 2200ft
Total Distance: 7.6 miles
Location: N 46° 59.5499, W 121° 50.5740
Required Permit: National Park Pass
Difficulty: Easy

Nathan's Photo
We made several trips out to the Carbon River Valley this past summer, trekking out to see glaciers, rivers and plenty of waterfalls. Our tour included Chenuis Falls, one of the more popular and easily accessible destinations in the area. With creekside access to a big cascading waterfall and a thick forest of cedar and hemlock to shelter the trail, there’s plenty to see on this low impact hike.

Chenuis Falls tumbles down the side of Chenuis Mountain just before Chenuis Creek joins the Carbon River. The name “chenuis” has been attached to this area for quite some time, and it is thought to be of Native American origin. While we were not able to find a definitive answer, it is believed that it was named in honor of a prominent tribal leader. When the Carbon River Road was open, hikers could drive directly to the Chenuis Falls Trailhead and park, allowing hikers to make a short .2 mile jaunt to the falls with very little effort. Since the Carbon River Road closed in 2008, grass has grown and covered the Chenuis Falls parking area, though it is still easy to see where it was.  The road closure is likely to be permanent, which means a visit to Chenuis Falls now requires an additional 3.7 miles of travel to access.

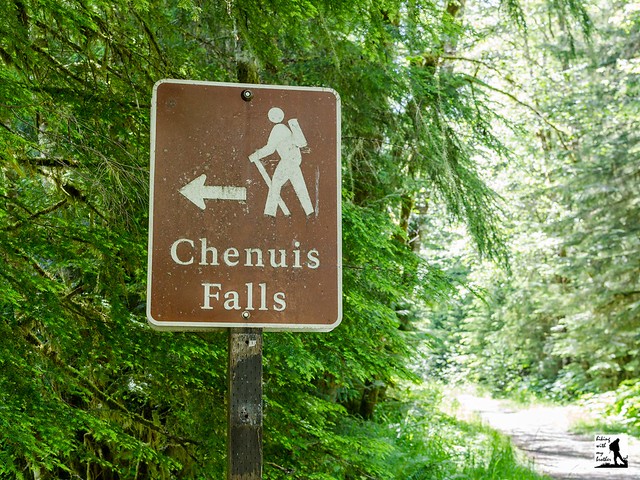
The hike begins from the Carbon River Entrance, following the Carbon River Road through a temperate rainforest of fir and cedar. The road provides access to a number of hikes, and many people opt to bike the road to cut down on travel time, though there is something to be said for the more leisurely walk through the woods. Flat and wide, the miles pass quickly and easily passing the Green Lake Trailhead after about three miles. The Chenuis Falls Trailhead is just another half-mile or so beyond. The well-signed trailhead will be on your left.

Turn off onto the Chenuis Falls Trail and begin to cross Carbon River's wide and rocky riverbed. A log bridge allows access across the rushing water, though the unruly river has been known to carry the bridge away on a fairly regular basis. If there is no bridge, we do not recommend you attempt to ford the river. Check with the ranger station to make sure the bridge is in place. Once across, the trail quickly leads to a rocky area with excellent views of the falls. Settle in for a snack and enjoy the sounds of the water.

Almost entirely flat and easily accessible, Chenuis Falls is perfect for hikers of any age. With the closure of the Carbon River Road, Chenuis Falls has become a hiking destination rather than simply a roadside pit stop. As a result, you can expect a little company on this hike. Still, the falls are well worth a visit whenever you’re in the area. If you’re looking to extend your day, you can head back to the Green Lake Trailhead or push further into the Carbon River Valley and visit Ipsut Campground.

To get there, take I-5 South to I-405. From I-405 take SR 167 south toward Auburn. In 20 miles take the SR 410 Exit toward Sumner/Yakima. Follow SR 410 for 12 miles to SR 165. Take a right and continue on SR 165 for about 10 miles through Wilkeson and Carbonado to the Carbon River Road/Mowich Lake Road junction. Veer left onto the Carbon River Road and follow for 7.7 miles to the Carbon River Entrance of Mt. Rainer and parking. -Nathan

Print Google Directions >>

Chenuis Falls

Carbon Glacier via Carbon River Road

Our Hiking Time: 10h
Total Ascent: 2300ft
Highest Point: 4100ft
Total Distance: 18.6 miles
Location: N 46° 56.4600,  W 121° 47.0459
Required Permit: National Park Pass
Difficulty: Moderate

Nathan's PhotoWe’ve done a lot of hiking in the Carbon River Valley this year, exploring quite a few trails in the area. After seeing so much of the river, we thought it only appropriate to head out to the Carbon Glacier to see where it all begins. While we expected to find a wall of ice, we underestimated just how impressive the river’s source would be.

Like the Carbon River, the Carbon Glacier was named in 1876 for the abundance of coal found along the upper reaches of the river, which fueled boom towns such as Fairfax, Melmont and Carbonado. Outside of Alaska, the Carbon Glacier has the distinction of being not only the longest, thickest and most voluminous glacier in the United States; it is also the lowest elevation. Perhaps because of its enormous size the glacier was something of an attraction, and park administrators began developing the Carbon River area almost immediately after the park was created in 1899. By 1923, the Carbon River Road was completed, ending just a mile shy of the glacier itself. For a few years, hikers could drive the entire length before floods and washouts would close more and more sections of the road. Today, the road is closed at the Carbon River Entrance and park officials are pushing to make the closure permanent.

The hike begins from the Carbon River Entrance, following the Carbon River Road through a temperate rain forest of fir and cedar. The road provides access to a number of hikes, and many people opt to bike the road to cut down on travel time, though there is something to be said for the more leisurely walk through the woods. Flat and wide, the miles pass quickly and easily, passing the Green Lake Trailhead after about three miles and the Chenuis Falls Trailhead another half-mile or so beyond. The river is your constant companion as you push past these popular day hikes toward Ipsut Campground. The campground is a good place to stop for a breather or to set up camp if you’re planning on a longer trip.

Continue past Ipsut Campground following the Wonderland Trail deeper into the lush forest for another 1.7 miles to the junction with the Northern Loop Trail. While older guides will suggest that you continue on the Wonderland Trail to Carbon River Camp, that section of trail is currently closed. Instead, veer left crossing the logs the span various sections of the Carbon River, eventually crossing the rocky riverbed. Look upstream to catch your first glimpse of the glacier, through it will likely look more like a distant mountain than an ice field. Once across, climb up the riverbank to find a junction where the Northern Loop Trail splits. Head right, continuing to follow the river as the trail wanders through mossy old growth and over endless streams and creeklets. After another mile and a half reach the Carbon River Suspension Bridge, built in 1984 as an answer to the constant need to replace the bridge that spanned this area for decades. If you have a little extra time, we recommend taking a few moments to cross the bridge and head out to Cataract Falls, just a few tenths of a mile from the river. The bridge also provides easy access to Carbon River Camp, another option for those planning an overnight.

From the bridge, the hike becomes a little more challenging, beginning to climb up the steep valley the glacier carved years ago. As you progress the trees fall away, providing big views of the enormous glacier and the river surging from the base of a icy wall hundreds of feet tall. There are plenty of places to stop along the way, though we recommend pushing onward and upward to Dick Creek Camp for views of the glacier and the valley below.

This is a classic hike, though since the road closure it is a little on the long side for a day hike. At the same time most of the distance is along the Carbon River Road, which can be biked or hiked without much effort. With several campsites near the glacier, there are a lot of options for adding a hike to the Carbon Glacier to an overnight or multi-day backpack. And while the first few miles of the Carbon River Road tend to have a lot of traffic, the crowds quickly thin beyond the Chenuis Falls Trailhead.

To get there, take I-5 South to I-405. From I-405 take SR 167 south toward Auburn. In 20 miles take the SR 410 Exit toward Sumner/Yakima. Follow SR 410 for 12 miles to SR 165. Take a right and continue on SR 165 for about 10 miles through Wilkeson and Carbonado to the Carbon River Road/Mowich Lake Road junction. Veer left onto the Carbon River Road and follow for 7.7 miles to the Carbon River Entrance of Mt. Rainer and parking. -Nathan

Print Google Directions >>

Carbon Glacier

Marymere Falls

Our Hiking Time: 1h
Total Ascent: 250ft
Highest Point: 850ft
Total Distance: 2.0 miles
Location: N 48° 3.0416, W 123° 47.3033
Required Permit: None
Difficulty: Easy

Nathan's PhotoWe’re always on the lookout for short hikes that will help break up a long car ride. These are usually hikes that are a little too short to be worth a long drive, but are perfect for short side trips. Marymere Falls is a great example of a roadside hike that can be added to any trek past Lake Crescent.

Barnes Point is one of the only flat areas on the rugged south shore of Lake Crescent. Formed by a buildup of sediments created by a glacier that has long since receded, the area has likely attracted people for many generations. Back in 1896, the Barnes family purchased a 135-acre homestead, making it among the first settlements on the lake. As such, the family name was given to the general area as well as the creek that flowed through their homestead

There is some confusion with the historical record regarding exactly which members of the Barnes family settled this area and how they are related. To clarify, William and Sarah Barnes had six children: Pierre, Charles, Paul, Mary Alice, Edward and Horace. After William died in 1878 the family moved west. Charles was a member of the 1899-1900 Seattle Press Expedition, a five man expedition sponsored by the Seattle Press newspaper to explore the interior of the Olympic Peninsula and report their findings. Perhaps motivated by what Charles found on his journey, the family bought their homestead on Lake Crescent and Paul is listed as the purchaser of the homestead. In 1906, the family built the Marymere Hotel, the first resort on the south side of the lake. Both the hotel and Marymere Falls are said to be named for Mary Alice. The Marymere Hotel was purchased by Rose A. Littleton shortly before it burned to the ground in 1914. Undeterred, Littleton replaced it with the Rosemary Inn that same year, portions of which still stand today.

The trail begins from the Storm King Ranger Station, following a well-signed path as it slopes gently toward Lake Crescent. Almost immediately, the paved trail enters a tunnel under Highway 101 and emerges into a mossy forest of cedar and hemlock. The path continues gently for about a half-mile to a junction with the Barnes Creek Trail. Veer right over the creek and continue a short distance past the Mt. Storm King Trail to the short loop at the end of the trail. To the left the path continues out to a view of the base of the falls; to the right the trail climbs up the hillside to a viewpoint before dropping back down to the creek. The upper viewpoint provides a better vantage point for watching Falls Creek tumble more than 100 feet down the cliffs to a small pool before joining Barnes Creek a short distance downstream.

This hike is perfect if you’re looking to stretch your legs on the drive out to the Olympic Peninsula. Short and not too challenging, this low-elevation hike is accessible year-round and should be approachable for even the youngest of hikers. If you’re looking for a little bit more trail time, consider exploring the short Moments through Time Loop or sections of trail along the lakeshore.

To get there, take the Bainbridge Island Ferry, following State Route 305 through Poulsbo to State Route 3. Follow SR 3 to the Hood Canal Bridge, taking a left over the bridge onto State Route 104. Follow SR 104 as it merges onto US 101 and continue another 36 miles to Port Angeles, taking a left on Lincoln Street to stay on US 101. Continue 21 miles to the Storm King Ranger Station and take a right. The entrance will be signed for Marymere Falls. Follow the signs to the ranger station to find parking and the trailhead. -Nathan

Print Google Directions >>

Marymere Falls

Green Lake and Ranger Falls

Our Hiking Time: 4h 15m
Total Ascent: 1400ft
Highest Point: 3200ft
Total Distance: 9.6 miles
Location: N 46° 58.6566, W 121° 51.4683
Required Permit: National Park Pass
Difficulty: Moderate

Nathan's Photo
A few weeks ago we headed back to the Carbon River Entrance of Mt. Rainier National Park to do a little more exploring. This time we headed down the washed-out Carbon River Road to the Green Lake Trail, one of the more popular and family-friendly hikes in the area that includes an alpine lake, old growth forest, and an impressive set of waterfalls.

Green Lake is named, somewhat unsurprisingly, for the color of its emerald waters set against the evergreen forest that crowds its shores. The lake is drained by Ranger Creek, christened by The Mountaineers in 1911 to honor the hard-working rangers of Mt. Rainier National Park. However, access to Green Lake and Ranger Creek was difficult when the park was established in 1899. What we now know as the Carbon River Road began as a wagon road built by the Washington Mining and Milling Company in 1907. When most of the large scale mining operations had left the area by 1913, park administrators saw an opportunity to develop an area of park that was closer to Seattle and Tacoma. Pierce County agreed to modernize and pave the road from Wilkeson to the park boundary, while park administrators built the road from the boundary out to Carbon Glacier. The Carbon River Road became the park’s second road when completed in 1921, though it took until 1925 for the county to complete their portion of the project. That same year the road suffered the first of many floods that would washout the road and require extensive repairs. Reopened in 1926, a 1934 flood washed out and permanently closed the road beyond Ipsut Creek. Floods followed in 1955, 1959, 1977, 2006 and 2008. The road has remained closed at the Carbon River Entrance since the 2008 flood and there are no immediate plans to repair it.

The hike begins from the Carbon River Entrance, following the Carbon River Road through a temperate rain forest of fir and cedar. Many people opt to bike the three miles to the Green Lake Trailhead, though there is something to be said for the more leisurely walk through the woods. Once you reach the trailhead, head up the well-maintained trail and into stands of moss-covered old growth. Your climb is helped along by wooden steps and stone stairs built into the trail by countless volunteers over the years. After a mile of moderate switchbacks, find the signed spur to Ranger Falls leading out to an observation area. Watch as Ranger Creek tumbles more than 150 feet over the three-tiered falls. The water flows year-round, but the falls are at their best in late spring and early summer when melting snow swells the creek.

After you’re done with the falls, return to the main trail and continue the last .8 miles to the lake. As you near the lake, the trail flattens out and crosses a log bridge over Ranger Creek and quickly delivers you to the shores of Green Lake. While the official trail ends here, paths can be found leading around the lakeshore. Do some exploring to find a spot to settle in and enjoy the view. The lake is flanked by Gove Peak to the east and Arthur Peak to the west. To the south is Howard Peak and the taller Tolmie Peak, which boasts a lookout cabin that can be seen on good days. Looking for more? It is not uncommon for peakbaggers to bushwhack their way up to the top of Gove or Arthur Peak, following the faint trails of those that went before them. Use caution if you attempt these scrambles.

This hike has a little bit of everything - a picturesque alpine lake, rushing waterfalls, and lush evergreen forests - which may explain why it is so popular. And while there is some elevation gain, the climb is not so strenuous that it will pose much of an obstacle for most families. Easily accessible and approachable for most hikers, this is a great hike to add to your list this year.

To get there, take I-5 South to I-405. From I-405 take SR 167 south toward Auburn. In 20 miles take the SR 410 Exit toward Sumner/Yakima. Follow SR 410 for 12 miles to SR 165. Take a right and continue on SR 165 for about 10 miles through Wilkeson and Carbonado to the Carbon River Road/Mowich Lake Road junction. Veer left onto the Carbon River Road and follow for 7.7 miles to the Carbon River Entrance of Mt. Rainer and parking. -Nathan

Print Google Directions >>

Green Lake

Mima Falls Trailhead - Capitol State Forest

Our Hiking Time: 2h 30m
Total Ascent: 400ft
Highest Point: 600ft
Total Distance: 6.5 miles
Location: N 46° 54.666, W 123° 5.28
Required Permit: Discover Pass
Difficulty: Easy

Nathan's PhotoNot long ago we returned to Capitol State Forest to check out another of the working forest’s many trailheads. This time we headed to the Mima Falls Trailhead for a short trek out to the waterfall. While the falls are pleasant enough, the hike to reach them is not, as portions of this hike cut across large swaths of recently cleared forest and a nearby shooting range means you’ll never quite escape the sound of gunfire.


Mima Falls takes its name from the nearby Mima Mounds. “Mima” is a Native term meaning “a little further along.” Over the years, the Washington Department of Natural Resources (DNR) has worked with volunteers to build up the trail system in Capitol State Forest, expanding on the network of logging roads. It is likely that at least some portions of this trail are built on sections of former logging roads that once led to logging camps that supplied the sawmills in the lumber boom town of nearby Bordeaux. Established by the Bordeaux Brothers back in 1896, this area of the Black Hills were logged for over 40 years until the old growth timber ran out and Bordeaux became a ghost town in 1941. While Capitol State Forest has been a recreation destination for decades, the Mima Falls Trailhead and Campground was not built until 1973. In 2013 the DNR completed an overhaul of the Capitol State Forest Trail system that renamed most of the trails. Older guides will reference these outdated trail names.

The trail begins from the Mima Falls Trailhead, along the Mima Falls Trail East Trail. The route immediately passes through the Mima Falls Campground and enters a large area that was very recently logged. After a half mile, reach a junction with the Campground Trail. Veer left and continue through the fields of stumps and newly planted seedlings to the shelter of the forest. In another 1.5 miles, the trail splits into Mima Falls Trail West and the Mima Falls Tie Trail. Veer left over Mima Creek and reach the falls within a few tenths of a mile. The only views of this short cascade are from a rough side trail that parallels the waterfall. If you’re looking to extend your hike, a series of interconnected trails make it easy to put together a number of loops.  The Department of Natural Resources offers a decent map to help you navigate the trails.

If you’re only heading out to Mima Falls, this isn’t a hike we can recommend highly. While it’s certainly approachable for any hiker, the sounds of the neighboring Evergreen Sportsman Club can be a bit overwhelming. The range was operating long before the Mima Falls Trailhead was built, making this a less than ideal location for a trailhead. In addition, the recent logging activity has taken a lot of the beauty out of this hike. While this trailhead serves bikers well, it’s not the best for a hike. We recommend heading to the Falls Creek Trailhead or the Rock Candy Trailhead instead.

To get there, take I-5 South to Exit 95 the Littlerock/Maytown exit. Follow Maytown Road through Littlerock as it turns into 128th Street for 3.7 miles to a T-intersection. Head left onto Mima Road for 1.3 miles to Bordeaux Road. Take a right and in .7 miles turn right onto Marksman Road. Mima Falls Trailhead is at the end of the road on the left. -Nathan

Print Google Directions >>

Mima Falls

Union Creek Trail #965 to North Union Creek Falls

Our Hiking Time: 3h
Total Ascent: 600ft
Highest Point: 4000ft
Total Distance: 3.8 miles
Location: N 46°57.041, W 121° 22.878
Required Permit: Northwest Forest Pass
Difficulty: Moderate

Nathan's PhotoLast summer we decided to do a little camping along Highway 410 out beyond Chinook Pass. We had high hopes of exploring a number of trails in the area, but ended up only having time to spend a day exploring the Union Creek Trail and its picturesque waterfalls.

Back as early as 1880, prospectors were staking dozens of claims along Union Creek. In 1897 Robert and Thomas Fife were working a set of six claims they had dubbed the Blue Bell Claims, in what was then known as the Summit Mining District. Blue Bell Pass is named after these claims and nearby Fifes Peak is named in honor of the brothers. In 1897 there was no real trail to the claims, instead the brothers followed blazes carved into trees to reach their mining site. Over the years, as ore was dug from the ground and transported back to civilization, a rough trail was slowly carved into into the mountainside. Portions of today’s trail are likely built on the bones of that route.

The Union Creek Trail #965 beings in a mature pine forest on a wide and well maintained trail. The trail almost immediately enters the Norse Peak Wilderness as it gently rises and begins to switchback up the mountain. After about a half-mile, a short side trail leads out to Union Creek and a view of Union Creek Falls, tumbling 60 feet from the cliffs above into a sheltered gorge, then sloshing down through a tangle of boulders and fallen logs. If you want to get closer to falls, push up the trail a bit more to find a steep social trail leading down to the base of the falls. After you’ve had your fill, continue to switchback up the mountain for another mile through sections of trail that still bear markings from a 1965 forest fire.

After a mile of hiking reach a small bridge crossing the North Fork Union Creek as it drops over a precipice to join Union Creek below. Before crossing the bridge and continuing up the trail, follow one of the rough paths hugging the creek back to North Union Falls which are not visible from the main trail. This secluded area offers an excellent place for a rest or makes for a decent turnaround point if you’re short on time. If you’re hungry for more, return to the main trail and press onward and upward for 3 more miles passing through forest punctuated by meadows before dropping back to Union Creek. From here, it’s a steep 2 mile climb up to Crown Point and the Pacific Crest Trail just below Blue Bell Pass.

Long and on the challenging side, the full length of this trail is probably too long for most day hikers. However, those interested in a short waterfall tour should have little problem climbing up the dusty trail to North Union Falls. This area is also a popular snowshoeing destination during the winter months. Whether you’re looking for a short day or a longer one, there is enough to see along the Union Creek Trail for every hiker to find what they are looking for.

To get there, take I-5 south to Highway 18 Exit 142A. Follow Highway 18 into Auburn and take the SR 164 exit. Head left on SR 164 through Enumclaw to SR 410. Head left onto SR 410 for 55 miles over Chinook Pass to the Union Creek Trailhead on the left side of the highway. -Nathan

Print Google Directions >>

Union Creek

Falls View Canyon Trail #868

Our Hiking Time: 1h 10m
Total Ascent: 300ft
Highest Point: 400ft
Total Distance: 1.8 miles
Location: N 47° 47.3633, W 122° 55.7516
Required Permit: None
Difficulty: Easy

Nathan's PhotoThe Olympic Peninsula offers everything from sandy beaches to windswept peaks and there are all manner of hiking trails to access those destinations. Some of those trails are difficult to reach, while others can be found just off the highway. This hike is in the latter category. The trails at Falls View offer a rhododendron-lined tour of a river canyon and a front row seat to a waterfall tumbling down 200ft into the Big Quilcene River. As an added bonus, these short and easily accessible trails can be explored any time of year.

Falls View Campground is situated on a bluff above the Big Quilcene River and likely owes its existence to its namesake waterfall. We weren’t able to dig up much in the way of the history behind the building of this campground, although we did find that the area is sometimes referred to as Fallsview in older guides and reference books. For the record, US Board of Geographic Names lists the official name of the campground as “Falls View.” While the falls themselves have been christened Falls View Falls or sometimes Campground Falls, the stream that creates the cascade has gone unnamed.

This hike is actually two separate trails, the Falls View Loop Trail #848 and the Falls View Canyon Trail #868. Both trails begin from the campground. The Falls View Loop trail clocks in at about a tenth of a mile, and leads out to a viewpoint overlooking Falls View Falls before looping back to the parking area. Take a few minutes to wander down this trail to get an idea of the canyon you will soon be descending into. Once you return to the trailhead, head toward the Falls View Canyon Trail, which quickly switchbacks down to the riverside to a view of the base of the falls.

From the canyon floor the trail wanders through a young forest of fir and alder rising out of a thick underlayer of fern and salal. The roar of the river is never far as you progress along the narrow trail, which splits after about three-quarters of a mile.  Head right and continue onward to the far reaches of the trail to find a calm section of the Big Quilcene River.  Here the water pools at the end of a series of rapids, and the shore provides plenty of room to stretch out and enjoy the river. Once you’re done exploring the rocks, return to the trail and follow it as it loops back toward the campground. This section of trail  is a little further away from the river, and it passes quickly. Before you know it you’ll reconnect with the trail and the river and find yourself climbing up the canyon wall to the trailhead.

While this pleasant river walk isn’t the most spectacular trail in the Olympic National Park, it does manage to pack both panoramic views of a big waterfall and access to a rushing river filled with moss-covered boulders into less than 2 miles of trail. This makes it a great addition to a day of short hikes or a nice way to stretch your legs while traveling on to your final destination. There is a bit of a climb into and out of the canyon, but hikers of all ages should be able to tackle these trails without a lot of difficulty. Falls View Falls is somewhat seasonal, and is best viewed in the winter and spring when waters are at their highest. In warmer years, the falls can dry up completely. If you’re going in the winter, the campground may be closed - simply park outside the gates and hike the short distance to the trailhead.

To get there, take I-5 south through Tacoma to Exit 132B SR 16 toward Bremerton. Continue on SR 16 for 27 miles to merge with SR 3 North. Follow SR 3 to the Hood Canal Bridge, taking a left over the bridge onto State Route 104. Follow SR 104 as it merges onto US 101 and continue 13.4 miles to Falls View Campground. Turn right and find the trailhead in the day use area of the campground. -Nathan

Print Google Directions >>

Falls View Falls

Honeymoon & Independent-Index Mines via Lake Serene Trail #1068

Our Hiking Time: 2h 30m
Total Ascent: 1000ft
Highest Point: 1500ft
Total Distance: 4.2 miles
Location: N 47° 47.418, W 121° 34.212
Required Permit: Northwest Forest Pass
Difficulty: Moderate

Nathan's Photo
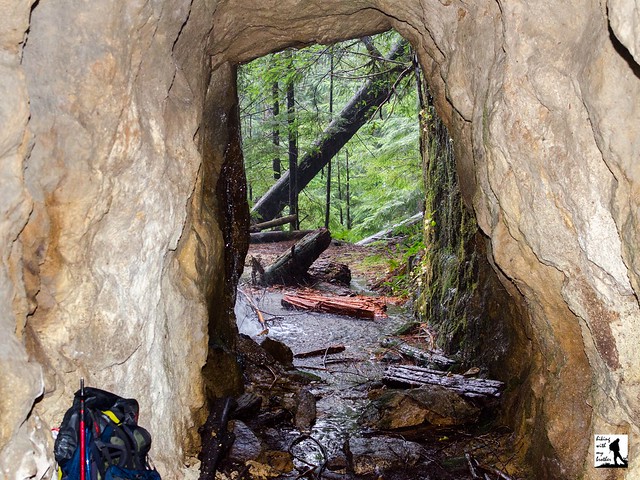
During our research on the Lake Serene Trail #1068, we ran into a number of references to different mines that could be found on the slopes of Mt. Index. Curious, we made a few return trips to the area to see if we could find some of the area’s rich mining past. After some bushwacking and creative route finding, we were able to locate two mines just off the main trail: The Honeymoon Mine and the Index-Independent Mine.

Back in 1898, the promise of mineral wealth brought prospectors to Mt. Index. A number of exploratory tunnels were dug before claims were staked. The Index Mining Company had the largest concentration of claims, which included Mystery, Pride of Index, Sixteen to One, the Crown Jewel and the Copper Queen. By 1902, the Independent Mining Company had become involved and the claims were collectively known as the Index-Independent Mine. Most of the work was on the Sixteen to One claim, which included three tunnels, each hewn from the rock at progressively higher elevations. The largest was at the lowest elevation, and can still be accessed today. From 1902-1907, copper ore was mined and sent down the mountain to Index. The mine was then abandoned until 1949, when the Lake Serene Mining Company took over and worked the claim until 1951. For this reason, the mine is sometimes referred to as the Lake Serene Mine. As for the Honeymoon Mine, less is known about it, as it is less a mine than simply a tunnel into the mountainside. It never produced much of anything, and after chipping out 250 feet of rock, the effort was abandoned.

The hike begins from the Lake Serene Trailhead, following a logging road for .1 miles before branching off onto the Lake Serene Trail. Enjoy the wide, relatively flat trail as it continues gradually through a mixed forest, crossing over a number of small creeks and streams. This portion of the trail follows an abandoned roadbed, one that was likely used to transport minerals down from the mines. While nature has done a decent job of reclaiming the former road, there are a few sections that feel like a truck filled with coal could come rumbling around the corner. This is especially true for those shadowy sections that run alongside the rocky cliffs created when the road was blasted from the mountainside.

After 1.5 miles you’ll pass a forest road branching left off the main trail. Ignore this road and continue a short distance to another road branching off to the right. Turn right and follow the road for a little less than .2 miles to a large clearing, once the parking lot for the Lake Serene Trailhead. From here, listen for the nearby creek as it tumbles down the cliffs above. The Index-Independent Mine is tucked into the cliffs next to the creek, and a rough bootpath leads up to the tunnel. Also nearby is a memorial to three hikers that were killed in an avalanche here in late 1996. Find it by following what remains of the roadbed a few hundred feet up to the rock face, and following the path to a small stone circle. Once you’re done exploring the area, head back down to the main trail and continue about .1 miles to a junction with the Bridal Veil Falls Trail.

Head right up the rocky Bridal Veil Falls trail, crossing over a few large streams and catching the occasional view of the South Fork Skykomish Valley. Continue switchbacking up the trail, and as you approach the crashing sound of Bridal Veil Falls, keep an eye out for the first in a series of wooden boardwalks. From the first boardwalk, turn right into the forest, heading toward a small waterfall a few dozen feet up the mountain, largely hidden in the trees. As you work your way toward the water, find a small gully providing easy access up the mountainside. After a short scramble you’ll end up on a small plateau at the base of the falls. The Honeymoon Mine is just to the left of the falls. After you’ve had your fill of the mine, head back down and spend some time at Bridal Veil Falls and the big views of the valley below.

Because they are fairly low on the mountain, these mines are a great winter outing or they work well as side trips on your way up to Lake Serene. The lack of real trails to the mines means that this adventure may not be for everyone, but they are so close to the trail that if you don’t mind some off-trail explorations you won’t have much difficulty reaching the mines. As always, use caution around the tunnels, as they can be dangerous. Do not enter the mines unless you have the appropriate gear and experience to do so.

To get there, take Highway 2 out toward Index. Keep an eye out for the Mt. Index road on the right near milepost 35. Take the Mt. Index Road for about a half-mile, following the signs directing you to the Lake Serene Trailhead and parking lot. Privy available. -Nathan

Print Google Directions >>
Honeymoon & Index-Independent Mines

Murhut Falls Trail #828

Our Hiking Time: 1h
Total Ascent: 300ft
Highest Point: 1100ft
Total Distance: 1.6 miles
Location: N 47° 40.422, W 123° 3.018
Required Permit: None
Difficulty: Easy

Nathan's Photo
Earlier this year we spent a weekend tromping around the Olympic Peninsula exploring a number of out-of-the-way hikes. One of our stops was Murhut Falls, a short jaunt out to a surprisingly impressive set of cascades tucked deep into a mossy ravine.

Murhut Falls is just one of quite a number of waterfalls along Murhut Creek, which flows down the flanks of  Murhut Ridge. Despite a somewhat unusual name, we have yet to track down the story behind “murhut,” though we can find references to Murhut Creek as far back as the 1920s. Much of the area was logged around the turn of the last century, a legacy that can still be seen on the sawed-off stumps that linger along the trail to this day. Times have changed, and there are now efforts underway by conservationist groups to extend the protections of The Brothers Wilderness to Murhut Falls and parts of the trail.

Some work has already gone into making Murhut Falls a little more accessible. The hike has always been a little off the beaten path, and likely because of that the trail to the falls had come degraded and somewhat treacherous. Thankfully, the trail was recently rehabilitated by the Forest Service, and the path and area around the base of the falls is in much better shape.

From the trailhead, the route begins along a former logging road, rising gently through a young forest filled with rhododendrons. The wide, smoothly graded trail soon levels out and enters stands of old growth. Eventually the logging road ends and you will find yourself on proper trail hugging the mountainside and providing a few peeks at Mt. Jupiter and Jupiter Ridge. Before long, the trail abruptly turns and climbs into a steeply-walled ravine. Lush and mossy, the ravine feels close and remote, as if you’ve suddenly been transported deep into the wilderness. Continue to the end of the trail to find the two-tiered Murhut Falls tumbling down between two large pools. Find a good spot to enjoy the view or do a little exploring near the base of the falls.

With short mileage and little elevation gain, this hike is accessible for any hiker and a great choice for bringing along the youngsters. Perhaps because this hike is under two miles, it does not see a lot of foot traffic, which means you’re likely to enjoy the roaring waterfall without too much in the way of company. If you’re looking to add some mileage to your day, we recommend combining this with a trek out to Ranger Hole, another short hike located nearby. The falls are also fairly impressive for such a short hike. If this one isn’t on your list already, we recommend exploring this short hike next time you make the trek out to the Olympics.

To get there, take I-5 south through Tacoma to Exit 132B SR 16 toward Bremerton. Continue on SR 16 for 27 miles to merge with SR 3 North. Follow SR 3 to the Hood Canal Bridge, taking a left over the bridge onto State Route 104. Follow SR 104 as it merges onto US 101 and continue 25 miles through Quilcene to Duckabush Road (FR 2150). Turn right and follow the road 6.3 miles to FR 2530 signed Murhut Falls Trail. Turn right onto and continue 1.2 miles on the gravel road to the trailhead. -Nathan

Print Google Directions >>

Murhut Falls
Copyright 2008-2016 - hikingwithmybrother.com
hikingwithmybrother@gmail.com