about us | links | permit info
Subscribe to Hiking With My Brother Email Subscribe Follow Hiking With My Brother on Facebook Follow Hiking With My Brother on Twitter Hiking With My Brother Picasa Hiking With My Brother YouTube

Cedar Butte Trail

Our Hiking Time: 3h 20m
Total Ascent: 900ft
Highest Point: 1880ft
Total Distance: 3.5 miles
Location: N 47° 26.0280, W 121° 44.5200
Required Permit: Discover Pass
Difficulty: Easy

Nathan's Photo
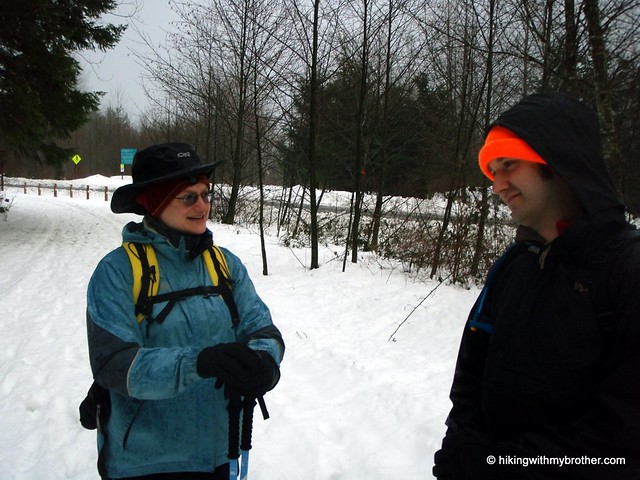
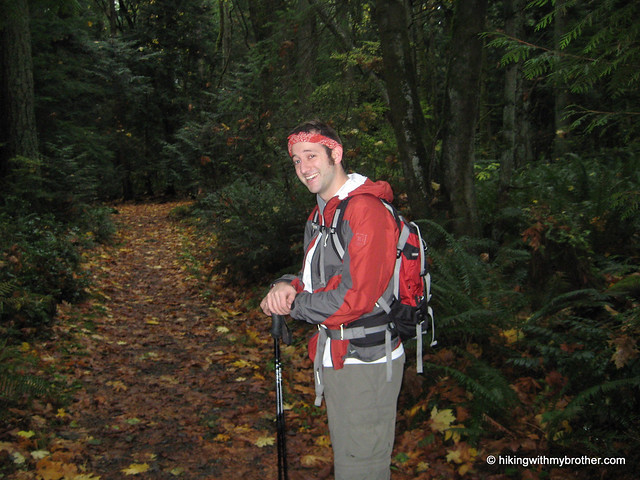
Between the holidays and navigating snowbound-Seattle for a week, Jer and I were looking for a nice short hike. Flipping through our trusty book we quickly found a winner: Cedar Butte, a three mile trek just outside of the city in familiar Rattlesnake Ledge territory. The scant page and a half devoted to describing the hike radiated ease and simplicity, so we packed our snow gear and hit the trail.

cedar butte hikingwithmybrother
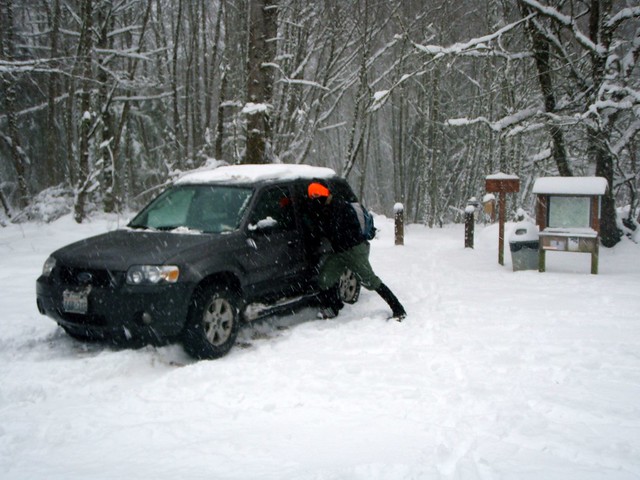
This little project is all about getting to be better hikers and perhaps becoming a bit more competent. This hike is a fine example of the unexpected little lessons you learn along the way. This week’s lesson was “ensure your trail book is up to date." While Harvey Manning’s crotchety meanderings were entirely accurate, changes to the surrounding trail system made getting to the trailhead something of an adventure.

Evidently Cedar Butte now has two trailheads, in old-school traditional and newly built flavors. The path to the older trailhead has had at least six years to grow up and out, but decades of use had left enough of an impression for us to follow. Our easy hike began with more bushwhacking than we expected, compounded by the foot of snow and insistent drizzle. The path spit us out onto the John Wayne Pioneer Trail, which now runs in the old Milwaukie Railroad rail bed.

cedar butte hikingwithmybrother
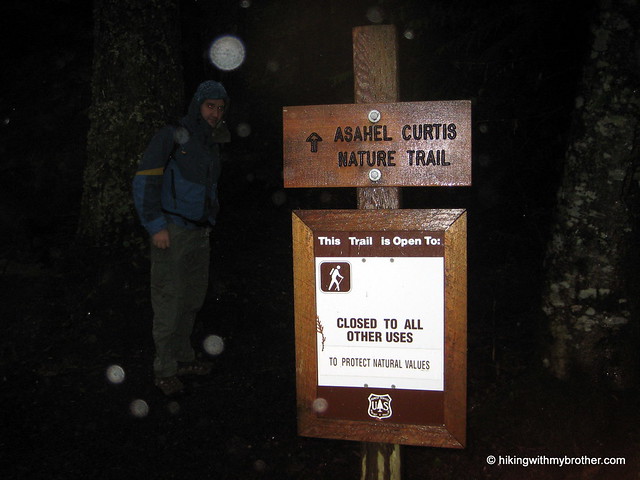
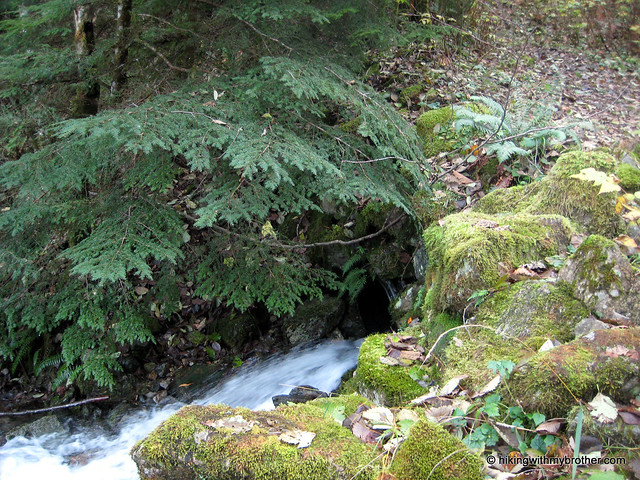
A pleasantly brush and scramble free half-mile from here we found the signed trailhead on the right, a few hundred yards after crossing a bridge over Boxley Creek. The sign implored us to “Check the Website!”, but alas, details as to which website should be interrogated seemed to be missing, so we were forced to forge blindly ahead. Snowshoe traffic clearly outlined the trail, which was helped along by small arrows nailed to trees and stumps and an occasional signpost. The trail is fairly varied, with stretches of level ground and lazy switchbacks peppered with patches of steepness.

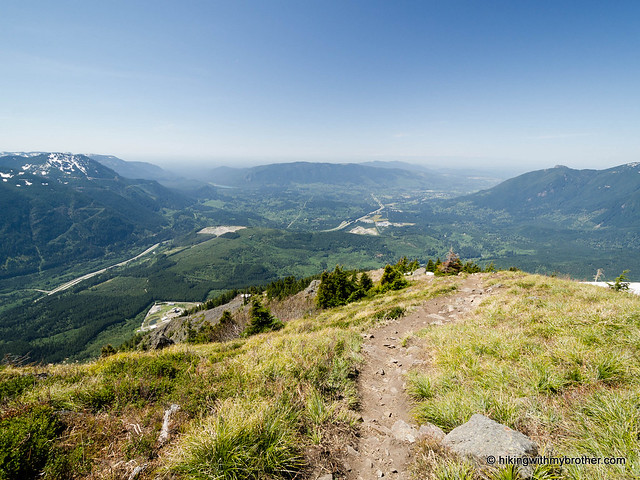
At the top of one of the longer hills you'll find yourself at an intersection, giving you the option to head toward the Boxley Blowout or up toward the summit. We opted, in the rain and snow, to go for the summit, although the Blowout comes highly recommended, reportedly giving a view into the lingering evidence of the 1918 reservoir failure that inundated and ultimately destroyed the fledgling town of Edgewick. Something of a scandal at the time, as apparently Seattle forged ahead on the planned Masonry Reservoir despite a number of surveys stating that the site chosen was not suitable for the project. Long story short, millions of cedar butte hikingwithmybrothercubic yards of earth and water spilled downstream, now manifested in a wide swath of deciduous trees cutting through the surrounding evergreen forest.

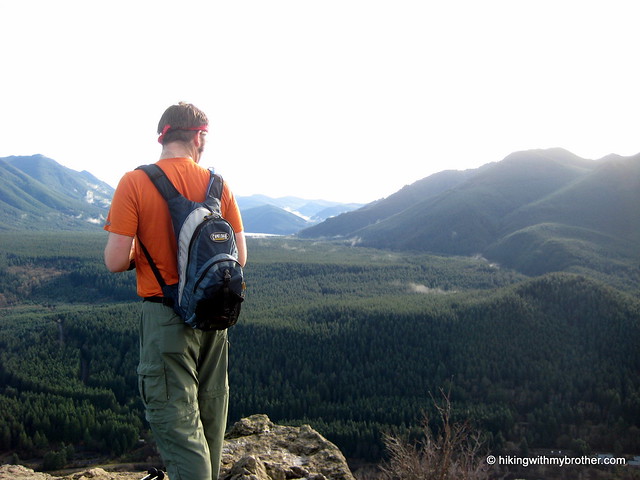
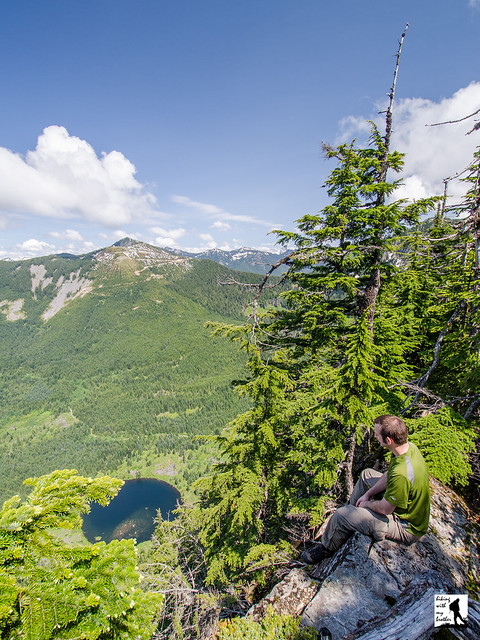
The trail is welcoming, close to the city, and pretty easy – great for a summer evening hike or an aggressive trail run. Along the way one can catch glimpses of Rattlesnake Lake, and the 1880’ summit gives limited views to Mailbox Peak, Rattlesnake Ledge and Mount Si. We’re recommending you ditch the “traditional” approach and head to the Cedar Falls Trailhead. Take I-90 to Exit 32, take a right onto 436th St, following it over the Snoqualmie River for about three miles to the Rattlesnake Recreation Area. Drive past initial signs to Rattlesnake Lake and find the signed Cedar Falls Trailhead ahead on the left. - Nathan

Print Google Directions >>

Cedar Butte

Cougar Mountain - Anti-Aircraft Peak

Our Hiking Time: 1h 40m
Total Ascent: 600ft
Highest Point: 1400ft
Total Distance: 3 miles
Location: N 47° 31.2500, W 122° 5.4833
Required Permit: None
Difficulty: Easy

tiger mountain hikingwithmybrotherNathan's PhotoDespite greater Seattle being pretty much snowed in, and I-90 closed past North Bend, and fresh snow beginning to fall, we decided to go for a quick hike anyway. Still, this severely limited our options. We chose Cougar Mountain because we were familiar with parts of it already and knew the 8 inches of snow would make the hike that much more fun. Plus it would round out the Cougar-Squak-Tiger trifecta for us. Major roads were not too bad and we managed to make it to the Anti-Aircraft Peak Trailhead with only a few questionable moments. We positioned the car so we wouldn’t get stuck, geared up, and took a study of the free trail maps before setting off.

The peak is named in honor Cougar Mountain's military legacy. Following World War II, 90mm anti-aircraft guns were installed in 1953 to guard Puget Sound until they were replaced from 1957-1964 by a Nike Ajax Missile Defense System. The installation languished until 1983 when King County acquired it from the military and began developing a regional park to preserve Cougar Mountain's cultural and historic heritage. Envisioned by Harvey Manning and first proposed in 1979, the Cougar Mountain Regional Park concept eventually managed to block planned residential development in the park and gain enough voter support to pass a bond measure. Today the park is the largest “urban wildland” in the United States with over 3,000 acres of forest riddled with 36 miles of trails.
tiger mountain hikingwithmybrother
We took to the trail and tromped down the Tibbetts Marsh trail toward the Fantastic Erratic, a short mile and a half away. The trails are wide and very well used and maintained, taking you over streams, beside gullies, and through a mixed forest of alders and evergreens. The network of trails is sprawling but well signed. If you’re unfamiliar with the 45 trail names that appear on these signs, however, be sure to take a map to help reorient you when needed. Trails are also helpfully named with what side of the park they are on they are at as the first letter, (N)orth, (S)outh, (E)ast, (W)est and (C)enter.

The Fantastic Erratic was much less fantastic under a layer of snow, but the trek down to the basin where it resides was worth it - especially after Jer took a tumble or three off the trail and the Erratic itself. Not only did the snow keep most people away, but provided that close, tiger mountain hikingwithmybrotherinsulated feel, making it seem like were snowshoeing deep in the Cascades instead of within a few miles of sprawling housing developments. We did not meet up with anyone else on the trail, though the fresh tracks we encountered let us know we were not entirely alone. Having started at the top, our way back was almost entirely uphill, made more slightly more difficult by the icy crust that had formed over the snow clawing at our boots and gaiters.

Overall, the trails are easy – great for the family, pets, or trail running – though from our own experience and from everything we’ve read, this is a very popular destination, so expect some company on your forays. The Anti-Aircraft Trailhead can be accessed via I-90 Exit 13. Take a left up Lakemont Boulevard following for roughly 3 miles before taking a left onto Cougar Mountain Way. Meander through the housing developments, continuing to head uphill and Cougar Mountain Way will change into Cougar Mountain Drive and terminate in the trail head parking lot. - Nathan

Print Google Directions >>

Cougar Mountain

Annette Lake Trail #1019

Our Hiking Time: 3h 50m
Total Ascent: 1700ft
Highest Point: 3700ft
Total Distance: 7 miles
Location: N 47° 21.5220, W 121° 28.4400
Required Permit: Northwest Forest Pass
Difficulty: Moderate

Nathan's PhotoWe had planned to tackle one last peak this year before the snows came in and made them inaccessible, thus the heights of Mt. Defiance or Bandera Mountain were on our minds as we set out on I-90. Sadly, the amount of rain and cloud cover forced us to steer toward something with less exposure to the elements. We chose the nearby Annette Lake hike for two reasons: the tree cover looked good enough to shelter us from the rain and it had the added bonus of the Asahel Curtis Nature Trail.

annette lake hikingwithmybrotherAnnette Lake has been a favorite of Seattle hikers for over a century. Named in honor Annette Wiesling, a prominent member of The Mountaineers near the turn of the 20th century, today the lake welcomes hundreds of hikers every summer.

The Annette Lake Trail #1019 begins quite mildly, not too rocky or rough, and is fairly well maintained. You’ll quickly cross over Humpback Creek and shortly thereafter break out into forest cleared for the high tension power lines overhead. A few hundred feet before the power lines, see if you can find the 8’ wide abandoned culvert skulking off the trail. Presumably a portion of Humpback Creek was once funneled through this monster. Makes a fun little stop and provides a much needed roof in the rain.

annette lake hikingwithmybrotherBeyond the power lines the well-marked path intersects with the Iron Horse Trail and begins a mild ascent up towards the lake. Both switchbacks and inclines increase as you press onward, ratcheting up the challenge after lulling you for the first two miles. The trail cuts through more than a few talus fields afforded some interesting views of the Humpback Mountain’s craggy outcroppings and colorful rock faces.

The forest is a pleasant mix of firs and pine, old enough to have long since replaced brushy undergrowth a carpet of moss. The last half-mile or so of the trail levels out and you soon find yourself at the lakeside, at the bottom of a bowl formed by the surrounding Humpback Mountain, Abiel Peak and Silver Peak. There are small picnic and camp sites on the trail around the edge of the lake, as well as some rough amenities for an overnight stay. For those looking for more of a challenge, rough trails lead up from the lake to Humpback and Silver Peak.

annette lake hikingwithmybrotherThe rain deterred us from exploring scrambles up the small waterfall on the opposite side of the lake, or even poking around too much on the shore. Instead we huddled down for a quick lunch and battled a couple of exceedingly bold gray jays, who all but dive bombed us for a scrap of food before we headed back down.

Surrounded by mature forest and nestled beneath intriguing heights, it is easy to see what brings the crowds to Annette Lake. Moreover, the trail is well-maintained trail and not too strenuous, making it approachable for a wide range of hikers of all ages. At the same time Annette Lake is certainly not the most stunning alpine lake in the area. If you prefer a little more quiet and solitude, we recommend skipping Annette Lake during the summer months.

To get there, take Exit 47 off I-90 and take a right at the end of the ramp on to Forest Road 55. At the T take a left onto Forest Service Road 5590 and follow the gravel road to the parking lot. Trailheads for both the Nature Trail and Annette Lake are at the east end of the lot. -Nathan

Print Google Directions >>

Annette Lake

Rattlesnake Ledge and Rattlesnake Mountain Trail

Our Hiking Time: 4h 30m
Total Ascent: 2600ft
Highest Point: 3500ft
Total Distance: 10 miles
Location: N 47° 27.5000, W 121° 48.3667
Required Permit: Discover Pass
Difficulty: Moderate

Nathan's PhotoThis week we had some unfinished business to attend to with the Rattlesnake Mountain Trail. Months ago, Rattlesnake Ledge was a good warm up during our Rainier training, but as the weather heated up, the amount of traffic increased exponentially. This created the difficulty of navigating between folks with large packs, which prompted us to forgo this hike in favor of the Cable Line. On one of our last climbs up to the Ledge we pushed past the crowds and further down the Rattlesnake Mountain Trail, quickly encountering icy snowpack that we were fairly unprepared to navigate. After meandering through trails and logging roads, rattlesnake mountain rattlesnake ledge hikingwithmybrotherwe were forced to turn around before reaching the next waypoint on the trail and assumed that we had somehow lost the trail.

We returned this week interested in finishing what we had started earlier in the year and shaking up our routine by doing a through-hike instead of a peak. We parked a car on the Snoqualmie Point end of the trail, and then carpooled up to the Rattlesnake Recreation Area to get started.

On the whole the trail is well maintained and friendly. The short two mile jaunt up to the Ledge makes it an attractive and easily accessible hike for families and large groups, which can quickly clog the sometimes narrow trail. The signed Ledge provides a fairly impressive panorama over Rattlesnake Lake, with Mt. Si, Mailbox Peak, and Mt. Washington dominating the view to the north. From here you can see two more outcroppings perched higher on the mountain which can be easily accessed by continuing up the trail. rattlesnake mountain rattlesnake ledge hikingwithmybrotherThe final ledge gives the greatest vantage point and most western view, with tiny trails carved into the scrub for the more adventurous scramblers to clamber around on.

The trail continues up through increasingly dense forest; at times sunlight is largely blocked out and footsteps lost in browned pine needless and the smell of humus. At about three miles, the trail begins to open up and intersect with a series of logging roads in various states of use and abandon. The trail is well signed and we had no trouble making our way to East Peak and its resident tower and vistas. The forest is young here, still not fully recovered from the timber harvest decades earlier. A mix of Noble firs and pines gives way to cedars and eventually alders, all no more than 30 years old. Trees continue to get younger as the trail progresses until you finally reach very recent cuts. Roughly the last two miles of the trail winds through recent select cut patches, with only a few trees left standing to foster an eventual rebirth.

rattlesnake mountain rattlesnake ledge hikingwithmybrotherEast Peak marks the end of the elevation gain at 3500’, and the rest of the trek was mostly a gentle downhill. Several other viewpoints await the hiker from here; Windy’s Point, Grand Prospect, and Stan’s Overlook are signed stopping points along the route to Snoqualmie Point, all offering expansive views to the north, eventually including views of Mr. Baker, Russian Butte and Mt. Teneriffe. Moderate in difficulty only because of the initial short bouts of steep grade going up to the ledge, this route is a great casual hike through the woods if you’re short on time but want to get some miles in.

From the number of hikers we passed coming from the opposite direction, Snoqualmie Point seems to be the more popular starting point of this trail; however, we’re recommending you start early at Rattlesnake Lake and avoid the crowds and the longer incline. Snoqualmie Point is easily accessed via Exit 27 off I-90 coming from the city. Take a right and follow the road for a ¼ mile until you hit the trailhead. Unfortunately there’s no onramp from Exit 27, so you’ll have to traverse North Bend to get back on I-90. To reach the Rattlesnake Recreation Area take Exit 32 off I-90 and a right on 436th Ave. SE. Follow the main road for a little over three miles before reaching the parking area. The trailhead begins on the opposite side of the lake, accessed via a service road opposite the lot. Park it and get going! - Nathan

Print Google Directions >>

Rattlesnake Mountain

Dirty Harry's Peak & Balcony

Our Hiking Time: 4h 30m
Total Ascent: 3400ft
Highest Point: 4680ft
Total Distance: 8 miles
Location: N 47° 27.0498, W 121° 37.2336
Required Permit: Discover Pass
Difficulty: Hard

Nathan's PhotoOn the heels of our Mt. Washington hike, we decided to return to the Exit 38 area to explore a ridge on the opposite side of the I-90 corridor.  We had our sights set on an area unofficially known as Dirty Harry's Peak, which promised broad vistas and rusting artifacts from the area's logging past.

The roughness of the former logging road -- large rocks, often made slippery by water -- and uncompromising inclines after the Balcony makes this a difficult hike. dirty harrys peak dirty harrys balcony hikingwithmybrotherDefinitely attainable by most prepared hikers, just make sure to bring the hiking poles to steady you over water hazards and rock.  If the full trip up to the summit is more than you want to tackle, the hike up to the Balcony is a fine hike unto itself.  This hike is also less traveled than the more popular hikes nearby, which means you're likely to get these big views all to yourself.

There's a lot more to Dirty Harry's Peak, and you can learn all about it in our book, Hiking Through History Washington.  You'll find a trail map, route descriptions, history, and more for this and many more hikes throughout the State. Help support hikingwithmybrother.com and the work we do by picking up a copy!

To get there, take Exit 38 off I-90 and take a right. Follow the remnants of old US 10 for two miles past Olallie State Park and back under I-90.  Find the gate for the State Fire Training Academy warning you that it closes at 4pm. Park in the paved lot just outside the gates, as the Washington State Patrol which manages the Academy prefers hikers do not attempt to park on the shoulder near the trailhead.  From the lot, follow the road over a bridge for about three-quarters of a mile to a bend in the road.   The trail is on the right and is unmarked.  To find it, look for a trail flanked by a large concrete block.  -Nathan

Print Google Directions >>

Dirty Harry's Peak

Mt. Washington Trail

Our Hiking Time: 4h 15m
Total Ascent: 3400ft
Highest Point: 4420ft
Total Distance: 8.5 miles
Location: N 47° 25.5667, W 121° 42.0167
Required Permit: Discover Pass
Difficulty: Moderate

Nathan's PhotoStanding watch over I-90, Mt. Washington and Mailbox Peak are the gateway to Snoqualmie Pass. Here, the Issaquah Alps end and the Cascades begin. A hike to the top of Mt. Washington through a maze of forest roads can be a little disorienting, but the views are more than worth it.

Originally named Profile Mountain, Mt. Washington was renamed for a likeness of George Washington on one of the mountain’s many exposed rock walls. Extensively logged decades ago, the main route to the top is almost entirely logging roads in various states of decay. Over the years, multiple routes have been blazed to the mount washington hikingwithmybrothersummit which can make the hike a little confusing. Occasionally an unofficial-looking sign will point you in the right direction, though none of the trails on Mt. Washington are really considered “official.” This is probably because Mt. Washington is managed piecemeal by the Forest Service and Washington Parks and Recreation. Half the mountain is part of Iron Horse State Park and the other half is in Mount Baker-Snoqualmie National Forest. To further complicate matters, there is at least one large privately owned plot on Mt. Washington. In the end, this means that trail maintenance is left to independent trailblazers and trail stewards like the Washington Trails Association.

Finding the trail can be trickiest part of this hike, as it is unsigned. From the Upper Twin Falls Trailhead, take the spur up to Iron Horse Trail and head right. Keep an eye out for a small trail to your left, not more than a few hundred feet after you get on the Iron Horse. Depending on the time of year it can be a little overgrown. Once you find the trail and start up, the route becomes increasingly rocky, as it wanders through alder and maple, past streams and waterfalls. Before long you’ll encounter the first of many rock walls that attract the bouldering and climbing crowd. On summer days you’ll see climbers roped in and clambering up rock walls just off the trail.

mount washington hikingwithmybrotherThe first couple of miles of trail are the most difficult. Expect long and steady inclines. At two miles or so you’ll hit the Owl Hike Spot, a small viewpoint carved out of the trees opposite a sheer rock wall. Years ago, the Mountaineers had a number of Owl Hikes - short hikes close to the city that could be done after work and into the evening - though today this turnaround point seems to be the only lingering legacy of the Owl Hikes. The spot offers some good views of Rattlesnake Ledge, Cedar Butte and Rattlesnake Lake, and wall serves as a makeshift bench for taking it all in. From here on out the trail is pretty friendly, mild inclines intermingled with lengthy distances of level ground.

Eventually you’ll break out of the trees and into meadows revealing a spectacular view of Mt. Rainier presiding over the Cedar River Watershed. From the summit you can easily pick out Little Si, Mt. Si, Mt. Teneriffe and Green Mountain. Mailbox Peak to the immediate northeast, peeking out from behind another ridge of Mt. Washington. Soak up the view and enjoy.

mount washington hikingwithmybrotherThe is an engaging route. The trail regularly transforms itself from friendly ex-logging road - spacious, flat, and graveled - to intermittent streambed, complete with water-carved contours and exposed rock. It’s not a particularly easy hike, but the views are excellent. As an added bonus this trail is a little under the radar, so it makes a great alternative to Mailbox or Mt. Si on a summer weekend.

To get there, take I-90 to Exit 38 and head right. Almost immediately, take a right onto a gravel road to the Upper Twin Falls Trailhead. -Nathan

Print Google Directions >>

Mt. Washington

Squak Mountain - Central Peak & Bullitt Chimney Trails

Our Hiking Time: 1h 45m
Total Ascent: 1300ft
Highest Point: 2000ft
Total Distance: 4.6 miles
Location: N 47° 28.908, W 122° 03.248
Required Permit: Discover Pass
Difficulty: Easy

Nathan's PhotoWe were short on time last Sunday, with a number of familial factors limiting the duration of our hike, so we took the opportunity to visit something closer to home. We’d often bypassed Squak in the past, preferring to push further out the I-90 corridor to places a bit more remote and potentially rugged. But, considering the number of times we’d been up and down Tiger, we thought a visit to Squak was long overdue.

squak mountain hikingwithmybrotherSquak Mountain is tucked between Tiger and Cougar Mountains, somehow dodging the feline-themed naming craze that struck the area back in the day. Back in 1972 the Bullitt family donated their one-time summer retreat of roughly 600 acres near the top of Squak to the State of Washington which has since managed to expand the boundaries of the park to encompass some 1,545 acres. There are several entrances to the park; we took one of the lesser known. I-90 to exit 17. Take Front Street N to W Sunset Way. Take a right and head straight, heading up Mt Park Blvd SW until taking a left on Mountainside Dr SW. Follow Mountainside around a curve or two before seeing a spur and some park signs just as Mountainside Dr continues a major switchback up Squak. Go ahead and park and pile out.

Arriving mid-drizzle we geared up and started off to conquer the nominal peak. We were, perhaps, over-prepared for the well maintained and gentle trail that greeted us. The primarily deciduous forest had already dropped the majority of their leaves and carpeted the trail in gold big leaf maple and brown alder. While the network of trails is fairly extensive, nearly every fork in the trail is well signed, making it unlikely that one could get too twisted around. The detailed map on at the trail head is worth a perusal before setting out, just to get a rough idea of where you’re going.

Our trek up to Central Peak followed the Bullitt Access trail, still fairly wide and graveled despite it being decades since a vehicle clunked its way up to the Bullitt summer cabin near the summit. squak mountain hikingwithmybrotherAfter a few junctions we took the Central Peak fork, where the trail became a little steeper and the vegetation shifted to a more familiar mix of ferns and Douglas fir. At about 1,700 feet, we were in the clouds, giving the trail an otherworldly feel that allowed us to pretend that we might be more than just a few miles outside of town, and that perhaps the occasional rumble was something other than rocks tumbling down the nearby quarry. Almost before we knew it arrived at the microwave towers that currently reside at the summit, along with the obligatory beige shacks, dreary chain link fencing and borderline hysterical over-signage. There’s no real view to speak of, though we supposed that on a clear day one could see Tiger and parts of Issaquah. We didn’t linger.

We took a slightly different route back to swing out and take a peek at the Bullitt Chimney, all that remains of the summer home that once stood here. The Chimney and cement foundation sit in a clearing along with a forlorn picnic table. Bullitt Chimney squak mountain hikingwithmybrother We assume that when a cabin stood here the residents hacked out some sort of view from the surrounding forest, felling trees to take in what could be a nice vista of Renton, Seattle, and the south end of the Sound. As it stands, the rejuvenated forest suffices.

The autumnal smell of damp rotting leaves returned as we descended – there were several opportunities to explore more branches of the trail network, however, we felt that we’d already captured the essence of the park. Squak is great for walking the dog or getting in some trail running close to home, and we would highly recommend bringing the family out for a stroll – nice, well maintained trails, lots of room, not too crowded, but easily accessible. It was not intense enough for our hiking needs, however, so save this one for the kids and look elsewhere if you're yearning for something of a challenge. -Nathan

Print Google Directions >>

Squak Mt Bullitt Chimney

Cable Line - West Tiger #3 Trail Loop

Our Hiking Time: 2h 15m
Total Ascent: 2042ft
Highest Point: 2522ft
Total Distance: 4.75 miles
Location: N 47° 31.766, W 121° 59.783
Required Permit: Discover Pass
Difficulty: Hard

Nathan's PhotoBack when we were training to summit Mt. Rainier, Jer and I went up and down the Tiger Mountain Cable Line more times than we can remember. Those familiar with West Tiger Mountain #3 off I-90’s Exit 20 will recognize the view from the top, as the Cable Line culminates at the same summit, but arrives there via what is essentially a straight shot up the back of #3. This is not a hike for those that prefer the easy path. This hike should be reserved for training or trail running, as there is little difference to the flora and fauna between it and West Tiger #3, other than the possibility of spending so much time trying to catch your breath on the Cable Line that you might not notice the forest surrounding you.

The trail can be accessed a number of ways; our preferred method was off tiger mountain cable line hikingwithmybrotherthe paved road on the way to the West Tiger Mountain #3 parking lot. There’s something of a cul-de-sac just before the gated gravel road here. If you’re lucky - and by lucky I mean arriving either early in the morning or on a weekday – you’ll be able to park here. A more likely scenario will find you parking on the shoulder nearby. A short way east of the cul-de-sac you’ll find some fairly large boulders marking the trail up. This is where the fun begins. Looking up the trail things seems fairly benign, but the trail climbs up a bit to momentarily flatten in a power line meadow before really kicking into gear.

The trail is best thought of as a series of three hills with some short plateaus between them.

The first hill is at once the least intense and arguably most treacherous. At this lower level, there tends to be more water and more soil; meaning, more mud. The incline is such that, depending on the time of year, you could find things extremely slick. It is also your first challenge and your body has yet to figure out that you’re going to be asking it to work a bit harder than a normal hike. After scrambling up the first half of this hill you’ll be presented with a sign letting you know that no one officially maintains the Cable Line. You may have deluded yourself into thinking things are not going to be that bad, but as you continue past the sign the sheer ridiculousness of the grade will be made readily apparent.

The first hill ends with a nice flat plateau that you will see the end of. If you’re a little winded, take a few minutes. The second hill is much longer and is the real hump of the hike. Getting to the second leveling off after that monstrosity really puts the bulk of the work behind you. While not as slick as the first leg, the second hill can seem unending. Unlike other portions of the hike, this hill is much more open, and feels like you’re walking up some sort of washed out gully. Your reward after this point is a significantly longer plateau before hitting the rocky home stretch. Again, if you’re winded, take a minute or two. There’s still one leg left.

The last push is close up again, the underbrush crowding up to the edges of the trail. Things are rockier here with a lot of loose stone, might want to pull that hiking pole out to keep you from sliding backwards. You’ll know when you’re near the top when you reach the next iteration of Cable Line signs, this one marking where the West Tiger Mountain #3 trail cuts across the Cable Line. #3 veterans will likely remember this signpost as the indicator they used to note that they were less than a ½ mile to the top.

Sweating past that last portion will deliver you to the 2522’ summit, tiger mountain cable line hikingwithmybrotherwhich looks roughly to the southwest. On a good day Mt. Rainier peers out from around a bluff to the south and the end of Lake Washington can be seen with I-90 stretching across it

So you made it up, now to get down. We recommend you try going from the summit back down to the regular trail on the Cable Line - it gives you a good sense of what you're in for and how steep it was on the way up. Once you get back to the regular trail, decide whether you want to brave the Cable Line down or if you'd like to take the easy road. As you can see from the map above, we took the easy road this time.

Over the course of 3 months or so we made the brutal slog to the top many times, methodically increasing the weight on our backs. Not surprisingly, during our early attempts we came up with a baseline time for ascending up the 2042’ to the summit. Everything thing we did after that was an attempt to push ourselves to shave a minute or two off our time. This became increasingly difficult as we started hauling up more and more weight, eliciting more and more cramping and cursing. We promised ourselves that after we beat Rainier we’d come back and see how fast we could do it without all that weight on our backs. Our current record to the top? 47 minutes. -Nathan

Print Google Directions >>

Tiger Mountain Cableline

Old Mailbox Peak Trail

Our Hiking Time: 4h 10m
Total Ascent: 4000ft
Highest Point: 4841ft
Total Distance: 5 miles
Location: N 47° 27.745, W 121° 38.354
Required Permit: Discover Pass
Difficulty: Hard

Nathan's PhotoI can’t remember the first time I ever heard mention of Mailbox Peak and its fabled mailbox - it was certainly many years ago. But I definitely recall the most recent sermon from a talkative hiker during one of our many training forays up the Tiger Mountain Cable Line. Through some twist in small talk we touched upon our training for Rainer, and how we found the Cable Line to be the best mix of proximity and incline for our needs - we were immediately admonished for our misconception. “Oh no. Mailbox. Mailbox is way stepper than Cable Line, this is nothing. You should be training there,” the stranger scoffed, all but chuckling at our appalling ignorance.

After that interaction, Mailbox became a running joke between us – any hike banter was incomplete without at least one “you haven’t done Mailbox? What the hell is wrong with you?” exchange. With Rainer behind us, it’s not too surprising that we chose Mailbox Peak as one of the first hikes to tackle, after all, we’ve summitted Mt. Rainier, how hard could it be?

mailbox peak hikingwithmybrotherTurns out? Mailbox Peak is, in fact, steeper than the Cable Line. Perhaps a bit less relentless, but it certainly makes you pay for the views it eventually gives up. It starts with deceptive simplicity; following a forest road up to the trailhead, at which point they attempt to scare you away with the pictured sign, and then winding through some innocuous low forest for about the first mile. Without fanfare, the trail morphs from a walk through the woods to 30-40 degree inclines, making climbing poles almost a necessity. Forest eventually opens up into some old burn, the lack of ground cover and uniformity of the terrain makes it easy to lose the trail if you’re not paying attention to the markers. Keep an eye on the reflective diamonds! If you haven’t seen one in awhile, you’ve gone off in the wrong direction.

Switchbacks wind up through the burn eventually opening up to salal and other sub-alpine scrub. Sky is suddenly visible and it’s easy to delude yourself that, after ascending 3000ft or so, you’d be near the end. You are wrong. There is more. Much more, as scrub opens up to a field of rocks and the summit. Or what you think is the summit. The trail continues up and around the rocks only to reveal that there is much more to go at 3800ft and that the true summit is still ahead.

The ridge to the top is open and the wind had no problem attempting to trip us up, laughing as we fought to keep our balance. Upon reaching a rocky crag that again appears to be the finish line, the newest incarnation of the mailbox looms ahead. It is only at this point it is safe to conclude that you’ve laid eyes on your goal. Everything previously is a cruel tease.

The views here are excellent; on a cloudless day Seattle’s skyscrapers are mailbox peak hikingwithmybrothervisible in the distance, Rainier looms proudly to the south, Baker to the northeast opposite the tips of the Enchantments to the northwest. The mailbox will be filled with any manner of items, almost certainly some notebook to log your conquest, as well as a menagerie of clever offerings to the alter of Mailbox. So leave your mark and take a rest. Heading down is probably going to be worse. It’s only on the way down that you notice how truly steep the trail is. This is where poles are a must, if only to keep yourself from twisting an ankle or utterly destroying your knees. Roots and soft soil will work to trip you up, so be more vigilant than usual.

To get there, take I-90 to exit 34 and take a left onto 468th Ave. Follow the road past the truck stop for about a half-mile until you reach SE Middle Fork Road, also known as Forest Road 56. Turn right and follow the road for a few twists and turns, keeping left when the road splits. After 2.2 miles reach SE Dorothy Lake Road. Turn left and continue .3 miles find the road up to the parking area on your right. - Nathan

Print Google Directions >>

Mailbox Peak
Copyright 2008-2016 - hikingwithmybrother.com
hikingwithmybrother@gmail.com