Our Hiking Time: 1h 20m
Total Ascent: 900ft
Highest Point: 6400ft
Total Distance: 2.5 miles
Location:
N 46° 48.0960, W 121° 44.0880
Required Permit:
National Park Pass
Difficulty: Moderate

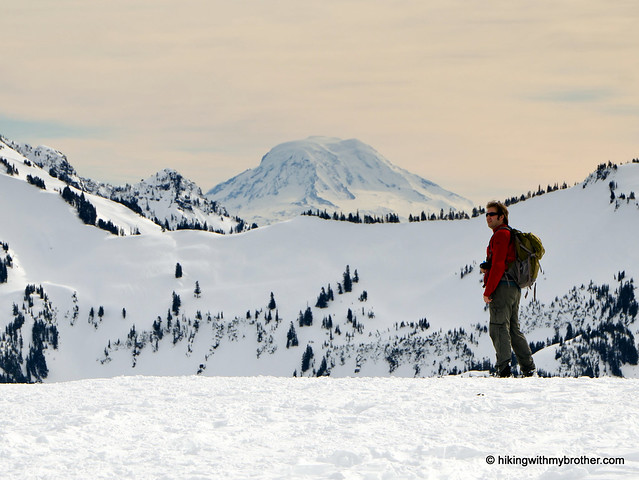
On a sunny weekend a few weeks ago, we packed up our snowshoes and headed out with a few destinations in mind. After some discussion, we decided to indulge our nostalgia and drive the extra distance to visit Paradise on the slopes of Mt. Rainier. It was from the parking lots around Paradise that we began our assent to the summit back in 2008, and we had not been back since. We were long overdue.
In 1885, a member of the Longmire family visited a flower-covered valley on a sunny day, and christened it Paradise. While there is some debate as to whether it was Virinda or Martha Longmire who came up with the name, no one is arguing its accuracy: the allure of Paradise has drawn millions of people to the area over the years. Reliable roads did not reach the area until 1915, but commerce quickly followed and in July 1917, the Paradise Inn was opened. Independently operated until it was sold to the Park Service in 1952, the Inn has welcomed guests nearly every year since it opened. In 1966 the Paradise Visitor Center was opened and

later renamed in 1987 for Senator Henry M. Jackson to honor his efforts to support Rainier National Park. If you haven’t been to Paradise in a few years, you’ll find a new Henry M. Jackson Visitor Center to greet you, which opened in 2008. The original “sunken Space Needle” building was demolished in 2009.
Glacier Vista is a treat in both the summer and the winter. It is an easy hike during the summer months, following the Skyline Trail through alpine meadows brimming with wildflowers, past pines and hemlocks dwarfed by the altitude. In the winter, the snowshoe route is a little more challenging. Some of the challenge comes from the added effort, but route finding can also be an issue. On the upside, if you’re there on a low avalanche danger day, it will be easy to find a route already cut through the powder. If you’re breaking trail, start to the west of the sledding area, heading upwards toward the tree-covered rise known as Alta Vista. We recommend you bear to the left around the knoll as it is less difficult, but either approach will get you there. Continue to parallel the Nisqually Glacier for about a mile-and-a-half to a broad flat area. This is Glacier Vista.
From this vantage point you can take in the massive Nisqually Glacier as well as the Nisqually Valley spreading out below. Rising above the parking lot to the south, a jagged ridgeline marks the beginning of the Tatoosh range, with prominences including Pinnacle Peak, Castle Peak, and

Plummer Peak. Beyond, you can pick out the snow-topped Mount Adams and Mount St. Helens. If you’re feeling like stretching your legs more, continue to follow the Skyline trail up to Panorama Point, to get a better view of the landscape.
Paradise is the perfect destination for exploring with youngsters or test driving that new pair of snowshoes. Many of the trails are paved, making the lower trail network friendly to strollers and wheelchairs in the summer months. Of course, expect a lot of company when visiting Paradise, though the traffic quickly dwindles as you head uphill and out to Glacier Vista or Panorama Point. If you’ve never been up to Paradise, we highly recommend you make the trip this year. One word of caution if you’re planning a winter visit – make sure to check the avalanche danger and keep an eye on the weather, which can change extremely quickly.
To get there, take I-5 South to Tacoma, taking Exit 127 for Highway 512. In about two miles, take the State Route 7 exit toward Spanaway. Continue on SR 7 for about 30 miles to the junction with SR 706 in Elbe. Keep to the left and follow SR 706 a little under 15 miles to the park entrance. From the gate, it is another 14 miles to the Paradise parking area. - Nathan
Print Google Directions >


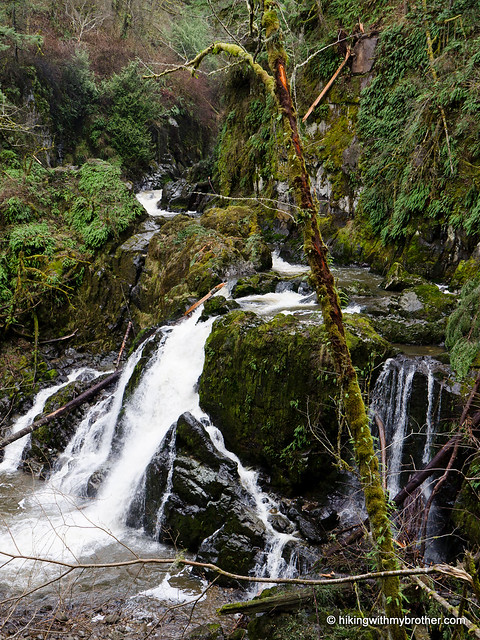
 With minimal elevation gain and easy access, this is a great pick for winter walks, hiking with youngsters or bringing out the dog for an adventure. We suggest that you bring along a map, as the multiple roads and trails can be confusing, and maps are not always available from the Gatehouse in the winter. If you make it out to Pack Forest, we highly recommend you take the time to head out to the waterfalls, which are well worth the trip.
 for this and many more hikes throughout the State. Help support hikingwithmybrother.com and the work we do by picking up a copy!