about us | links | permit info
Subscribe to Hiking With My Brother Email Subscribe Follow Hiking With My Brother on Facebook Follow Hiking With My Brother on Twitter Hiking With My Brother Picasa Hiking With My Brother YouTube
Showing posts with label washington. Show all posts

Our New Website is Live!

Jer's PhotoAfter many months of work, our new website is live! Simply go to www.hikingwithmybrother.com to check it out. If you notice any errors, bugs, or incorrect information, please reach out to hikingwithmybrother@gmail.com or message us on facebook to let us know! The changes we made were substantial so we're sure there are things to fix in the coming weeks.

We plan to continue using our old blog hikingwithmybrother.blogspot.com to complement the website as a communication method to share updates and hiking information. If you're following us via email or RSS feed, it will continue to work. Now that the website finally transitioned, we can turn our attention to posting our backlog of hikes to new site!

Thanks so much for following us!

Nathan & Jer

Kelcema Lake Snowshoe #718

Our Hiking Time: 4h 30m
Total Ascent: 1600ft
Highest Point: 3600ft
Total Distance: 9.0 miles
Location: N 48° 06.908, W 121° 36.069
Required Permit: None
Difficulty: Moderate due to distance and some route-finding

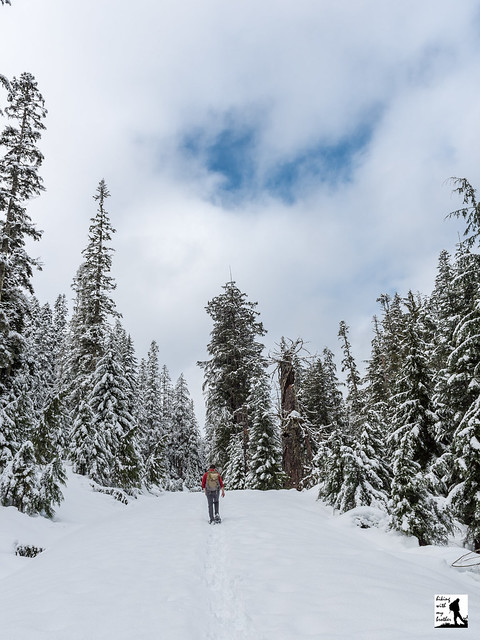
Nathans PhotoIt’s snowshoe season and the mountains are brimming with layer upon layer of decent snow. Our most recent snowshoe took us out along the Mountain Loop Highway to the popular Deer Creek Sno-park. While most folks are here to check out the Big Four Ice Caves or do a little sledding on the hill, we had our sights set on Kelcema Lake, tucked into the base of Mt. Baldy at the end of FR 4052.

According to local lore, Kelcema Lake was named by an early homesteader in honor of his three daughters, Kelly, Cecilia and Mary - Kel-Ce-Ma. With the Marten Creek Mine just over the ridge, the area has a rich mining history. More recently however, it was home to Boy Scout Camp Kelcema, from 1922 to 1944. Situated on the eastern shore, the camp was eventually quite extensive, with a lodge, quite a few cabins, and a makeshift dock. Scouts would spend their time climbing nearby peaks, swimming in the lake, and enjoying the pristine setting. It was renamed camp Mathews in 1944, and a few years later it was shut down entirely as the Scouts decided to consolidate summer camps. The buildings suffered from vandalism and disrepair until the Forest Service burned it down in 1966. Since that time, the lake has remained a popular, as the short .4 mile walk to the lakeshore from the road made it a summer destination for adventurers of all ages. More recently however, fallen trees and washouts have blocked the road and significantly lengthened the trek to the lake.

The snowshoe begins from the Deer Creek Sno-Park, following FR 4052 up a gentle grade and into the second generation forest. Your path is fairly straightforward. The road continues to climb while offering occasional glimpses of the forested ridges that surround you. You’ll cross a number of easily forded washouts as you work your way toward the lake. After about 3.5 miles you’ll reach a hairpin turn, signaling that you are nearing the trailhead. Continue onward and upward for another mile to the end of the road and the trailhead. The Kelcema Lake Trail #718 is signed, but if snow levels make it difficult to find, listen for Deer Creek and follow it the .4 mile into the Boulder River Wilderness and to the shores of Kelcema Lake.

Nestled in a bowl beneath Mt. Baldy and Devil’s Peak, it is not hard to imagine the area teeming with Boy Scouts. There is a rough trail around the lake, though sections can be difficult to navigate in the summer months. Find a good spot to settle down and enjoy the quiet before gearing up to head back. On your way out do a little exploring around the end of FR 4052 to find a view of nearby Big Four Mountain and Sperry Peak.

This is a great snowshoe for those looking to put in some distance rather than tromp through the backcountry. The snow makes the hike down four miles of forest road a lot more fun and you’re likely to have the icy lake all to yourself. With relatively little elevation gain, this is also a good area for young or novice snowshoers - even if you don’t make it to Lake Kalcema, it’s still a pleasant tromp in the woods.

To get there, take I-5 North to Exit 194. Follow Highway 2 for about two miles. Stay in the left lane and merge onto Lake Stevens Highway 204. Follow for two miles to Highway 9. Take the left onto Highway 9 toward Lake Stevens. In just under two miles, you’ll reach Highway 92 to Granite Falls. Take a right and follow for about nine miles to the Mountain Loop Highway. Take the MLH for a little over 23.5 miles to the Deer Creek Parking Area/Sno-Park. -Nathan

Print Google Directions >>
Kelcema Lake Snowshoe

High School Trail to Poo Poo Point

Our Hiking Time: 3h 10m
Total Ascent: 1900ft (1750ft in; 150ft out)
Highest Point: 1900ft
Total Distance: 6.6 miles
Location: N 47° 31.163, W 122° 01.778
Required Permit: None
Difficulty: Moderate

Nathans PhotoThis time of year, snowbound trailheads and forest roads push us toward winter walks on urban trails. These walks are a great chance to do a little exploring in our backyard and enjoy familiar forests without their usual abundance of greenery. Recently we decided to head back to Poo Poo Point, but wanted a different approach. The High School Trail was the perfect choice.


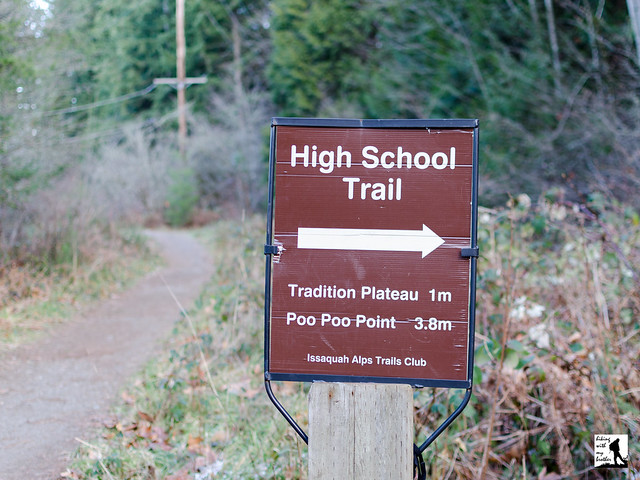
The trail begins from the 2nd Avenue Trailhead, following the Rainier Trail around the edges of the Issaquah High School sports fields. After .2 miles, you will arrive at the signed High School Trail junction. Although the sign states that Poo Poo Point is 3.8 miles down the trail, the actual distance is closer to 3.1. Veer right and enter a young forest dominated by red alder and sword fern. The wide, well-trodden trail soon begins to climb steadily upward, crossing over the Tiger Mountain State Forest boundary at the .5 mile mark. In another .3 tenths a mile reach a junction with the Adventure Trail, the first of a rapid secession of trail junctions on this route. Continue straight ahead and almost immediately find yourself leaving the forest and crossing under power lines. At .9 miles from the trailhead pass the junction with the Bonneville Grade and head back into the shelter of the forest. In a few hundred feet reach an intersection where the Gas Line, Section Line and Poo Poo Point trails cross. Head right, following the sign pointing toward Poo Poo Point.

From here the trail steepens and occasionally switchbacks as it works its way up Tiger Mountain’s shoulders. After 1.7 miles of climbing reach the West Tiger Railroad Grade and your last trail junction. Here the One View Trail, West Tiger Railroad Grade and the Poo Poo Point Trail intersect. Head right, toward Poo Poo Point, following the trail as it descends from the heights you just finished climbing before leveling out. At 3.3 miles reach Poo Poo Point and expansive views of Issaquah and Lake Sammamish. The forested hills to the west are Squawk Mountain’s Southeast and Central Peaks, with the Olympics rising in the distance behind them. On good days you can see Mt. Baker to the north. If you’re lucky, you may even find some hang gliders getting ready to launch themselves out into the open air. Take a few minutes to enjoy the view.

If Poo Poo Point is your goal, the High School Trail is a decent year-round alternate to the more crowded Chirico Trail. With enough elevation gain to get your blood moving, the trail is a great option for conditioning or trail running. What it lacks in wilderness appeal is made up for with its easy access and approachability. During the winter months, snow adds extra challenge and adventure to this normally tame trail. There is enough foot traffic that the snow is quickly compacted, which can make some sections of the trail slick and treacherous. Bring along your microspikes to make the climb a little easier. If you’re a Poo Poo Point veteran and are looking for something a little different, give the High School Trail a try.

To get there, take I-90 out to Exit 17. Take a right onto Front Street and drive 1.6 miles to 2nd Avenue. Take a left at the signal and find the 2nd Avenue Trailhead immediately on your right. Limited parking. - Nathan

Print Google Directions >>

High School Trail

Tunnel Creek Trail #841 to 5050 Pass

Our Hiking Time: 4h 20m
Total Ascent: 2600ft
Highest Point: 5000ft
Total Distance: 8 miles
Location: N 47° 45.384, W 123° 05.489
Required Permit: None
Difficulty: Moderate

Nathans PhotoMore than a few months ago we headed out to the Olympic Peninsula in search of a quiet walk in the woods. We turned our attention to the Buckhorn Wilderness and found the Tunnel Creek Trail, which promised a creekside hike, as well as some panoramic views of wild and rugged peaks. That was more than enough to entice us down ten miles of forest road to this peaceful and engaging trail.

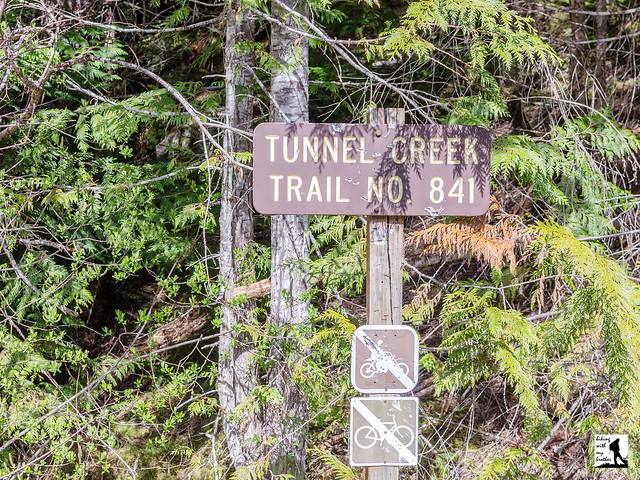
The Tunnel Creek Trail #841 is a through hike, meaning that hikers can start on either end of the trail to make their way up to 5050 Pass. Like most hikers we took the Quilcene approach, which is less steep and somewhat easier to navigate than the Dosewallips end. The Quilcene route begins by following Tunnel Creek into the Buckhorn Wilderness and the quiet shelter of old growth. Ancient trees line the trail as it carves its way through a mossy forest floor and gently climbs up the creek valley. Tunnel Creek is your cheerful companion as you press deeper into the trees, keeping your attention by playfully tumbling over fallen logs or cascading down rocky ravines.

After 2.7 miles reach the Tunnel Creek Shelter, which has offered hikers a roof since at least the 1930s. Take a moment to duck in and read the names and dates carved into the wood stretching back through the decades. Rest up, because from here the trail gets more serious about reaching the pass. Cross Tunnel Creek over a short footbridge and begin your mile long climb to Harrison Lake, following the trail as it works its way steeply up the mountainside. As you climb, the trees will part just enough to offer brief glimpses of Mt. Constance and hints of the views to come. Eventually you'll pass a small tarn just before reaching Harrison Lake at 3.7 miles, then continue upwards another .3 miles to 5050 Pass and a short scramble out to the overlook. One 1932 map notes the location as a “Fine View of Surrounding County,” and that is something of an understatement. Mt. Constance dominates this stunning scene, though in the distance to the north you can pick out Buckhorn Mountain and Iron Mountain. Settle in to see how many peaks you can find or do some exploring to see if you can find a better perch than we did. If you’re still hungry for a challenge, you can push another 4 miles down from 5050 Pass into the Dosewallips Valley, though the trek is reportedly rough and very steep.

Tunnel Creek is a great choice for those that want a little taste of everything on a hike; rushing mountain waters, big views, alpine tarns and old growth forests all a little off the beaten path. The trail shelter offers a decent turn around point for a shorter day, while the climb up past Harrison Lake to 5050 Pass is sure to satisfy hikers looking for a full day in the wilderness. The trail is well maintained and easy to follow, thanks in park to trail volunteers who work diligently to remove blowdowns. For all the trail has to offer, it's often overlooked, which makes it a good alternative to more popular hikes in the area.

To get there, take the Bainbridge Island Ferry and follow State Route 305 through Poulsbo to State Route 3. Follow SR 3 to the Hood Canal Bridge, taking a left over the bridge onto State Route 104. Follow SR 104 as it merges onto US 101 and continue 11.3 miles through Quilcene to Penny Creek Road. Take a right and continue 1.4 miles to a split in the road and the end of the pavement. Veer left onto the Big Quilcene River Road (FR 27). Continue 3.1 miles to the intersection with FR 2740 over sections of both pavement and gravel. Veer left onto FR 2740 and continue 6.8 miles to the end of the road and the trailhead. -Nathan

Print Google Directions >>

Tunnel Creek

Island Lake via Ira Spring Trail #1038

Our Hiking Time: 5h 30m
Total Ascent: 2500ft
Highest Point: 4400ft
Total Distance: 10.2 miles
Location: N 47° 25.290, W 121° 32.185
Required Permit: Northwest Forest Pass
Difficulty: Moderate

Nathan's PhotoNot too long ago we decided to return to our old stomping grounds around Snoqualmie Pass to visit Island Lake, one of a handful of alpine lakes we’d overlooked on our last trek up Mt. Defiance. The lake is nestled at the base of Bandera Mountain about a mile beyond the beckoning shores of Mason Lake, putting it a little beyond the range of most day hikers.

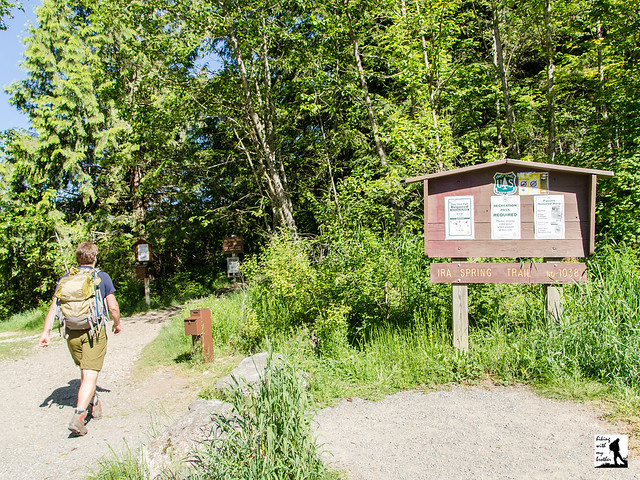
Before the 1960s, the only way for hikers to reach Island Lake was to start at the Pratt Lake/Granite Mountain Trailhead and trek out to the Mt. Defiance Trail junction. Named for the lake’s small rocky island, the shores of Island Lake used to see many more visitors than it does today, and distant Mason Lake was a side trip for those heading to the top of Mt. Defiance. That changed in 1958, when a large wildfire on the slopes of Bandera Mountain prompted crews to hastily build a fire road to help fight the blaze. Not too long after, curious hikers took to exploring the area and using it as a “backdoor” to Mason Lake and as an approach to Bandera Mountain. Harvey Manning popularized the route and soon the official Mason Lake Trail #1038 was born, though its popularity soon led to erosion and a reputation for being steep, rocky, and often difficult to navigate. At the urging of wilderness advocate Ira Spring, a new route was proposed to address the trail’s issues, and between 2003 and 2004, a small army of volunteers in coordination with Forest Service made the trail a reality. With the passing of Spring in 2003, the new trail was renamed the Ira Spring Memorial Trail #1038.

The hike begins on the bones of the re-purposed fire road, with a grade suitable for conveying heavy machinery up a mountainside. Enter a young forest still recovering from fires that ravaged the mountain sometime in the nineteenth century as well as the 1958 fire. At times you can still catch the faint smell of charred wood mixed with the heavy aromas of pollen and dust. Leisurely weaving uphill, you'll cross Mason Creek early on before leaving the last of the water behind and entering the Alpine Lakes Wilderness. At 1.5 miles, the trail abruptly leaves the logging road and becomes serious, exchanging the road’s gentle grade for a steep and rocky path. After a short climb, the dusty trail moves beyond the pines for ever-larger glimpses at the valley below. Once the trail sheds the last of the trees, enjoy the enormous views that come with traversing a grassy mountainside.

At just under 3.0 miles, the Mason Lake Trail and the Bandera Mountain Trail diverge. Head left and to the west through sub-alpine meadows and talus fields, reaching the Ira Spring Memorial just before the short descent down to Mason Lake. While Mason’s lakeshore offers an abundance of campsites and the possibility of a refreshing dip, your destination lies beyond. Push onward following the trail along the lake and further from the shore to reach the Mt. Defiance Trail. Head right and soon find yourself wandering through peaceful tree-lined meadows. Pass Rainbow Lake at 4.0 miles and the signed junction to Island Lake at 4.5 miles. From here it’s just a short jaunt past a few tarns to sparkling Island Lake, resting quietly below Bandera Mountain. Find a cozy rock and enjoy a slice of tranquility.


The hike to Island Lake is a great option if you’re feeling ready to move beyond the more popular and well-trodden trails. While the first two-thirds of the route are likely to be crowded, as you push past the Bandera Mountain Trail junction and Mason Lake, you’ll soon find yourself almost entirely alone. Island Lake and Rainbow Lake also work as quick backpacking destinations, as you can be setting up camp on the quiet shores of a lovely alpine lake in fairly short order. Looking for more? The trail continues onward to connect with the Pratt Lake Trail #1007, providing access to Talapus Lake, Ollalie Lake and Pratt Lake. This also allows for the possibility of a through hike by parking a vehicle at the Ira Spring Trailhead and another at the Pratt Lake/Granite Mountain Trailhead.

To get there, take I-90 to Exit 45, going left under the freeway to Forest Road 9030. Follow FR 9030 for .9 miles until the road splits. Veer left onto FR 9031 and follow it for 2.9 miles until the road terminates in a parking lot. - Nathan

Print Google Directions >>

Island Lake

Lena Lake Trail #810

Our Hiking Time: 3h 15m
Total Ascent: 1200ft
Highest Point: 1900ft
Total Distance: 5.8 miles
Location: N 47° 37.227, W 123° 9.659
Required Permit: Northwest Forest Pass
Difficulty: Easy

Nathan's PhotoEarly this past summer we headed out to Hood Canal to hike the Lena Lake Trail, one of the most popular trails in the area and one with a long history. While the shores of a large alpine lake always draw a crowd, Lena Lake also serves as a basecamp for exploring Upper Lena Lake, the Brothers Wilderness, portions of the Olympic National Park and a whole host of mountaintops.

For eons, Lena Creek flowed down between the shoulders of Lena Mountain and Mt. Bretherton. Then, roughly 1,000 years ago, a massive section of the ridge above the creek slid down into the basin below, blocking the creek. The creek backed up and Lena Lake was formed. Dozens of huge, moss-covered boulders from that slide can be seen from the trail, still sitting where they tumbled to rest centuries ago. Sometime in the late 1910s or early 1920s, the Hamma Hamma Lumber Company built a railroad to access timber in the Hamma Hamma Valley, paving the way for easier access to wilderness once reserved for trappers and prospectors. In 1927 Boy Scout Camp Cleland was established at Lena Lake and eventually grew to 6 scout cabins, a dock, a cook house and even a water system. Over the years thousands of Boy Scouts spent summers at Camp Cleland, including some that eventually made names for themselves in the outdoor community such as Chet Ullin and Ira Spring. By the late 1930s improvements to the Hamma Hamma Road and the Lena Lake trail provided easy access to the unattended camp. After months of rough use, the scouts would return in the summer to find ruined cabins and stolen supplies and by 1941 the decision was made to close the camp. Today all the remains of the camp is a small plaque on Chapel Rock commemorating the experiences of Cleland’s scouts and leaders.

From the trailhead, the well-maintained Lena Lake Trail #810 begins a series of fairly gentle switchbacks before starting to climb in earnest. As you climb, listen to the rushing sound of Lena Creek and watch as a young forest slowly gives way to sturdy old growth. After about two miles, cross a footbridge spanning Lena Creek and press onward for another mile through mossy forest to reach Chapel Rock. Perched a few hundred feet above the lake, Chapel Rock is a favorite stopping point for hikers to take in the panorama below. Have a snack or break out your lunch and enjoy the view before continuing down to the shore.

From Chapel Rock it's a short jaunt to Lena Lake, though the trail continues out to the far end of the lake, with plenty of opportunities to grab a little section of rocky beach. Along the way you’ll pass the trail for Upper Lena Lake and eventually cross a footbridge over Lena Creek. Here you can find the lake’s 28 campsites. From the camp the trail continues onward into the Valley of the Silent Men and provides access to the many scramble routes up the shoulders of The Brothers. Whether you’re spending the night or just want a longer day hike, a climb to Upper Lena Lake is well worth the effort, though the 3.5 mile climb is rougher and more difficult than the main trail.

Lena Lake is a classic. Approachable by almost any hiker and very popular in the summer, it’s a hike almost everyone knows. The hike is also a perfect option for an introductory backpack or a day hike with the kids. And while the lake loses some luster when the water level drops late in the season, the quiet, tree-lined shores offer solace and more than a day’s worth of exploration.

To get there, take I-5 south to Olympia to Exit 104 toward Aberdeen and Port Angeles. Follow US 101 along Hood Canal almost 49 miles through Shelton and Hoodsport to FR 25, also known as the Hamma Hamma River Road. Take a left and follow the road 7.6 miles to the Lena Lake Trailhead. Privy available. -Nathan

Print Google Directions >>

Lena Lake

Weekend Hike Calendar 2016!!

Jer's PhotoLooking for inspiration to get out on the trail? Looking for a great holiday gift? Look no further! For the fifth year in a row, we've put together a great calendar with a different hiking trip every weekend in the new year. The Weekend Hike Calendar 2016 recommends a different hike every Saturday that we've chosen specifically with the season in mind.

Of course all the hike details, including directions, history, and photos can be found on hikingwithmybrother.com or in our guidebook Hiking Through History Washington. A full preview of the calendar is below and we hope you pick one up this holiday season.

Be sure to check Lulu.com for promotional discount codes! -Jer


Support hiking with my brother: Buy this calendar on Lulu.

Deep Lake via Cathedral Pass Trail #1345

Our Hiking Time: Overnight
Total Ascent: 3400ft (2200ft in; 1200ft out)
Highest Point: 5600ft
Total Distance: 15 miles
Location: N 47° 32.5683, W 121° 8.3816
Required Permit: Northwest Forest Pass
Difficulty: Moderate

Nathan's PhotoRecently we decided to get one last overnight in before the snows seal off the mountains for a few months. We wanted to capture some fall color so we headed out to the Salmon la Sac area to tackle Cathedral Rock and explore some nearby alpine lakes. With good weather on our side, we enjoyed spectacular autumn landscapes and the quiet of the wilderness.

Back in the late 1800s, prospectors and sheepherders were far more common in this area than hikers. One of those prospectors was a gold miner named James “Jimmy” Grieve, who was likely the first to scale Cathedral Rock. As a result it was known as Grieve’s Peak and Jimmy’s Jumpoff for years. The name did not sound regal enough for the Forestry Service, so someone in the 1940s or 50s decided Cathedral Rock was a better fit. Grieve had several claims in the area and built a cabin near Peggy’s Pond that was a popular site for hikers to visit for decades, though it is little more than a pile of crumbling logs today. The story behind some of the places in the area is a bit murkier. Supposedly it was Spanish-speaking shepherds that gave the Spinola Meadows their name. Deep Lake, unsurprisingly, was named for its depth, perhaps by the same folks that decided Grieve’s Peak somehow resembled a cathedral.

The Cathedral Pass Trail #1345 begins from the Cathedral Pass Trailhead (officially part of the Tucquala Meadows Trailhead), near the end of FR 4330. From the parking area, craggy Cathedral Rock juts dramatically into the skyline, giving you some perspective on the hike ahead. The rocky trail begins without fanfare, crossing a few creeks before beginning a series of long switchbacks, slowly ratcheting up the mountainside. After .4 miles the trail brings you into the Alpine Lakes Wilderness without fanfare, drawing you past brushy undergrowth and deeper into dark stands of hemlock and fir. Soon the trail begins to level out and at the 2.2 mile mark reaches the junction to the Lake Waptus Trail #1322. Push ahead for another .5 mile to your first destination, Squaw Lake. There are a number of campsites around this little tarn, as well as a backcountry toilet, making it a decent option for a quick overnight with the kids or basecamp for exploring the area trails.

From Squaw Lake, the trail begins a long, rocky traverse up to Cathedral Pass offering occasional views of the Wenatchee Mountains just to the east, while snaking past the occasional pond. Continue to push upwards through the thinning sub-alpine forest for another two miles to the connection with the Pacific Crest Trail #2000 at the 4.2 mile mark. Cathedral Pass is less than .25 mile up ahead, so climb the last few feet to the 5400’ pass, though do not expect a lot of fanfare - there is not much in the way of big panoramic views. But be sure to take a moment to scan the cliffs for mountain goats before beginning the long descent down into the Spinola Valley.

Compared to the Cathedral Pass Trail the Pacific Crest Trail is a breeze. Wide and almost smooth, the trail gently guides you down the mountainside. At the first big switchback you’ll reach the junction with the Peggy’s Pond Trail #1375 - it’s a decent .6 mile side trip out to a lovely tarn, though the trail is rough and somewhat challenging to navigate. Most hikers will opt to continue down another three miles to Spinola Meadows and the shores of Deep Lake, 7.5 miles from the trailhead. As you descend, enjoy a bird’s-eye view of Deep Lake and the valley below as well as Circle Lake Falls cascading down the opposite side of the valley into the lake below. Depending on the season, you may be in for quite a show before the views disappear into the trees as you re-enter the forest. Eventually you’ll reach the bottom and the old growth will give way to meadow. Here the barren cliffs of Cathedral Rock rise dramatically above Deep Lake, demanding your attention as you take in the panorama. Take some time to explore the shore before settling in - there are plenty of campsites around the lake for those planning to spend the night and you can afford to find the best vantage point to take in this gorgeous alpine landscape.

This hike is a classic, offering some of the best the Alpine Lakes Wilderness has to offer: a pristine alpine lake, views of the surrounding rugged landscape, and the quiet solace of the wilderness. While some hikers can tackle this one as a day hike, the distance really lends itself better to an overnight or a multi-day exploration of the area, as there are a number of destinations right nearby including a popular scramble route up Mt. Daniel by way of Peggy’s Pond.

To get there, take I-90 out over Snoqulamie Pass to Exit 80. Head left over the freeway following Bullfrog Road to SR 903. Follow 903 16.6 miles through Roslyn and along Cle Elum Lake to FR 4330 just beyond the Salmon La Sac guard station. Veer right, avoiding the campground and continuing onto the dirt and gravel FR 4330 for 12.3 miles to the Cathedral Pass Trailhead. Privy available. -Nathan

Print Google Directions >>

Deep Lake

Licorice Fern Trail (S6) to Far Country Falls

Our Hiking Time: 2h
Total Ascent: 200ft
Highest Point: 700ft
Total Distance: 3.8 miles
Location: N 47° 31.26, W 122° 7.7033
Required Permit: None
Difficulty: Easy

Nathan's PhotoOver the years we have spent many an afternoon tromping up and down Cougar Mountain. Still, with many miles of official, “unofficial” and abandoned trails, there are still areas we have yet to explore. Recently we had a chance to check out the often-overlooked Licorice Fern Trail, which offers a quiet alternative approach to Far Country Falls.
We’ve covered much of Cougar Mountain’s past on previous hikes. From the early coal mining days to the area’s more recent military history, the nearly 30-year-old park contains and preserves a rich cultural legacy. Envisioned by Harvey Manning and first proposed in 1979, the Cougar Mountain Regional Park concept eventually managed to block planned residential development in the park and gain enough voter support to pass a bond measure. Today the park is the largest “urban wildland” in the United States with over 3,000 acres of forest riddled with 38 miles of hiking trails.

The trail begins directly from 169th Street and is largely unmarked. Only a small sign picturing a hiker gives any indication of a trailhead. Once you find roadside parking, be sure to avoid the paved driveway leading uphill to the left and the grassy yard to the right as you begin the hike. Instead stay on the wide gravel path leading into the trees. From here the trail angles uphill, winding beneath mossy alders and through a thick understory of vine maple and fern. After a mile of hiking, the trail crosses SE Licorice Way before continuing to climb another third of a mile to the junction with the Indian Trail (W7).

Head left at the junction, following the Indian Trail for a half-mile to the Far Country Trail (S1). Continue straight ahead to reach the Far Country Falls overlook. The seasonal multi-tiered cascade drops about 20 feet through a field of moss-covered boulders. While not necessarily spectacular, the falls are interesting enough to make a good destination for those looking for a short hike. You can add some mileage by hiking another third of a mile down the Far Country Trail, to the Far Country Lookout, though this somewhat overgrown peek-a-boo view of the surrounding suburban landscape is unlikely to hold your attention for long.

This trail is a great alternative to the more popular Cougar Mountain trailheads, offering the same outdoor experience with a little less foot traffic. Easy and approachable for any hiker, this easily accessible trail is also a good option during the off-season or just a rainy day as Far Country Falls is fueled entirely by rain or snow melt. Next time you head out for jaunt up Cougar Mountain, consider trying something a little different and exploring the Licorice Fern Trail.

To get there, take I-90 out to Exit 10A, merging onto I-405 South. Stay to the right to take Exit 10 onto Coal Creek Parkway. Follow Coal Creek Parkway four miles to May Valley Road. Take a left onto May Valley Road and continue 2.2 miles to a sharp bend in the road and veer left, continuing to stay on May Valley Road. In .1 miles keep left as the road splits, merging onto SE 112th Street. Continue another .4 miles to the first big curve in the road. As you turn left up the hill the road becomes 169th Ave and the trailhead is here. Find parking along the roadside. -Nathan

Print Google Directions >>

Licorice Fern Trail

Lake Josephine via the Pacific Crest Trail #2000

Our Hiking Time: 5h
Total Ascent: 2400ft (1500ft in; 900ft out)
Highest Point: 5100ft
Total Distance: 10.4 miles
Location: N 47° 43.103, W 121° 3.27
Required Permit: None
Difficulty: Moderate

Nathan's PhotoWith autumn in full swing we wanted to find a hike with plenty of fall foliage and a taste of the wilderness. We settled on Lake Josephine in the Stevens Pass area, which was a little light on the wilderness, but made up for it with brilliant fall colors, pristine alpine lakes, and spectacular weather.

Back around the turn of the 20th century, Albert Hale Sylvester was a forest supervisor in the Snoqualmie Ranger District and would later go on to supervise the Wenatchee Ranger District. During his career he explored, mapped and named thousands of features, including Lake Josephine, named after Josephine Williams, the wife of one of the rangers in his district. Often referred to as A.H. Sylvester, he began the tradition of naming lakes after women, a legacy that is now splashed across maps of the Cascades.

The hike begins from the Stevens Pass Ski Area parking lot, picking up the Pacific Crest Trail #2000 (PCT) as it climbs its way through the ski slopes. The well-trodden trail winds its way up through brushy ski slopes, offering glimpses of the surrounding landscape as it meanders under the occasional ski lift. After two miles of traversing the slopes you’ll crest the first rocky ridge to find Mill Valley spread out before you as well as the Jupiter Express ski lift. From this vantage point you can see Mount Stuart and the rest of the Stuart Range looming large to the southwest. Note the large forested bowl almost directly across Mill Valley from you. Nestled within that bowl is Susan Jane Lake and just over that ridge is Lake Josephine, your final destination. You’ll need to traverse the entire valley to get there, so enjoy the view for a few moments before heading down the mountainside.

The trail down to Mill Creek is largely exposed, affording big views of Mill Valley. Follow the trail as it gently guides you downward through talus fields and the occasional clump of evergreens. Ignore the power lines and ski lifts and push onward, eventually crossing Mill Creek and beginning your climb out of the valley. At about three miles from the trailhead, shortly after you enter a quiet forest of hemlock and fir, cross the Alpine Lakes Wilderness boundary and leave the slopes behind you. Continue the climb for another mile before reaching a small tarn and just above it Lake Susan Jane. There are several campsites here for those looking to make a longer stay and the lake makes for a decent destination if you’re short on time. To reach Lake Josephine, continue to press upward for another half mile to a forested plateau and the junction with the Icicle Ridge Trail #1551. Peer down at glimmering Lake Josephine a few hundred feet below.

When you’re ready, head left, leaving the PCT for the Icicle Ridge Trail and continuing to climb upward, passing several tarns as you work your way around the lake high above the shore. The trail is somewhat rockier and rougher than the PCT, but easily navigable. Eventually the trail dips sharply down to the lake, depositing you at the edge of Icicle Creek near several established campsites. Take a few minutes to explore the shore and stake out a place for lunch or a snack and take in Josephine’s crystal clear waters. Follow the rushing sound of Icicle Creek for glimpses of Icicle Valley and the Stuart Range beyond. Once you find a spot, settle in and enjoy this little slice of wilderness.

A popular hike during the summer months, this section of the PCT is all but deserted in the early fall. As an added bonus, the season paints the ski slopes in vibrant reds and oranges, making your trek past power lines and ski resort outbuildings a little more visually appealing. While there is a moderate amount of elevation gain on this hike, the well-maintained trail makes this one approachable for most hikers. For those looking for more, you can push further down the PCT past Swimming Deer Lake to reach Hope & Mig Lakes.  Or continue down the Icicle Ridge Trail and toward the French Ridge area or explore the ever-popular Chain Lakes region.

To get there, take Highway 2 to the Stevens Pass Ski Area. Park on the south side of the highway. The trailhead can be found to the east in the parking lot furthest from the main ski lodge. Privy available. -Nathan

Print Google Directions >>

Lake Josephine

Mt. Ellinor via Upper Trailhead #812

Our Hiking Time: 2h 45m
Total Ascent: 2300ft
Highest Point: 5800ft
Total Distance: 3.2 miles
Location: N 47° 31.299, W 123° 15.641
Required Permit: Northwest Forest Pass
Difficulty: Hard

Nathan's Photo
The Mt. Ellinor Trail is easily one of the most popular hikes on the east side of the Olympic Peninsula and with sweeping vistas filled with mountaintops and endless stretches of water, it’s no wonder hikers flock to the summit. While we’d seen the mountain on our climb up Mt. Rose, we decided it was time we experienced the well-trodden trail ourselves.


Between 1853-57 a geographer named George Davidson was working on the Coast Survey, a mapping of project that included triangulating the heights and precise location of geographical features on the West Coast, including Washington and the Puget Sound. In 1856, Davidson was commanding the survey brig R.H. Fauntleroy, named for another prominent surveyor and Davidson’s mentor, Robert Henry Fauntleroy. Davidson’s triangulation work required him to name a number of prominent mountains in the area including Mt. Ellinor, Mt. Constance, and The Brothers. They were all named for members of the Fauntleroy family. Mt. Ellinor was named in honor of Fauntleroy’s daughter Ellinor, who would later marry Davidson. Mt. Constance was named in honor of Fauntleroy’s other daughter, while The Brothers were named for Fauntleroy's sons, Arthur and Edward. The first recorded climb of Mt. Ellinor was in 1879 when Mr. and Mrs. J.W. Waughop, D.N. Utler, and H.C. Esteps found their way to the top. Since that time, thousands of hikers have followed in their footsteps, braving steep slopes to take in Ellinor’s fabled views.

The Mt. Ellinor Trail #812 begins from one of two trailheads. The lower trailhead adds 1.7 miles and about 1,300 feet to the hike, which makes the upper trailhead the far more popular choice. The upper trail begins at the end of FR 2419-014 and immediately begins to climb. The trail’s popularity means a steady march of boots have keep the trail free of rocks and roots. At the same time, steps and rails have been built into trail to minimize erosion and help smooth out the climb. Pass the junction with the lower trailhead at .3 miles before tackling a series of steep switchbacks. After about a mile of hard climbing, the trail leaves the trees and continues over talus fields and across exposed mountainsides. Before long, the trail crests a ridge and begins a short set of switchbacks that quickly deliver you to the nearly 6,000ft summit.

The sweeping views from the top are nothing short of captivating. Mt. Ellinor’s closest neighbor, Mt. Washington, is to the north with The Brothers in the distance just to the right. As you turn west to look into the Mount Skykomish Wilderness, you can pick out Mt. Pershing looming over Brown’s Hike Lake, then Mt. Stone, Mt. Skykomish and Mt. Cruiser. Copper Mountain is almost directly to the west and as you turn south you can pick out Lightening Peak just behind Ellinor’s other neighbor, Mt. Rose. Lake Cushman lies to the south, and as you turn to the east the Puget Sound is spread out before you. On clear days you can pick out Mt. St. Helen’s, Mt. Adams and Mt. Rainier rising above Seattle and Tacoma. Settle in and see how much more you can pick out of these vast horizons.

Mt. Ellinor is a classic hike, one that is more than worthy of being on everyone’s bucket list. While the hike’s popularity and difficulty often draw comparisons to Mt. Si, you will find far fewer people and far better rewards along the Mt. Ellinor Trail. Still, we recommend trying to find a weekday to give this one a try, as it will make your climb a little more peaceful. At the same time, the trail is well maintained and easy to navigate which means that despite a healthy amount of elevation gain, most hikers will be able to make it to the top.

To get there, take I-5 south to Olympia to Exit 104 toward Aberdeen and Port Angeles. Follow US 101 along Hood Canal just over 35 miles through Shelton to Hoodsport. Turn left onto Lake Cushman Road/State Route 119 and follow for 9.2 miles to a T-intersection. Take a right and follow 1.6 miles to FR #2419. Take a left and follow #2419 for 5.3 miles to the signed lower trailhead. The more popular upper trailhead is reached by continuing another mile to #2419-014. Head left onto the 014 spur and continue 3 miles to the end of the road and trailhead. -Nathan

Print Google Directions >>

Mt. Ellinor

Pot Peak Trail #1266

Our Hiking Time: 2h 45m
Total Ascent: 1900ft
Highest Point: 3800ft
Total Distance: 6.6 miles
Location: N 47° 56.5683, W 120° 19.766
Required Permit: None
Difficulty: Moderate

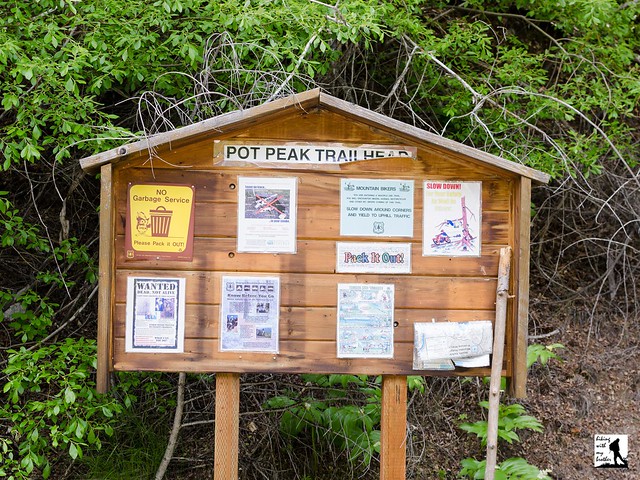
Nathan's PhotoLast summer we spent a weekend hiking around the bluffs above Lake Chelan. We explored a number of trails, all of which had something a little different to offer. One of those trails was the Pot Peak Trail, a dusty mixed use trail that climbs Pot Peak Ridge to take in views of the surrounding foothills.

The Pot Peak Trail #1266 begins from a roadside trailhead and immediately begins ascending the ridgeline. Like many of the trails in this area, the Pot Peak Trail is primarily a biking trail and some sections of the trail have been improved to handle bike traffic. Many of the trail’s switchbacks are reinforced with cinder blocks to keep the trail from degrading. After about a half mile of climbing the trail enters a burn zone, a stark reminder of the 2004 Pot Peak Fire that offers an early glimpse of the views to come.

As you continue upward, the trail will slip back into sections of pine forest, offering some shelter from the sun. The respite is short however, as you will soon find yourself wandering through stands of charred trees rising out of a shallow sea of saplings and underbrush. Continue to push upward until you find a suitable stopping point. We turned around at a vista a little over 3 miles from the trailhead. More intrepid hikers will continue upward to Pot Peak's exposed summit for slightly bigger views and a glimpse of Lake Chelan in the distance. From the summit the trail continues onward to connect with the Devil’s Backbone Trail at the 10 mile mark.

Somewhat challenging and easily accessible from Chelan, the Pot Peak Trail is a good option for those hikers looking to fit a good hike into a weekend at the lake. While the views are not necessarily spectacular, the opportunity to explore a terrain recovering from a relatively recent forest fire has a certain appeal. Keep in mind that this is primarily a biking trail, so be ready to share the trail with bikers who may be coming downhill quickly. At the same time, this trail is often overlooked as a hiking option, which means you’re likely to enjoy the trail without much in the way of company.

To get there, take I-90 to Exit 85 to Cle Elum/Leavenworth. Cross the freeway and head right on WA 970 toward Leavenworth as it merges into WA 97. As WA 97 ends, merge on US 2 toward Wenatchee following signs for US 2 and WA 97. In West Wenatchee, follow signs for WA 97 ALT. Once on WA 97 ALT, continue 23.5 miles to WA 971, taking a left and following to Lakeshore Road. Take a left and continue 10.4 miles past Twentyfive Mile Creek State Park to FR 5900. Take a left and follow FR 5900 2.5 miles to a junction with FR 8410. Head left onto FR 8410 for .5 mile to the Pot Peak Trailhead. -Nathan

Print Google Directions >>

Pot Peak

Horseshoe Mine

Our Hiking Time: 3h 30m
Total Ascent: 2000ft
Highest Point: 2800ft
Total Distance: 5.6 miles
Location: N 47° 28.253,  W 121° 37.702
Required Permit: None
Difficulty: Hard (due to route finding)

Nathan's PhotoPlease note that Middle Fork Road is in the process of being paved. It may be that access to this trail is limited during construction.

A few weeks ago we decided to head back to the Middle Fork Snoqualmie Area to do a little more exploring. After doing a bit of research we found a few references to a copper mine that had been carved into the slopes of Mailbox Peak above Granite Creek near the Granite Lake Trail. We’ve made the hike out to Granite Lakes in the past, so we decided to try an alternative approach for this trek up to the seldom visited Horseshoe Mine.

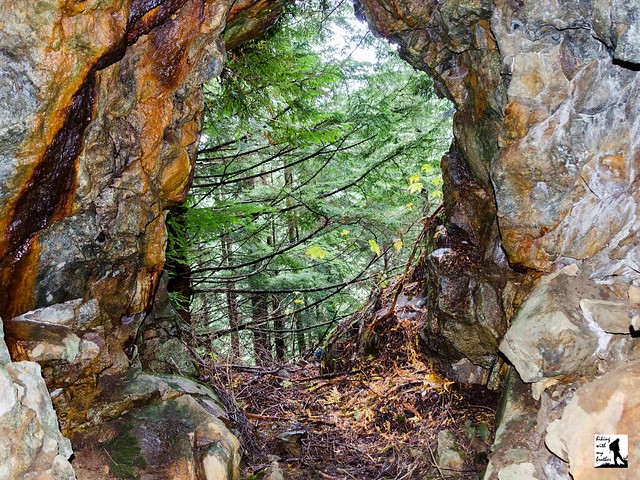
The Horse Shoe Mining Company was established in Seattle in 1904 and eventually held 11 claims covering 220 acres of land in the Middle Fork Snoqualmie and Pratt River Valleys. The company joined other mining operations already working along Quartz Creek and in the Dutch Miller area. One of the company’s first claims was known as “Horse Shoe” and was centered around a four-foot wide vein of bornite ore. From this vein, now known as the Horseshoe Mine, miners used hand drills to follow the bornite a few hundred feet into Mailbox Peak. The bornite was then hauled out of the river valley to be smelted down for its copper. Sometime before 1909 the bornite ran out and the company abandoned the claim. Today, the remains of the mine slumber in the forests above Granite Creek.

The trail begins directly off the Middle Fork Road, following the remains of an old logging road into a young forest of alder and hemlock. The road is currently marked by a large notice indicating a trailhead, parking area and restroom will be built here soon, making it likely that this approach will be developed in the near future. Continue following the road for .6 miles to a well-marked bootpath leading up and into the trees on your left. From here the thin trail is a little rough, but easy to follow as it works its way up the mountainside. Keep an eye out for the mossy stumps with springboard notches cut into them, a lasting reminder of the area’s timber history.

After a half-mile of climbing through encroaching underbrush the path connects with the Granite Lakes Trail. Head left and continue to climb alongside the sound of Granite Creek to the 2.3 mile mark. Look for a slight dip in the trail indicating an overgrown forest road that once provided easy access across the creek. The trail is otherwise unmarked and it will require a little bushwhacking to find a way across. The barely recognizable remains of the bridge that once spanned the creek are still here and can be used, though nearby rocks and logs may prove easier to navigate. Once on the other side the wide roadbed is easy to find and is marked by the rusting remains of a 1941 Chevrolet Special Deluxe Coupe.

Continue following the road as it begins its gentle climb toward the mine. Find a trail leading steeply up the hillside in about a third of a mile, though the road continues on for a few hundred feet. The path is a helpful start, but it soon disappears leaving you with few hints as to the location of the mine. From here, traverse the mountainside in the same direction as the road bed below, continuing to climb upward. Within .1 mile you should reach what remains of a rough road, which eventually leads to the mine. Note that there are few discernible landmarks in this area and it took us quite a while to find the mine without GPS data. If at all possible, bring along a GPS with our tracks as it will make it much easier to reach your destination.

We don’t recommend this hike for everyone, as some route finding skills are required to find your way to the mine. However, if you’re comfortable with a little adventure, this is a fun alternative to the Mailbox Peak crowds. If you’re looking for a longer hike, you can get some more mileage by starting from the Granite Lakes Trailhead rather than the shortcut we recommend here. As always, use caution around the mine as it could be unstable.

To get there, take I-90 to exit 34 and take a left onto 468th Ave. Follow the road past the truck stop for about a half-mile until you reach SE Middle Fork Road, also known as Forest Road 56. Turn right and follow the road for a few twists and turns, keeping left when the road splits. After 2.2 miles reach SE Dorothy Lake Road. Turn left and continue 2.9 miles to a pullout on the right side of the road just before the bridge crossing the Middle Fork Snoqualmie. Park here and walk a few hundred feet down to the abandoned road to begin the trail. -Nathan

Print Google Directions >>
Horseshoe Mine
Copyright 2008-2016 - hikingwithmybrother.com
hikingwithmybrother@gmail.com