about us | links | permit info
Subscribe to Hiking With My Brother Email Subscribe Follow Hiking With My Brother on Facebook Follow Hiking With My Brother on Twitter Hiking With My Brother Picasa Hiking With My Brother YouTube

Coal Mines Trail - Cle Elum to Roslyn

Our Hiking Time: 2h 20m
Total Ascent: 200ft
Highest Point: 2200ft
Total Distance: 6.5 miles
Location: N 47° 12.5280, W 120° 58.5360
Required Permit: None
Difficulty: Easy
 
Nathan's Photo
We’re always looking for ways to inspire hiking during the winter months. With the New Year upon us, we wanted to find a hike that any family to could take on New Years Day to start 2013 off right. With that in mind, we decided to head out over Snoqualmie Pass to take a winter walk down the Coal Mines Trail.

In 1884, the rapidly expanding Northern Pacific Railroad began laying track toward Stampede Pass, in an effort to finally connect the Puget Sound to the Midwest. The previous year, the company’s engineers had located rich coal deposits near the railroad’s planned route and wasted no time in setting up a means to extract the substance that was fueling their locomotives. By 1886 the Northern Pacific Coal Company’s settlement around the coal mines was platted as Roslyn, named by the railroad’s vice president, Logan Bullitt, after a city in New York associated with his girlfriend. Nearby, the town of Ronald also sprang up, named after Alexander Ronald, the superintendent of the coal company. A spur track was quickly built from Ronald through Rosyln to Cle Elum, where the coal could be loaded onto trains and shipped where it was needed. In 1987, the tracks were removed and in 1994 Coal Mines Trail was created following the old railroad grade.

The mines along the Coal Mines Trail operated for 77 years before the last one closed down in 1963. During that time the population of the area mushroomed as miners from many different groups came to work the mines. As they arrived, miners found others that spoke their language and shared their culture, creating small ethnic communities all along the rail route. That tradition had some interesting side effects such as the Rosyln cemetery, which consists of 5,000 graves divided between 25 different religious and ethnic cemeteries. Some of those graves are a product of Washington State’s worst mining disaster in 1892, when 45 miners perished after an explosion in the lower levels Roslyn’s No. 1 mine.

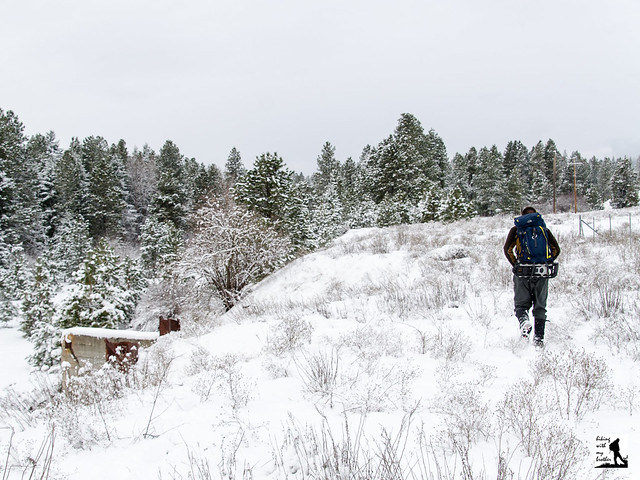
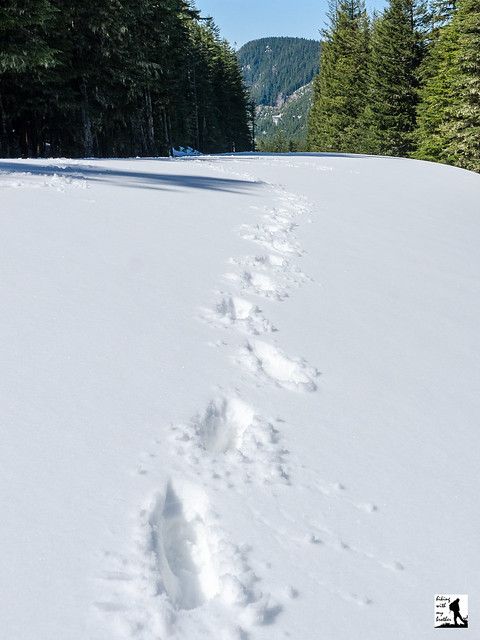
The trail begins directly from the street, passing the tree-lined backyards of current neighbors. Wide and flat, the trail can handle bikes and strollers in warmer months and snowmobiles and cross-country skiers when it snows. Houses quickly yield to more trees, cottonwoods and maples at first, followed by pines and firs further down the trail. With no elevation to slow you down, you’ll quickly glide past interpretive signs marking long-gone settlements such as Happy Hallow and Ducktown, as well as mine and building locations.

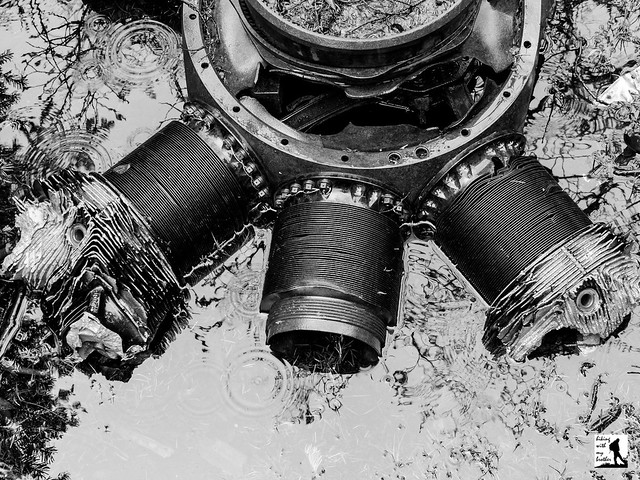
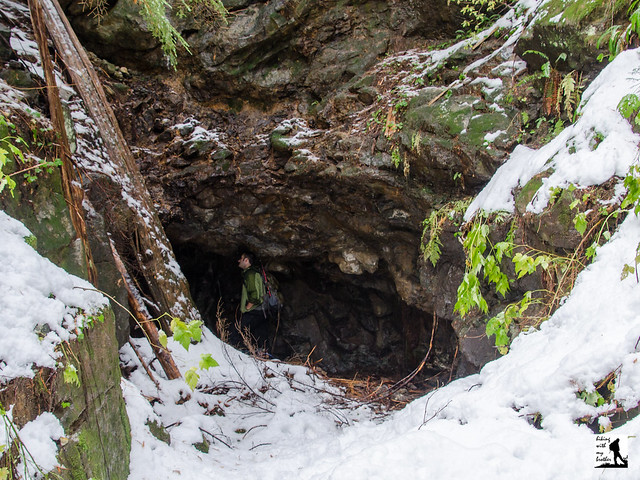
At just over a mile pass what remains of a coal washer that used waters from Crystal Creek to separate the coal from less useful substances. A quick climb up the hill reveals your first glimpse of the neatly sculpted hills made of slag and tailings from the mines. Miners dumped everything they brought up out of the ground in massive piles near the mines, some of which rise right next to the trail. At two miles a spur line leads out to the No.9 and No. 10 mines, where the curious can do some exploring and find the sealed mine entrances and the cement foundations of surrounding buildings.

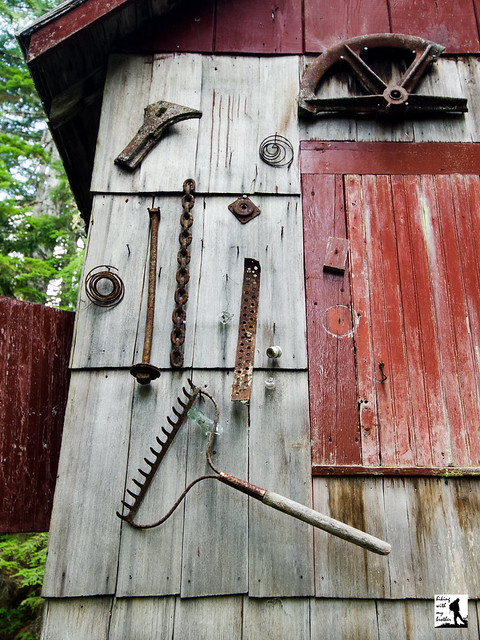
Continue to follow the trail for another mile to find the site of the No. 1 mine and other buildings on the outskirts of Roslyn. From here, the trail takes you though the town, past a number of former mining offices and stores, and onward toward Ronald. The last mine on the route is the No. 3 mine, which has plenty of artifacts and crumbling foundations to explore.

While the Coal Mines Trail is not exactly a hike, it allows absolutely anyone to wander through the area’s coal mining past. Easily accessible and walkable year-round this trail should be on your list of alternatives when you need to entertain your non-hiking friends and family. During the fall months, the changing leaves attract even more folks to this popular walk. Try starting off your year with something a little different, and give the Coal Mines Trail a visit.


To get there, take I-90 to Exit 84 to Cle Elum, merging onto 1st Street. Continue for a mile to Stratford Street. Take a left and find the signed trailhead on the corner of Stratford and 2nd Street. Parking spots are available in front of Flag Pole Park, which includes a large map of the historical highlights along the trail. If you’re looking for more detailed information, free Coal Mine Trail pamphlets are available at the Cle Elum Chamber of Commerce located just across the street on 1st Street. -Nathan

Print Google Directions >>

Coal Mines Trail

Surprise and Glacier Lakes Trail #1060

Our Hiking Time: 5h 30m
Total Ascent: 2700ft
Highest Point: 4900ft
Total Distance: 9.5 miles
Location: N 47° 39.4980, W 121° 8.5020
Required Permit: None
Difficulty: Moderate
 
Nathan's Photo
Over the years we’ve had a number of folks pointing us toward Surprise Lake for both summer and winter hiking. A few weeks ago we decided it was time to see if the hike could live up to the all the good reviews. Enough snow had fallen around Stevens Pass that we packed up our snowshoes and set out on what we thought might be our first snowshoe of the season.


We recommend this hike for anyone looking for an engaging hike throughout the year. It is a little long for more causal hikers, and the elevation gain is not insignificant, but most of the work is a short series of switchbacks at around the three mile mark. However, if you budget enough time, this hike should be attainable for almost every hiker. The lakes are more than worth the effort, and the hike even makes for a decent little backpacking weekend. While Surprise Lake is popular in the summer, few people make the trek in the winter, making this a good time to do some exploring and get the lakes all to yourself.

There's a lot more to Surprise and Glacier Lakes, and you can learn all about it in our book, Hiking Through History Washington.  You'll find a trail map, route descriptions, history, and more for this and many more hikes throughout the State. Help support hikingwithmybrother.com and the work we do by picking up a copy!

To get there, take Highway 2 out past Skykomish toward Stevens Pass. Just past milepost 58, look for an unmarked road on your right just beyond the Iron Goat Interpretive Site. Turn onto the access road and follow it across the Tye River to the Burlington Northern Santa Fe railroad tracks. Cross the tracks and head to the right paralleling the tracks for a short distance to a spur road heading into the trees. Follow this road a few tenths of a mile to the trailhead. -Nathan

Print Google Directions >>

Surprise Lake

Easton Ridge Trail #1212

Our Hiking Time: 4h
Total Ascent: 2200ft
Highest Point: 4500ft
Total Distance: 6.5 miles
Location: N 47° 14.9040, W 121° 8.3640
Required Permit: None.
Difficulty: Moderate

Nathan's Photo
A few months ago before the grey of autumn brought along chilly winds and endless rain, we found some time to head out over Snoqualmie Pass to tackle Easton Ridge. Much like nearby Kachess Ridge, the hike promised an exposed ridgeline with broad views of nearby peaks and lakes. Easton Ridge not only delivered the views, but also surprised us with abundant fields of wildflowers.


Easton Ridge works well for an early season hike. At a lower elevation and located east of Snoqualmie Pass, it tends to melt out quickly. And while more folks are discovering the hikes near Easton, they do not get nearly as much traffic as other I-90 hikes leaving you to enjoy the big views without a lot of company. Although there is a bit of elevation gain, but most hikers should be able to tackle Easton Ridge, making it a great alternative on a sunny weekend. We recommend you tackle this hike in late June or July when the wildflowers will be at their height.


There's a lot more to Easton Ridge, and you can learn all about it in our book, Hiking Through History Washington.  You'll find a trail map, route descriptions, history, and more for this and many more hikes throughout the State. Help support hikingwithmybrother.com and the work we do by picking up a copy!

To get there, take I-90 to Exit 70. Take a left over the freeway and turn left onto West Sparks Road. Continue for a half-mile to FR 4818 (signed Kachess Dam Road) and take a right. Follow FR 4818 for a mile to an unmarked road on the right. Follow this road for a half-mile to the small parking area at the trailhead. -Nathan

Easton Ridge

Marten Creek Trail #713

Our Hiking Time: 4h 45m
Total Ascent: 1400ft
Highest Point: 2800ft
Total Distance: 6.6 miles
Location: N 48° 6.2640, W 121° 37.3320
Required Permit: None
Difficulty: Hard (Overgrown after 2.0 miles)

Nathan's Photo
A few weeks ago we headed back out the Mountain Loop Highway to the Marten Creek Trail #713, an all-but-forgotten mining road that once connected Silverton with Darrington over Granite Pass. We expected to find a trail leading out to an old mine, but instead we were confronted with a bit more route-finding and bushwhacking than we anticipated.


If you’re looking for a training hike or a quiet snowshoe without a lot of company, the Marten Creek trail is an excellent choice. Although there is not much in the way of a destination, the first two miles of this trail offer forested trails, a roaring creek, some views and more than a little history. Much beyond this point most folks are unlikely to enjoy the hike, at least until the trail gets some serious trail maintenance. Because of this, we recommend you save this one for snowshoe season, as it makes a great alternative to the more popular routes along the Mountain Loop Highway.

There's a lot more to Marten Creek, and you can learn all about it in our book, Hiking Through History Washington.  You'll find a trail map, route descriptions, history, and more for this and many more hikes throughout the State. Help support hikingwithmybrother.com and the work we do by picking up a copy!

To get there, take I-5 North to Exit 194. Follow Highway 2 for about two miles. Stay in the left lane and merge onto Lake Stevens Highway 204. Follow for two miles to Highway 9. Take the left onto Highway 9 toward Lake Stevens. In just under two miles reach Highway 92 to Granite Falls. Take a right and follow for about nine miles to the Mountain Loop Highway. Follow the MLH for about 20 miles to the bridge over Marten Creek, just past the Marten Creek Campground. The signed trailhead is on the east side of the creek. There is no parking lot, find parking along the shoulder. -Nathan

Print Google Directions >>

Marten Creek

Colquhoun Peak Trail #1195

Our Hiking Time: 30m
Total Ascent: 600ft (900ft from FR7036)
Highest Point: 5200ft
Total Distance: 1.0 mile (2.0 miles from FR7036)
Location: N 47° 7.7520, W 121° 27.6720
Required Permit: None
Difficulty: Moderate

Nathan's Photo
Last week we decided to do a little exploring in the forests that surround Greenwater out along Highway 410. We had a couple of different trails and destinations we wanted to check out, including a return trip to Colquhoun Peak for a snow-free trek up the site of a former fire lookout. As we knew from our previous visit, this short hike offers some excellent views of Mt. Rainier and the White River Valley.

Although quite short, Colquhoun Peak makes a good addition to a day of hiking, delivering excellent views in a very little time. Combining a trip of Colquhoun Peak with a trek up Kelley Butte or Blowout Mountain can make for a decent day of hiking and exploring this area. While the trail is somewhat steep and a little rough, because it is only a half-mile, the trail should be approachable for almost any hiker. As an added bonus, this trail also does not see a lot of foot traffic, probably because it is a little tricky to find. So expect to savor Colquhoun Peak’s views without anyone else around.

One word of caution: the spur road to the trailhead is very narrow and is not wide enough for two cars to pass each other. Be careful if you chose to drive that half-mile to the trailhead, the road drops off steeply, and reversing down the rough road if you meet another car on your way up will be difficult. We recommend you park on the shoulder near the spur road and hike the road to the trail.

There's a lot more to Colquhoun Peak, and you can learn all about it in our book, Hiking Through History Washington.  You'll find a trail map, route descriptions, history, and more for this and many more hikes throughout the State. Help support hikingwithmybrother.com and the work we do by picking up a copy!

To get there, take I-5 south to Highway 18 Exit 142A. Follow Highway 18 into Auburn and take the SR 164 exit. Head left on SR 164 through Enumclaw to SR 410. Turn left onto SR 410 and drive about 20 miles through the town of Greenwater, past the fire station to FR 70 on the left. Take a left and follow FR 70 for about eight-and-a-half miles to FR 7030. Take a left and continue about four miles to FR 7036. Take a right and continue half a mile to unmarked Road 7036-110 on your right. It is a narrow, rough road that requires a high clearance vehicle. Either park at the junction and hike the half-mile to the trailhead, or drive to the end of the road and park in at the small turnaround at the end of the road. -Nathan

Print Google Directions >>

Colquhoun Peak

The 2013 Hiking with my Brother Calendar

Jer's PhotoAlmost every weekend for years, we have been trekking down hiking trails across Washington and reporting our experience on hikingwithmybrother.com. Now we've put together our 2nd annual calendar that draws on our all-season hiking experience. The Hiking with my Brother 2013 Calendar suggests a different hike every Saturday in 2013, each chosen with the season in mind. The calendar also showcases some of our best photography from the suggested hikes to inspire you to get out on the trail. Of course all the hike details, including directions, history, and photos can be found on hikingwithmybrother.com.

Check out the preview of the calendar below, and we hope you pick one up for you or a loved one this holiday season. Use Lulu.com promotional code NOVCALENDARS12 to get a 25% discount in the month of November! -Jer


Support independent publishing: Buy this calendar on Lulu.

Ashland Lakes Trail

Our Hiking Time: 3h 15m
Total Ascent: 800ft (500ft in; 300ft out)
Highest Point: 3000ft
Total Distance: 5.5 miles
Location: N 48° 1.6800, W 121° 43.7100
Required Permit: Discover Pass
Difficulty: Easy

Nathan's Photo
A few months ago we headed out on the Mountain Loop Highway to explore the Ashland Lakes Trail and the Morning Star Natural Resource Conservation Area (NRCA), one of Washington’s 30 NRCAs managed by the Department of Natural Resources. Boasting lakes, marshes, mountaintops, and old growth forest, the area promised a little bit of everything and managed to deliver.

Ashland Lakes have attracted hikers and campers for years, but it wasn’t until the late 1980s that steps were taken to protect the area. Around 1989 the Mt. Pilchuck Natural Resource Conservation Area was formed, preserving 9606 acres of land ranging from the top of Mt Pilchuck down the to shores of Ashland Lakes. The ecologically diverse area included alpine meadows and stands of old growth roughly 300 years old. In 2007, the Mt. Pilchuck NRCA was combined with nearby Greider Ridge NRCA and Morning Star NRCA. Now collectively known as the Morning Start NRCA, this 26000-acre conservation area provides a home to threatened species as well as a wide array of recreational opportunities.

The trail begins by following a logging road through a young forest of recovering clear-cut. Mostly wide and flat, this first mile or so of trail breezes quickly past grassy marshes and over a small creek before leaving the road and plunging into old growth. The change is dramatic. The forest closes in and trees loom above you as you cross planks spanning creeks, puddles and bogs. Stroll through lush undergrowth and past moss-covered rocks. Find the junction to Beaver Plant Lake branching off this network of boardwalks and take the short side trip out to this little lake before returning to the trail. As you continue, you’ll pass the junction to the Mallardy Ridge Trail leading out to Bald Mountain – an adventure for another day. Push ahead to Upper Ashland Lake.

Hugging Upper Ashland’s lakeshore, boardwalks lead you around the lake. Pass the occasional wooden platform built to allow campers to pitch a tent with the hope of staying dry on the lake’s soggy shores. After you’ve gotten your fill of Upper Ashland Lake, continue down another half mile to Lower Ashland Lake. Slightly less traveled than the upper lake, this tree-lined lake is a little wilder and you are less likely to encounter other hikers here. Continue to the end of the lake to find a log bridge spanning Wilson Creek and beyond another platform that makes for a good stopping point. The trail continues another mile and a half to Twin Falls Lake, but recent storm damage has washed out the trail and the Department of Natural Resources has closed the trail until further notice.

The Ashland Lakes Trail has the right mix of distance, elevation and destinations to make it ideal for bringing younger hikers along. The elaborate system of bridges and boardwalks also make this a fun hike for both new and experienced hikers. However, the area does receive quite a lot of rain – over 100 inches annually – which means you can almost always expect a little mud and that boardwalks will be a little slippery. Still, each of the three lakes has their own personality and offer a great deal to see on this relatively short and easy hike.

To get there, take I-5 North to Exit 194. Follow Highway 2 for about two miles. Stay in the left lane and merge onto Lake Stevens Highway 204. Follow for two miles to Highway 9. Take the left onto Highway 9 toward Lake Stevens. In just under two miles reach Highway 92 to Granite Falls. Take a right and follow for about nine miles to the Mountain Loop Highway. Follow the MLH for nearly 16 miles to FR 4020, signed for multiple trailheads including the Ashland Lake Trail. Take a right and follow the gravel road about two-and-a-half miles to a junction. Head right on to FR 4021 and continue for a mile and a half to a junction with Spur 016, signed for Ashland Lakes. Head uphill and find the trailhead at the top. - Nathan

Print Google Directions >>

Ashland Lakes

Deception Creek Trail #1059

Our Hiking Time: 4h
Total Ascent: 1100ft
Highest Point: 3000ft
Total Distance: 6.5 miles
Location: N 47° 40.5600, W 121° 10.8360
Required Permit: Northwest Forest Pass
Difficulty: Moderate

Nathan's Photo
A few months ago, we ventured out along Highway 2 in search of a suitable hike for the day’s rainy weather. After consulting a few guidebooks, we settled on the Deception Creek Trail #1059, a hike that promised creeks, lakes, and the shelter of old growth forest.

There are quite a few geographical features in Washington that have earned the name “deception.” Usually, this is because the feature caused some sort of confusion upon discovery. Puget Sound’s Deception Pass, for example, was named by Capt. George Vancouver because it first appeared to be a narrow bay rather than a passageway. Our efforts to dig up the story behind the naming of Deception Creek and the Deception Lakes the creek drains came up empty, but we do know it has been called Deception Creek for quite some time. Back 1893 the last spike of the Great Northern Railway was driven at Deception Creek, connecting Seattle to St. Paul, Minnesota. You can learn more about the role the Great Northern Railway played at Stevens Pass by exploring the Iron Goat Trail.

The trail begins beneath the crackle of power lines, but soon plunges into a mature forest of fir, cedar and hemlock. Almost immediately you’ll cross into the Alpine Lakes Wilderness and find yourself alongside Deception Creek. The first mile is fairly tame, climbing slowly but steadily up the valley. The somewhat narrow trail crosses over streams large and small, usually with a bridge or boardwalk to help you to the other side. Depending on the season, you may find that Deception Creek has spilled over onto the trail, and you may need to find creative ways of getting across.

After crossing the log bridge over Deception Creek, the trail steepens, pulling you up the mountainside high above the creek. Eventually the trail levels out and crosses over Sawyer Creek. At roughly three miles find a campsite well-suited for a break or a turn-around point for those looking for a shorter day. This was our stopping point, but you can continue on for another two miles to find the Tonga Ridge Trail #1058. For those looking to do some backpacking, the connecting trail to Deception Lakes #1059B is found at the seven mile mark and Deception Pass and the Pacific Crest Trail is beyond ten miles from the trailhead.

Surprisingly, the Deception Creek Trail does not get a lot of traffic. It’s among the least traveled trails in the Alpine Lakes Wilderness, despite lush old growth and the fairly impressive cascades of Deception Creek. Beyond our stopping point the trail leaves the shelter of the forest and opens into sub-alpine meadows with views of the surrounding mountains. With fairly easy access to the trailhead and moderate elevation gain, this is a decent hike for almost anyone. We also recommend this area for your next backpacking trip, as you’re likely to get Deception Lakes all to yourself.

To get there, take Highway 2 out past Skykomish just beyond milepost 56, just past the Deception Falls Interpretive Site to FR 6088 also known as Deception Creek Road. The road is not well signed, and can be easy to miss. Take a right and follow FR 6088 under the railroad trestle for about a half-mile to the trailhead. -Nathan

Print Google Directions >>

Deception Creek

Monte Cristo Ghost Town

Our Hiking Time: 4h 15m
Total Ascent: 600ft
Highest Point: 2900ft
Total Distance: 9.5 miles
Location: N 47° 59.1180, W 121° 23.5620
Required Permit: Northwest Forest Pass
Difficulty: Easy

Nathan's Photo
As Halloween approaches, a lot of folks start thinking about ghosts, goblins and haunted houses. While we’ve yet to find a hike out to a haunted house, we do occasionally get the chance to visit a ghost town. Recently we trekked out to Monte Cristo, one of Washington’s most famous ghost towns and the site of the state’s biggest gold rush.

This is a decent hike that should be approachable for almost anyone, especially those interested in a little history. To get the most out of your visit, we recommend you stop at the Verlot Ranger Station on your way out to Barlow Pass to pick up a pamphlet that includes a map of Monte Cristo and explanations of the various marked sites in the town. After you are done touring the town you may be looking to do a little more hiking. If that’s the case you can continue up to Glacier Falls and Glacier Basin. Or you can retrace the pre-railroad approach to Monte Cristo with hike up to Poodle Dog Pass #708, named in honor of Frank Peabody’s dog, which he evidently took with him when he climbed the pass on his way to Monte Cristo from Mineral City.

This hike’s only challenge is the river crossing, but that may soon be changing. A new access road will be on the other side of the river, connecting with the current road after the washout. The road is being built to support a massive cleanup effort focusing on containing the arsenic and other heavy metals churned up by Monte Cristo’s mining past. The cleanup will begin in fall of 2013 lasting to the summer of 2015, during that time the plan is to close the townsite. How the new road will be used after the cleanup is still undecided. Luckily, even though a little snow has fallen, you still have some weekends left to visit Monte Cristo before it’s shuttered until 2015.

There's a lot more to Monte Cristo, and you can learn all about it in our book, Hiking Through History Washington.  You'll find a trail map, route descriptions, history, and more for this and many more hikes throughout the State. Help support hikingwithmybrother.com and the work we do by picking up a copy!

To get there, take I-5 North to Exit 194. Follow Highway 2 for about two miles. Stay in the left lane and merge onto Lake Stevens Highway 204. Follow for two miles to Highway 9. Take the left onto Highway 9 toward Lake Stevens. In just under two miles, you’ll reach Highway 92 to Granite Falls. Take a right and follow for about nine miles to the Mountain Loop Highway. Take the MLH for 31 miles to Barlow Pass. Park and find the gated Monte Cristo Road on the right side of the road, opposite the trailhead parking lot. -Nathan

Print Google Directions >>

Monte Cristo

Snoqualmie Tunnel via The Iron Horse Trail

Our Hiking Time: 2h 30m
Total Ascent: 0ft
Highest Point: 2500ft
Total Distance: 5 miles
Location: W 47° 23' 23.6820, N 121° 23.7540
Required Permit: Discover Pass
Difficulty: Easy

Nathan's Photo
With Halloween just around the corner, we wanted to find something a little spooky for our hike this week. After considering a few ghost towns and mines, we settled on a restored railroad tunnel that offers a slightly unnerving 11,890ft walk under Snoqualmie Pass in near total darkness. Complete with dripping walls, echoing voices, misty air and a chilly breeze, this short trek through a piece of railroading history makes for the perfect Halloween hike.

Back around the turn of the last century, the Chicago, Milwaukee, St. Paul and Pacific Railroad finally connected Seattle to the rest of its eastern lines. They were a little behind their competition, as the Great Northern Railway had completed this feat over a decade earlier. Like Great Northern, the Milwaukee folks underestimated the Cascade snows and began operation without a tunnel, building the Laconia Station at Snoqualmie Pass to help keep the trains running through the winter. It only took a few years of heavy snow to convince the railroad to accelerate its plans to build a tunnel.

Early surveys began in 1908, and some initial construction preparation was started in 1911, but not until after the particularly nasty winter of 1912-13 did construction begin in earnest. In roughly 15 months, around 2,500 “tunnel stiffs” bored into the mountain from either end of the tunnel, burning through 340 tons of dynamite and removing 180,000 cubic yards of rock. They met on August 5, 1914 and the first passenger came through Tunnel 50 on January 24, 1915. In 1917 the tunnel was connected to the lines that powered the railroad's hybrid electric-steam engines in order to deal with ventilation problems, and the large wooden housing for the electrical boxes still line the tunnel today.

Times change and over the years traveling to the ski slopes by rail slowly gave way to private automobiles. The railroad declined and the last Milwaukee train passed through the tunnel on March 15, 1980. The railroad abandoned its land and the tunnel was closed. Ownership passed to Washington State, and for the next 15 years, tracks were removed and the Iron Horse State Park slowly began to take shape, but without the Snoqualmie Tunnel, the park remained divided. Then, on September 24, 1994 old Tunnel 50 was re-opened, creating an unbroken trail that now stretches 110 miles across the state. The tunnel was again closed on January 30, 2009 for renovations including adding another 4-inch layer of concrete on the walls and ceiling. It reopened July 5, 2011.

From the trailhead walk the gravel path the short distance to the tunnel entrance. The wide, graveled railroad grade is flat and easy for large groups and bikers to share the trail. At the entrance note the wooden doors used to seal the tunnel between trains during the winter months. In the past these were used to minimize the ice that would form in the tunnel. For the same reason, the tunnel closes every year from November 1 to May 1, to prevent ice-related injuries. As we mentioned, the tunnel is a chilly and dark, so put on your jacket and headlamp before you plunge into the darkness.

The faint pinpoint of light ahead is the other end of the tunnel, and you’ll spend the next hour or so watching it get bigger and brighter. Once you emerge from the tunnel, be sure to linger and take in the decent views of nearby Granite Mountain, Denny Mountain, Bandera Mountain and McCellan Butte. As you turn around, take note of the second arched entrance that many say was made in preparation for a parallel tunnel that was never built. Because of the slight curve at the beginning of the tunnel, you will not have the light at the end of the tunnel to guide you for most of the way, making the return trip a little spookier.

This is a great hike for the whole family around this time of the year. There’s no elevation gain, the trail is wide enough for everyone to share, and a tunnel is a decent option on a rainy autumn day. If you’re looking to minimize the number of folks you share the trail with, we recommend you head out to the tunnel earlier in the day, as it can become crowded later. Remember to bring a strong flashlight or headlamp and enough layers to keep you warm. The tunnel closes the day after Halloween, so plan to give Snoqualmie Tunnel a visit before it closes for the next six months.

To get there, take I-90 to exit #54 and head right. Almost immediately take a left onto State Route 906, following the signs to Snoqualmie Tunnel. In about a half-mile, take a right just before the Highway Maintenance area. In a few hundred feet turn right into the trailhead parking lot. -Nathan


Print Google Directions >>

Snoqualmie Tunnel

Tubal Cain Mine and Tull Canyon Trails

Our Hiking Time: 3h 45m
Total Ascent: 1600ft
Highest Point: 4600ft
Total Distance: 8.5 miles
Location: N 47° 51.1680, W 123° 5.7780
Required Permit: None
Difficulty: Moderate

Nathan's Photo
A few months ago we headed across the water to the Olympic Peninsula to take on a hike that promised lakes, mines, creeks, and the wreckage of a B-17. The Tubal Cain Mine Trail snakes through the Buckhorn Wilderness, tracing the route miners took back in the early 1900s to reach their mining camps.

This hike has a little bit of everything, from lakes and creeks to canyons and mountain passes. With multiple destinations along the trail, you can tailor this hike depending on your time and company. The trail to the mine is a good choice for a late season hike and should be approachable for almost every hiker. And while Tull Canyon Trail is more challenging, the promise of plane wreckage provides ample motivation. The trek out to Buckhorn Pass is for those folks looking to put in a ten or eleven mile day. Whatever you’re looking to do, find some time to head out to the Olympics to explore the Buckhorn Wilderness along the Tubal Mine Trail soon.

There's a lot more to the Tubal Cain Mine and Tull Canyon Trails, and you can learn all about it in our book, Hiking Through History Washington.  You'll find a trail map, route descriptions, history, and more for this and many more hikes throughout the State.  Help support hikingwithmybrother.com and the work we do by picking up a copy!

To get there, take the Bainbridge Island Ferry, following State Route 305 through Poulsbo to State Route 3. Follow SR 3 to the Hood Canal Bridge, taking a left over the bridge onto State Route 104. Follow SR 104 as it merges onto US 101 and continue another 18 miles and turn left onto Palo Alto Road. Continue about eight miles to Road #2880. Veer right and steeply descend down to the Dungeness River, past Dungeness Forks Campground. In about two miles head left on Road #2870 and continue about 11 miles to the Tubal Cain Mine Trailhead. -Nathan

Tubal Cain Mine

Hibox Mountain via Rachel Lake Trail #1313

Our Hiking Time: 8h
Total Ascent: 3800ft
Highest Point: 6547ft
Total Distance: 7 miles
Location: N 47° 25.9020, W 121° 18.0360
Required Permit: Northwest Forest Pass
Difficulty: Hard

Nathan's Photo
Not long ago, we had the chance to return to the Rachel Lake and Box Canyon aiming to climb Hibox, a prominence along Box Ridge’s rocky spine. We really enjoyed our hike up Alta Mountain a few years ago, and hoped Hibox would be a similar experience. As it turned out, Hibox Mountain is a little more challenging than Alta Mountain, but the views are at least as good, if not better.

Back before Washington was a state, it was part of the Oregon Territory, and settlers carved out their lands on either side of the Washington Cascades. By 1853, Washington’s population had grown to the point that it was re-organized as a separate government known as the Washington Territory. Almost immediately, the new government began to tackle the need to connect the eastern and western portions of the territory. Surveyors and explorers set about finding suitable passage through the Cascades, eventually finding many routes, including Snoqualmie Pass. Box Canyon was explored during this time, and was named for the way Rampart Ridge and Keechlus Ridge “box” you in as you try and cross the Cascades. Hibox (sometimes called High Box) is the highpoint on Box Ridge, and was named by forest officers.

The hike beings at the Rachel Lake Trailhead #1313, following Box Canyon Creek through small stands of pine and lush slide zones filled with bracken fern and salmonberry. The trail here is relatively flat, with only small ups and downs and an occasional log to hop over. The creek also provides a couple of open areas that make for great rest stops on your return trip. Keep an eye out for the rocky finger of Hibox on the ridge. Your first glimpse will be in a large slide area and again at a second clearing at a little over 2 miles. Just after you cross the second clearing, look in the trees for an unmarked but obvious trail heading toward the mountain.

From here, there is only one direction: up. Switchback up the shoulders of the ridge, following a rough and narrow trail through the trees toward the summit block. Eventually, the trees recede, replaced by talus and scree veering to the right, under the cliffs that make up the mountaintop. Some sections of the trail are loose rock here, so tread carefully as you climb up to the ridgeline.

Your last challenge is the short scramble to the top where 360-degree views await. From those heights you can easily pick out nearby Alta Mountain, Three Queens and the Park Lakes to the north. Beyond you can see Chikamin Peak, Lemah Mountain, Chimney Rock and Summit Chief Mountain. On a good day you’ll be able to pick out Glacier Peak. As you turn east you’ll see Mt. Hinman, Mt. Daniel and Mt. Stuart. To the south is Rampart Ridge and Mt. Rainier. Keep turning west to pick out Mt. Thompson out from among the Snoqualmie Peaks. Settle in to see how many more peaks you can count.

Climbing up to Hibox will be a challenge for some hikers and we don’t recommend it for everyone. Once you leave the Rachel Lake Trail, the trail is steep, rough, and is easy to lose in the talus fields. On the upside, you can also expect to leave most hikers to Rachel Lake and Alta Mountain, as the route does not get a lot of traffic. This hike can be great alternative, as long as you’re comfortable with a little route finding and a small amount of scrambling. If you’ve already explored Rampart Ridge and are hungry for a little more, Hibox might be the perfect fit.

To get there, take I-90 to Exit 62. Turn north and drive five miles to the Lake Kachess campground, then turn left onto Box Canyon Road #4930. Continue for four miles to the large trailhead parking area. –Nathan

Print Google Directions >>

Hibox Mountain
Copyright 2008-2016 - hikingwithmybrother.com
hikingwithmybrother@gmail.com