about us | links | permit info
Subscribe to Hiking With My Brother Email Subscribe Follow Hiking With My Brother on Facebook Follow Hiking With My Brother on Twitter Hiking With My Brother Picasa Hiking With My Brother YouTube
Showing posts with label snowshoeing. Show all posts

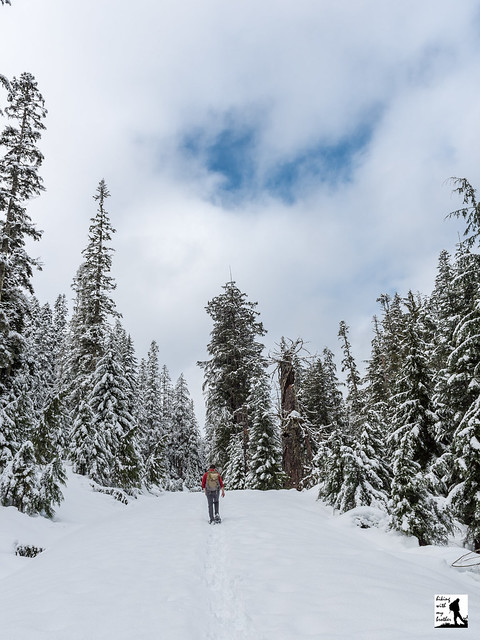
Kelcema Lake Snowshoe #718

Our Hiking Time: 4h 30m
Total Ascent: 1600ft
Highest Point: 3600ft
Total Distance: 9.0 miles
Location: N 48° 06.908, W 121° 36.069
Required Permit: None
Difficulty: Moderate due to distance and some route-finding
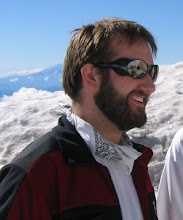
Nathans PhotoIt’s snowshoe season and the mountains are brimming with layer upon layer of decent snow. Our most recent snowshoe took us out along the Mountain Loop Highway to the popular Deer Creek Sno-park. While most folks are here to check out the Big Four Ice Caves or do a little sledding on the hill, we had our sights set on Kelcema Lake, tucked into the base of Mt. Baldy at the end of FR 4052.

According to local lore, Kelcema Lake was named by an early homesteader in honor of his three daughters, Kelly, Cecilia and Mary - Kel-Ce-Ma. With the Marten Creek Mine just over the ridge, the area has a rich mining history. More recently however, it was home to Boy Scout Camp Kelcema, from 1922 to 1944. Situated on the eastern shore, the camp was eventually quite extensive, with a lodge, quite a few cabins, and a makeshift dock. Scouts would spend their time climbing nearby peaks, swimming in the lake, and enjoying the pristine setting. It was renamed camp Mathews in 1944, and a few years later it was shut down entirely as the Scouts decided to consolidate summer camps. The buildings suffered from vandalism and disrepair until the Forest Service burned it down in 1966. Since that time, the lake has remained a popular, as the short .4 mile walk to the lakeshore from the road made it a summer destination for adventurers of all ages. More recently however, fallen trees and washouts have blocked the road and significantly lengthened the trek to the lake.

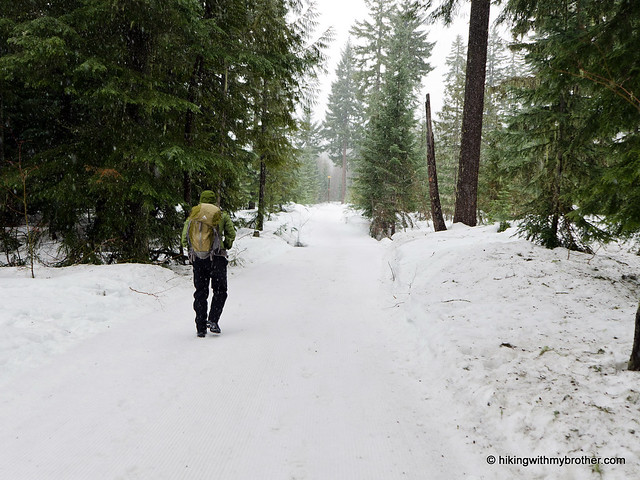
The snowshoe begins from the Deer Creek Sno-Park, following FR 4052 up a gentle grade and into the second generation forest. Your path is fairly straightforward. The road continues to climb while offering occasional glimpses of the forested ridges that surround you. You’ll cross a number of easily forded washouts as you work your way toward the lake. After about 3.5 miles you’ll reach a hairpin turn, signaling that you are nearing the trailhead. Continue onward and upward for another mile to the end of the road and the trailhead. The Kelcema Lake Trail #718 is signed, but if snow levels make it difficult to find, listen for Deer Creek and follow it the .4 mile into the Boulder River Wilderness and to the shores of Kelcema Lake.

Nestled in a bowl beneath Mt. Baldy and Devil’s Peak, it is not hard to imagine the area teeming with Boy Scouts. There is a rough trail around the lake, though sections can be difficult to navigate in the summer months. Find a good spot to settle down and enjoy the quiet before gearing up to head back. On your way out do a little exploring around the end of FR 4052 to find a view of nearby Big Four Mountain and Sperry Peak.

This is a great snowshoe for those looking to put in some distance rather than tromp through the backcountry. The snow makes the hike down four miles of forest road a lot more fun and you’re likely to have the icy lake all to yourself. With relatively little elevation gain, this is also a good area for young or novice snowshoers - even if you don’t make it to Lake Kalcema, it’s still a pleasant tromp in the woods.

To get there, take I-5 North to Exit 194. Follow Highway 2 for about two miles. Stay in the left lane and merge onto Lake Stevens Highway 204. Follow for two miles to Highway 9. Take the left onto Highway 9 toward Lake Stevens. In just under two miles, you’ll reach Highway 92 to Granite Falls. Take a right and follow for about nine miles to the Mountain Loop Highway. Take the MLH for a little over 23.5 miles to the Deer Creek Parking Area/Sno-Park. -Nathan

Print Google Directions >>
Kelcema Lake Snowshoe

Coal Mines Trail - Cle Elum to Roslyn

Our Hiking Time: 2h 20m
Total Ascent: 200ft
Highest Point: 2200ft
Total Distance: 6.5 miles
Location: N 47° 12.5280, W 120° 58.5360
Required Permit: None
Difficulty: Easy
 
Nathan's Photo
We’re always looking for ways to inspire hiking during the winter months. With the New Year upon us, we wanted to find a hike that any family to could take on New Years Day to start 2013 off right. With that in mind, we decided to head out over Snoqualmie Pass to take a winter walk down the Coal Mines Trail.

In 1884, the rapidly expanding Northern Pacific Railroad began laying track toward Stampede Pass, in an effort to finally connect the Puget Sound to the Midwest. The previous year, the company’s engineers had located rich coal deposits near the railroad’s planned route and wasted no time in setting up a means to extract the substance that was fueling their locomotives. By 1886 the Northern Pacific Coal Company’s settlement around the coal mines was platted as Roslyn, named by the railroad’s vice president, Logan Bullitt, after a city in New York associated with his girlfriend. Nearby, the town of Ronald also sprang up, named after Alexander Ronald, the superintendent of the coal company. A spur track was quickly built from Ronald through Rosyln to Cle Elum, where the coal could be loaded onto trains and shipped where it was needed. In 1987, the tracks were removed and in 1994 Coal Mines Trail was created following the old railroad grade.

The mines along the Coal Mines Trail operated for 77 years before the last one closed down in 1963. During that time the population of the area mushroomed as miners from many different groups came to work the mines. As they arrived, miners found others that spoke their language and shared their culture, creating small ethnic communities all along the rail route. That tradition had some interesting side effects such as the Rosyln cemetery, which consists of 5,000 graves divided between 25 different religious and ethnic cemeteries. Some of those graves are a product of Washington State’s worst mining disaster in 1892, when 45 miners perished after an explosion in the lower levels Roslyn’s No. 1 mine.

The trail begins directly from the street, passing the tree-lined backyards of current neighbors. Wide and flat, the trail can handle bikes and strollers in warmer months and snowmobiles and cross-country skiers when it snows. Houses quickly yield to more trees, cottonwoods and maples at first, followed by pines and firs further down the trail. With no elevation to slow you down, you’ll quickly glide past interpretive signs marking long-gone settlements such as Happy Hallow and Ducktown, as well as mine and building locations.

At just over a mile pass what remains of a coal washer that used waters from Crystal Creek to separate the coal from less useful substances. A quick climb up the hill reveals your first glimpse of the neatly sculpted hills made of slag and tailings from the mines. Miners dumped everything they brought up out of the ground in massive piles near the mines, some of which rise right next to the trail. At two miles a spur line leads out to the No.9 and No. 10 mines, where the curious can do some exploring and find the sealed mine entrances and the cement foundations of surrounding buildings.

Continue to follow the trail for another mile to find the site of the No. 1 mine and other buildings on the outskirts of Roslyn. From here, the trail takes you though the town, past a number of former mining offices and stores, and onward toward Ronald. The last mine on the route is the No. 3 mine, which has plenty of artifacts and crumbling foundations to explore.

While the Coal Mines Trail is not exactly a hike, it allows absolutely anyone to wander through the area’s coal mining past. Easily accessible and walkable year-round this trail should be on your list of alternatives when you need to entertain your non-hiking friends and family. During the fall months, the changing leaves attract even more folks to this popular walk. Try starting off your year with something a little different, and give the Coal Mines Trail a visit.


To get there, take I-90 to Exit 84 to Cle Elum, merging onto 1st Street. Continue for a mile to Stratford Street. Take a left and find the signed trailhead on the corner of Stratford and 2nd Street. Parking spots are available in front of Flag Pole Park, which includes a large map of the historical highlights along the trail. If you’re looking for more detailed information, free Coal Mine Trail pamphlets are available at the Cle Elum Chamber of Commerce located just across the street on 1st Street. -Nathan

Print Google Directions >>

Coal Mines Trail

Marten Creek Trail #713

Our Hiking Time: 4h 45m
Total Ascent: 1400ft
Highest Point: 2800ft
Total Distance: 6.6 miles
Location: N 48° 6.2640, W 121° 37.3320
Required Permit: None
Difficulty: Hard (Overgrown after 2.0 miles)

Nathan's Photo
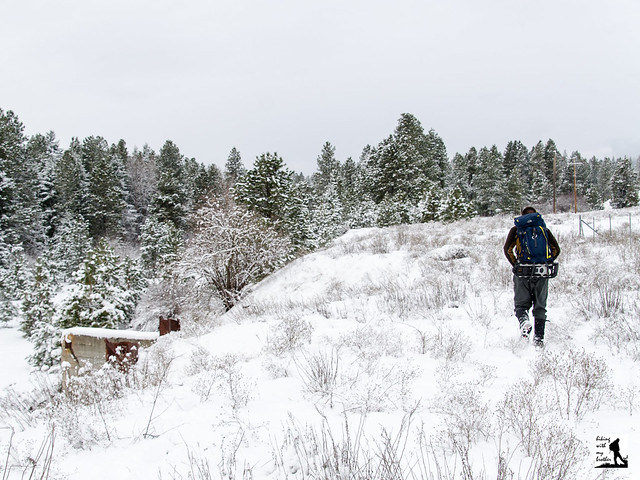
A few weeks ago we headed back out the Mountain Loop Highway to the Marten Creek Trail #713, an all-but-forgotten mining road that once connected Silverton with Darrington over Granite Pass. We expected to find a trail leading out to an old mine, but instead we were confronted with a bit more route-finding and bushwhacking than we anticipated.


If you’re looking for a training hike or a quiet snowshoe without a lot of company, the Marten Creek trail is an excellent choice. Although there is not much in the way of a destination, the first two miles of this trail offer forested trails, a roaring creek, some views and more than a little history. Much beyond this point most folks are unlikely to enjoy the hike, at least until the trail gets some serious trail maintenance. Because of this, we recommend you save this one for snowshoe season, as it makes a great alternative to the more popular routes along the Mountain Loop Highway.

There's a lot more to Marten Creek, and you can learn all about it in our book, Hiking Through History Washington.  You'll find a trail map, route descriptions, history, and more for this and many more hikes throughout the State. Help support hikingwithmybrother.com and the work we do by picking up a copy!

To get there, take I-5 North to Exit 194. Follow Highway 2 for about two miles. Stay in the left lane and merge onto Lake Stevens Highway 204. Follow for two miles to Highway 9. Take the left onto Highway 9 toward Lake Stevens. In just under two miles reach Highway 92 to Granite Falls. Take a right and follow for about nine miles to the Mountain Loop Highway. Follow the MLH for about 20 miles to the bridge over Marten Creek, just past the Marten Creek Campground. The signed trailhead is on the east side of the creek. There is no parking lot, find parking along the shoulder. -Nathan

Print Google Directions >>
Marten Creek

Welldigger's Ass Snowshoe via Yodelin Ski Area

Our Hiking Time: 3h 15m
Total Ascent: 1700ft
Highest Point: 5300ft
Total Distance: 4.0 miles
Location: N 47° 46.1580, W 121° 3.0180
Required Permit: None
Difficulty: Moderate

Nathan's Photo
We managed to work in a short snowshoe a few weeks ago, taking advantage of some decent weather to explore portions of the old Yodelin Ski Area near Stevens Pass. We were aiming for a lonely prominence above the Ski Area unofficially named Welldiggers Ass, where we had heard we could find some decent views. Although trail information was a little sparse, we plugged the coordinates into our GPS and headed out to see what we could find.

The Yodelin Ski Area opened for business on December 27, 1969. At the time, Yodelin boasted a three-story lodge, a single rope tow, and a 1,800-foot double chairlift. Owned by Nason Properties, the operation also worked to develop over 180 homesites into “Yodelin Village” across the highway from the ski area. During 1970, a number of lodges and cabins were built, and the venture appeared off to a good start. However, on January 24, 1971, a large avalanche crushed two cabins, killing four and hitting the resort with over $2,000,000 in legal claims. Despite continued warnings from the State of Washington of how avalanche-prone the area was, Nason Properties continued to develop and expand the Yodelin Ski Area. In 1972, an additional 1,600-foot chairlift was installed, but the expansion only helped the Ski Area to limp along for another few years. By 1976, the Stevens Pass Ski Area bought what remained of Yodelin, including a chairlift, which is still in operation as the Tye-Mill lift. The remaining lift was moved to Crystal Mountain where it serves as the Upper Cambell lift.

yodelin welldiggers ass hikingwithmybrotherThe trail begins from the old Yodelin parking lot, now usually referred to as the overflow lot for Stevens Pass. The route initially follows the remains of the roads used by the defunct ski area, before quickly switchbacking up the mountainside. You will quickly find expansive views of the surrounding landscape as you wind your way up Yodelin’s former slopes. Along the way, keep an eye out for another artifact of the area’s past: the concrete foundations that once supported the ski lifts still trace a route up the mountain.

Once you reach the ridgeline, steer east toward a burned out swath of forest to reach Welldiggers Ass. Slog your way up through a maze of bleach-white tree trunks and into the forest, pushing past the true summit to a viewpoint further east. The views are not stunning, but you should be able to pick out nearby Jim Hill Mountain, Arrowhead Mountain and the Chiwaukums. If you are thirsty for a little more distance, retrace your path and head to the flat-topped highpoint at the southern end of the ridge, known as Point 5023.

yodelin welldiggers ass hikingwithmybrotherShort, sweet and easily accessible, this little snowshoe is perfect if you are short on time or want to add a couple extra miles to your day. As an added bonus, the slopes do not see a lot of foot traffic these days. Backcountry skiers occasionally make their way over from the Steven’s Pass Ski Area, but most do not make it all the way up to Welldiggers Ass, so expect a little solitude at the top.

To get there, take US 2 to Stevens Pass. Continue another mile and a half past the main ski area to an overflow parking lot on the right. Once parking for Yodelin, the Stevens Pass area now owns the lodge here. Park and find the route beginning behind the lodge. -Nathan

Print Google Directions >>

Welldiggers Snowshoe

Glacier Vista Snowshoe at Paradise Mt. Rainier

Our Hiking Time: 1h 20m
Total Ascent: 900ft
Highest Point: 6400ft
Total Distance: 2.5 miles
Location: N 46° 48.0960, W 121° 44.0880
Required Permit: National Park Pass
Difficulty: Moderate

Nathan's Photo
On a sunny weekend a few weeks ago, we packed up our snowshoes and headed out with a few destinations in mind. After some discussion, we decided to indulge our nostalgia and drive the extra distance to visit Paradise on the slopes of Mt. Rainier. It was from the parking lots around Paradise that we began our assent to the summit back in 2008, and we had not been back since. We were long overdue.

In 1885, a member of the Longmire family visited a flower-covered valley on a sunny day, and christened it Paradise. While there is some debate as to whether it was Virinda or Martha Longmire who came up with the name, no one is arguing its accuracy: the allure of Paradise has drawn millions of people to the area over the years. Reliable roads did not reach the area until 1915, but commerce quickly followed and in July 1917, the Paradise Inn was opened. Independently operated until it was sold to the Park Service in 1952, the Inn has welcomed guests nearly every year since it opened. In 1966 the Paradise Visitor Center was opened and paradise glacier vista hikingwithmybrotherlater renamed in 1987 for Senator Henry M. Jackson to honor his efforts to support Rainier National Park. If you haven’t been to Paradise in a few years, you’ll find a new Henry M. Jackson Visitor Center to greet you, which opened in 2008. The original “sunken Space Needle” building was demolished in 2009.

Glacier Vista is a treat in both the summer and the winter. It is an easy hike during the summer months, following the Skyline Trail through alpine meadows brimming with wildflowers, past pines and hemlocks dwarfed by the altitude. In the winter, the snowshoe route is a little more challenging. Some of the challenge comes from the added effort, but route finding can also be an issue. On the upside, if you’re there on a low avalanche danger day, it will be easy to find a route already cut through the powder. If you’re breaking trail, start to the west of the sledding area, heading upwards toward the tree-covered rise known as Alta Vista. We recommend you bear to the left around the knoll as it is less difficult, but either approach will get you there. Continue to parallel the Nisqually Glacier for about a mile-and-a-half to a broad flat area. This is Glacier Vista.

From this vantage point you can take in the massive Nisqually Glacier as well as the Nisqually Valley spreading out below. Rising above the parking lot to the south, a jagged ridgeline marks the beginning of the Tatoosh range, with prominences including Pinnacle Peak, Castle Peak, and paradise glacier vista hikingwithmybrotherPlummer Peak. Beyond, you can pick out the snow-topped Mount Adams and Mount St. Helens. If you’re feeling like stretching your legs more, continue to follow the Skyline trail up to Panorama Point, to get a better view of the landscape.

Paradise is the perfect destination for exploring with youngsters or test driving that new pair of snowshoes. Many of the trails are paved, making the lower trail network friendly to strollers and wheelchairs in the summer months. Of course, expect a lot of company when visiting Paradise, though the traffic quickly dwindles as you head uphill and out to Glacier Vista or Panorama Point. If you’ve never been up to Paradise, we highly recommend you make the trip this year. One word of caution if you’re planning a winter visit – make sure to check the avalanche danger and keep an eye on the weather, which can change extremely quickly.

To get there, take I-5 South to Tacoma, taking Exit 127 for Highway 512. In about two miles, take the State Route 7 exit toward Spanaway. Continue on SR 7 for about 30 miles to the junction with SR 706 in Elbe. Keep to the left and follow SR 706 a little under 15 miles to the park entrance. From the gate, it is another 14 miles to the Paradise parking area. - Nathan

Print Google Directions >

Glacier Vista

Skyline Lake and Ridge Snowshoe

Our Hiking Time: 3h 15m
Total Ascent: 1400ft
Highest Point: 5400ft
Total Distance: 3 miles
Location: N 47° 45.4080, W 121° 6.2100
Required Permit: None
Difficulty: Moderate

Nathan's PhotoRecently we had the chance to pack up our snowshoes and head out on Highway 2 toward Stevens Pass to explore the Skyline Ridge Trail. We’re right in the middle of an excellent snowshoe season, and we try to take advantage of it whenever the weather will allow us to wander under snow-laden trees toward sun-sparkling vistas. And it looks like the snow is going to continue to be good, as the state’s recent “snowpocalypse” has laid down a thick new layer of powder to tromp through.

skyline ridge skyline lake heather ridge hikingwithmybrotherThis short snowshoe packs a lot into just a few miles. We definitely recommend taking the more direct route when snowshoeing, as it gets you to the views faster and is a lot more rewarding than trudging up a service road. This is an understandably popular destination in the winter, so expect a little company. Although there is some elevation gain involved, the different approaches mean that you can easily tailor this snowshoe so that even a first-timer will be able to make the lake, while the expert can explore the more challenging sections.

A word of caution when snowshoeing this area: stick to the western end of the ridge and avoid the southern slopes – there have been multiple avalanche fatalities there over the years. And, when you reach the lake, stick to the shores and resist the temptation to march across the frozen surface. It’s impossible to tell if the ice has started to melt or is otherwise weak.

There's a lot more to Skyline Lake, and you can learn all about it in our book, Hiking Through History Washington.  You'll find a trail map, route descriptions, history, and more for this and many more hikes throughout the State. Help support hikingwithmybrother.com and the work we do by picking up a copy!

To get there, take Highway 2 to the Stevens Pass Ski Area. Find parking in the lots on the north side of the highway. -Nathan

Print Google Directions >>
Skyline Lake Snowshoe

Amabilis Mountain Snowshoe

Our Hiking Time: 5h 10m
Total Ascent: 2100ft
Highest Point: 4570ft
Total Distance: 9.5 miles
Location: N 47° 17.5980, W 121° 15.6720
Required Permit: Sno-Park Permit
Difficulty: Hard

Nathan's PhotoA rare break in cloud cover found us scrambling for a snowshoe route with promises of a view. After checking out the avalanche danger, we settled on Amabilis Mountain, an isolated prominence just beyond Snoqualmie Pass.

Amabilis Mountain looks over Kachess Lake, somewhat isolated and disconnected from the nearby massive ridgeline that ends with Keechlus Ridge. While we were unable to track down the origin of the name, “amabilis” is Latin for “lovely” or “loveable” and the mountain certainly lives up to that description. Then again, it’s also possible that it was named for the abundance of Pacific Silver Fir (abies amabilis) that covers the mountainsides. In either case, the route is accessed via the Cabin Creek Sno-Park and one of the more popular cross-country skiing destinations in the Snoqualmie Pass area. Probably for this reason, Amabilis is often overlooked as a snowshoe route.

amabilis mountain hikingwithmybrotherBegin by finding a spot to park in the Cabin Creek lot, and gearing up. Hold off on strapping on the snowshoes however, as the trail begins on the opposite side of the freeway, requiring a short jaunt across the overpass to get started. Most likely the trail will be groomed, and you’ll have plenty of company. The first task is to navigate the maze of ski loops to get on the path to the summit. Keep to the right following the signed Berg route for about a quarter-mile until you encounter signs pointing uphill to Amabilis.

The route follows FR 4822 as it slowly switchbacks up the mountain. In the summer, most vehicles can navigate this well-maintained road nearly to the summit. While the skiers are confined to the groomed trail, there’s plenty of opportunity to forge uphill and shave some distance off the long switchbacks - keep a look out for gullies and open areas to take advantage of. At the same time, some sections of Amabilis are extremely steep, and it might make more sense to stick to the road in those areas. At 1.5 miles, do keep a look out for Toll Creek, which can be used to cut out nearly a mile of forest road.

amabilis mountain hikingwithmybrotherAfter a little over two miles, the grooming ends and the trail forks. Either path will take you to the summit, though the shorter and more popular choice veers to the left. If you head left as we did, you’ll break trail or follow the path of those that came before you for about a half-mile to a small widening in the road, signed “FR 123” on the left side of the trail. You can cut out three-quarters of a mile of forest road by taking a shortcut up through the pines and taking in some of the views along the way as the trees begin to thin. Once you regain the road, you’re about a mile from the summit.

Forge onward, passing another widening offering excellent westward views of Kachess Lake a little before you reach the top. Press on to enjoy views of Kachess Ridge to the north, rising above Kachess Lake. To the south, a sea of ridges and mountains spread out toward Mt. Rainier. To the northwest, the jagged peaks of the Three Queens and Chikamin Ridge stand out against the skyline. Rest up so that you can enjoy breaking new trail on the way down if you choose to go cross-country.

amabilis mountain hikingwithmybrotherThis is a somewhat difficult snowshoe, one that can be made even more challenging by leaving the forest road in favor of the back country. Whether you prefer the road or the untamed powder, you cannot escape some company at lower elevations, which fades as you push upward. Overall this was a rewarding snowshoe, eventually yielding spectacular views and solitude. The area could definitely benefit from a dedicated snowshoe route, but as it is, it’s still well worth the trip. One note: the lot is a little too small to support the vehicle traffic on the weekends, so try to get an early start.

To get there, take I-90 to the Cabin Creek Exit, #63. Take a right and find parking in the lot. -Nathan

Amabilis Mountain

Keechelus Ridge Snowshoe

Our Hiking Time: 4h 15m
Total Ascent: 2500ft
Highest Point: 5000ft
Total Distance: 8 miles
Location: N 47° 20.8500, W 121° 18.4380
Required Permit: Sno-Park Permit
Difficulty: Moderate

Nathan's PhotoWhile there is plenty of good snowshoeing left this season, weather and timing sometimes makes the trek out to the back country a challenge. Since we had the right amount of time and what we thought was a favorable forecast, we headed out over Snoqualmie Pass to a snowshoe route with a little elevation gain and the promise of some views: Keechelus Ridge.

keechelus ridge hikingwithmybrotherThe ridge overlooks the eastern end of nearby Keechelus Lake. “Keechelus” is a Native word meaning “few fish” or “less fish” in contrast to neighboring Kachess Lake which means “more fish.” Although portions of the ridge are privately owned, national forest roads provide a public route to the summit. In 2007, the Cascade Land Conservancy acquired 320 acres of wildlife habitat on Keechelus Ridge, further expanding the area that you can explore with a sturdy pair of snowshoes.

The trail begins at the Price Creek Sno-Park, cutting up a few hundred feet through second generation firs and cedar to FR 4832. Head left down the wide road and you will soon encounter Price Creek. If you’re already itching for the back country, leave the road here and head uphill parallel to the water, staying high on the bench above the creek. This will shave some distance off the road route. Alternatively continue a short distance to FR 124, which swings wide around Price Creek and slowly switchbacks up the mountainside.

keechelus ridge hikingwithmybrotherThe road route passes a number of small roads, some private. Stick to the larger, wider FR 124 until you reach a major intersection, likely filled with snowmobile tracks in the winter. The back country route will land you at this same intersection as well. This is FR 4934, and you should expect some company. It is a popular road for snowmobilers, and it’s likely they’ll buzz by you if you stick to the road. Back country folks can walk straight across FR 4934 and continue the charge straight up the ridgeline to the radio tower at the summit. If you prefer the road, angle to the right and uphill on FR 126 and continue to the tower.

While the radio tower is fun for some, most will find bigger rewards from the views here on a clear day. Don’t expect 360-degree views, and do expect to tromp around a bit to get views in different directions. Still, it should be easy to pick out Mt. Rainier in the panorama, seasoned hikers will be able to pick out Chair Peak, Kaleetan Peak, Bandera Mountain, Mt. Stuart, Mt. Defiance, and Granite Mountain. But everyone will be able to enjoy the expanse of snow-covered mountaintops and craggy ridges. Find a good spot sheltered from the snowmobilers and reap the rewards of your climb.

At almost 2,500’ of elevation gain, this is a challenging snowshoe. keechelus ridge hikingwithmybrotherMake sure you save this hike for a clear day, as the views really make this hike worth it. Unfortunately, the weather was not in our favor, and we were shrouded in low-hanging clouds. This limited visibility kept us on the roads rather than venturing into the back country, which not only prevented us from feeling like we’d gotten away from civilization, but also kept us in close contact with snowmobilers. While we went off road on our trek back down, we couldn’t quite escape the noise of the snowmobiles. We recommend tackling this hike on a sunny weekday to minimize the motorized company.

To get there, take I-90 over the Pass to the Kachess Lake Exit 62. Avoid the temptation to take Exit 61, with its alluring “Price Creek Sno-Park” sign, since there’s no way to cross I-90 to get to the trail. Instead, take Exit 62, head left across the overpass and get on I-90 heading west to Exit 61 and the side of Price Creek Snow Park you need. - Nathan

Keechelus Ridge

Iron Goat Trail #1074

Our Hiking Time: 4h 15m
Total Ascent: 700ft
Highest Point: 2800ft
Total Distance: 6.3 miles
Location: N 47° 42.6840, W 121° 42.6840
Required Permit: Northwest Forest Pass
Difficulty: Moderate

Nathan's PhotoSome days are meant for snowshoeing: cold and crisp, with just enough sun to give the snow an extra sparkle. Finding ourselves facing a perfect day for strapping on our snowshoes, we packed up to explore a section of reclaimed railroad grade known as the Iron Goat Trail.

iron goat hikingwithmybrother
With nine miles of trail and three different trailheads, the Iron Goat Trail has more than enough to explore. The trail between Martin Creek Trailhead and Scenic Trailhead is ADA accessible and stroller friendly in the summer months, and is an easy snowshoe in the winter. If you want a little extra, take a cutoff trail up to the Embro workcamp or out to Windy Point. The trail doesn’t have the remoteness and hushed silence that some of us associate with snowshoeing, but it is perfect for a last minute destination or a first-time snowshoe.

There's a lot more to the Iron Goat Trail, and you can learn all about it in our book, Hiking Through History Washington.  You'll find a trail map, route descriptions, history, and more for this and many more hikes throughout the State. Help support hikingwithmybrother.com and the work we do by picking up a copy!

To get there, take US 2 out just past milepost 58 and look for the Iron Goat Interpretative Site on the left. -Nathan

Print Google Directions >>
Iron Goat Trail

Big Four Ice Caves Trail #723

Our Hiking Time: 3h
Total Ascent: 300ft
Highest Point: 2000ft
Total Distance: 2.5 miles (7.5 miles in winter)
Location: N 48° 3.1980, W 121° 31' 31.1760
Required Permit: Northwest Forest Pass
Difficulty: Easy

Nathan's PhotoOur Mountain Loop Highway tour continued this week with a trip out to the Big Four Ice Caves. For generations, the Caves have drawn crowds out to the Stillaguamish Valley, and we wanted to find out why. When downed trees and snow-covered roads stopped us short of the trailhead, we were undeterred; we happily hiked the extra miles through the falling snow to catch a glimpse of the Caves at the base of Big Four Mountain.

big four ice caves hikingwithmybrotherNamed for a “4” shaped snowfield on the east face of the mountain, Big Four Mountain rises abruptly from the landscape, creating steep-sided recesses that harbor permanent snowfields. When snowmelt flows down the mountain and under the snowfield each year, caves are craved out by the rushing water. While these caves look solid and stable, there is always a chance of avalanche or cave-in. Use caution around the Caves, and resist the temptation to explore interiors or climb the snowfield above them.

While the Caves are currently popular with hikers, back in the day the area was a resort destination. In 1921, Big Four Inn was opened by the Rucker brothers, owners of the railroad that pumped vast amounts of timber out of the valley to the expanding cities along the Puget Sound. Thousands of tourists were carted out to the inn by rail year-round for a weekend in the wilderness, enjoying staggering views of Big Four Mountain, playing a round of golf, or taking a short hike up to the Ice Caves. After a brief heyday, the resort fell on hard times with the removal of the rail line in 1936 to make way for the Mountain Loop Highway. It limped along until 1949 when it burned to the ground, and today, all that remains are the remnants of the inn’s chimney still standing in the Big Four picnic area.

big four ice caves hikingwithmybrotherDespite the demise of the resort, the Big Four Ice Caves Trail #723 still sees over 50,000 hikers a year. Comprised almost entirely of bridges, boardwalks, and staircases, the short trail is an easy walk, gaining less than 300ft in elevation. Such a mild route makes this trail ideal for everyone in the family or an introduction to snowshoeing. During the winter, the Mountain Loop Highway closes, and this hike begins at the Deer Creek Snow play area. This adds a few miles of easy, snowy road-walking. Our hike was made more difficult by a recent storm that toppled more than a few large trees, forcing a couple of significant detours. Until more snow falls to cover up these new obstacles, the trail will be a tricky snowshoe – you may need to step out of your snowshoes to navigate around some of the blow-downs.

To get there, take I-5 North to Exit 194. Follow Highway 2 for about two miles. Stay in the left lane and merge onto Lake Stevens Highway 204. Follow for two miles to Highway 9. Take the left onto Highway 9 toward Lake Stevens. In just under two miles, you’ll reach Highway 92 to Granite Falls. Take a right and follow for about nine miles to the Mountain Loop Highway. Take the MLH for a little over 25 miles to the Big Four Picnic Area. – Nathan

Big Four Ice Caves

Kendall Peak Lakes

Our Hiking Time: 3h 50m
Total Ascent: 2100ft
Highest Point: 4750ft
Total Distance: 8.5 miles
Location: N 47° 25.9197, W 121° 22.8277
Required Permit: None
Difficulty: Easy

Nathan's PhotoThis week found us just over Snoqualmie Pass exploring some of the shorter jaunts around Hyak. After a few weeks of longer forays to various summits along the I-90 corridor, we were looking forward to a leisurely hike. A mountain lake seemed the ideal destination on a brisk October day, so we pointed the car in the direction of Kendall Peak Lakes and hit the road.

Kendall Peak Lakes have always been lakes that were seen more than they were visited. Couched in a cul-de-sac of mountain ridges, kendall peak lakes hikingwithmybrotherthe three lakes were so often observed from the surrounding lofty heights that we today we continue to refer to them as just that: lakes seen and accessed via Kendall Peak. Nowadays, extensive logging and the roads that go along with it have hewn a much easier route to Kendall Peak Lakes, though it was a high price to pay for ease of access, as the vast fields of clear-cut forest are still struggling to recover.

The trail is mostly decommissioned logging road, making for a leisurely stroll through alders and vine maples. The shrubbery quickly gives way to long views of stump-strewn clear cuts complete with young saplings struggling against low underbrush. The carefully carved slopes of the Snoqualmie Ski Resort contrast with the clear-cuts and dominate the view. The road is short - just a few switchbacks and one slightly confusing kendall peak lakes hikingwithmybrotherintersection are between you and a clear path toward the craggy mountaintops of the Alpine Lakes Wilderness.

As the logging road begins to thin and taper out, keep watch for a cairn indicating a boot-path to the lakes. The roughly cut trail will bring you to the first meadow-bound lake. More accurately a pond, the reed-lined waters are surrounded by marsh, so watch your step. Upon reaching the lake, the trail becomes more intermittent, branching off in dozens of directions. There is more than one viable route up to the next lake, accessed on either side of the pond.

The middle child of the Kendall Peak Lakes makes for something more of a destination, but it pales in comparison to the last lake. We highly recommend that you press onward and upward. The trick is to find the trail to access it. Simply work your way around to the far side of the second lake to the talus field and start climbing your way up. kendall peak lakes hikingwithmybrotherHopefully you’ll be able to find the shadows of a path up the very steep mountainside. Ascend roughly 200’ to the last and largest of the Kendall Peak Lakes. Surrounded by steep cliffs and talus, the lake somehow feels remote and private. Unpack your lunch and enjoy.

This is great hike for those looking for a quick escape – a taste of the wilderness just a few miles away from I-90. In the winter this is an extremely popular snowshoe route, since the grade and distance are perfect for a romp through fresh powder. Keep this one on the list for the first snowshoe trip this year.

To get there, take I-90 to the Hyak Exit #54 and head right to the Gold Creek parking area. Depending on snow conditions, you can either park here or continue the half-mile on Forest Road #9090 to the road block before piling out and heading up. - Nathan

Print Google Directions >>

Kendall Peak Lakes
Copyright 2008-2016 - hikingwithmybrother.com
hikingwithmybrother@gmail.com