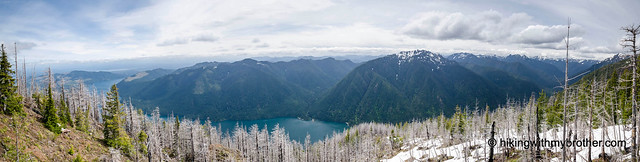
about us | links | permit info
Subscribe to Hiking With My Brother Email Subscribe Follow Hiking With My Brother on Facebook Follow Hiking With My Brother on Twitter Hiking With My Brother Picasa Hiking With My Brother YouTube
Showing posts with label loop. Show all posts

Little Bear Trail at Lake Chelan State Park

Our Hiking Time: 1h
Total Ascent: 250ft
Highest Point: 1350ft
Total Distance: 2.3 miles
Location: N 47° 52.325, W 120° 11.851
Required Permit: Discover Pass
Difficulty: Easy

Nathan's Photo
A few months ago we spent a weekend checking out a handful of hikes around Lake Chelan. Our tour included everything from creekside trails, windswept mountain tops to quiet state park walks. Our visit to the Little Bear Trail in Lake Chelan State Park was easily the most sedate of the trip, but this family-friendly walk managed to pack a variety of landscapes into just a few miles of hiking.

The 127-acre Lake Chelan State Park is situated on the shores of Lake Chelan and is divided by the South Lakeshore Road.  For generations, Native Americans called this area home and the park contains a few archeological sites from that era. The park is also host to a cabin once owned by John Stevenson, one of the area’s earliest homesteaders. According to the Washington Parks Commission, most of the land that now makes up the park was acquired as a result of a court settlement in 1943. The issue involved a real estate scheme that involved selling investors “lakeshore” property that was in reality nowhere near the lake. While the park’s focus has long been on Lake Chelan, in recently years other areas of the park have been developed including the Little Bear Trail. The trail is named after the bear cub that was spotted by rangers as they surveyed a route for the trail.  After that encounter, the cub became something of an unofficial mascot during the trail’s construction and the trail was eventually named in honor of the cub.

From the parking area, the trail sets off into the woods and quickly into a short tunnel beneath South Lakeshore Road. Once through, start wandering under a pine forest that has remained largely untouched since the park's creation in the 1940s. After a few minutes of walking, you will find yourself at a junction. Heading right will take you down the Forest Loop, whereas heading left will take you down the Bitterbrush Loop. You can go either way, though we suggest heading left and making a wide loop that includes both trails.

After you head left, you will soon will pass another junction.  This is the turn off for Forest Loop that leads to the upper reaches of the trail. Ignore it and continue onward. As you progress, the trail  leaves the shelter of the forest to trek through Eastern Washington Ponderosa pine savanna.  Here you'll find grassy areas punctuated with Ponderosas and bitterbrush, as well as decent views of the lake. Eventually you’ll hook back toward the woods and spend time wandering under the Forest Loop’s canopy before finding yourself back at the first junction.

Short, easy, and close to Chelan, this hike works well if you’re looking to break up a weekend at the lake. Complete with a number of interpretive signs, this is also a nice choice if you have youngsters in tow. While not a destination unto itself, if you find yourself with a little extra time in Chelan, a short hike might be a great way to stretch the legs before a long car trip home.

To get there, take I-90 to Exit 85 to Cle Elum/Leavenworth. Cross the freeway and head right on WA 970 toward Leavenworth as it merges into WA 97. As WA 97 ends, merge on US 2 toward Wenatchee following signs for US 2 and WA 97. In West Wenatchee, follow signs for WA 97 ALT. Once on WA 97 ALT, continue 23.5 to WA 971, taking a left and following to South Lakeshore Road after 9.1 miles. Take right and immediately find the park entrance on the left. Turn and find parking near the trailhead. -Nathan

Print Google Directions >>

Little Bear Trail

Quillayute River Slough Trail

Our Hiking Time: 1h
Total Ascent: 30ft
Highest Point: 30ft
Total Distance: 1.7 miles
Location: N 47° 54.7799, W 124° -35.669
Required Permit: None
Difficulty: Easy

Nathan's Photo
A few months ago we spent a weekend on the Olympic Coast exploring the beaches and trails around La Push and the Quillayute River. Most of our time was spent wandering past wave-carved seascapes and peering into tidepools. However, we also made a point to hike nearby trails like the Quillayute River Slough Trail, which offer a chance to contrast the crashing ocean against the lush forests of the Olympics.

For generations, members of the Quileute Tribe called the land around the Quillayute River home. Quileute means “joining together” a reference to the rivers that merge into the Quillayute along its short length. Within about five miles of the ocean, the Calawah, Sol Duc, Bogachiel and Dickey Rivers all join to complete their journey to the sea together. The Quillayute (also spelled Quileute) once teemed with salmon, through this has declined in more recent years. Back in 1872, the salmon led an enterprising settler by the name of Frank T. Balch to set up shop on the banks of the Quillayute along with his wife. At the time the couple were the only American settlers -- often referred to as “Bostons” -- in the area. As other settlers joined the Balchs, the growing settlement was called Boston. By 1891 enough folks had settled in the area that a post office was needed, and Balch became the first postmaster. However, the name Boston caused some confusion with the delivery of mail, and in 1900 a settler named Kron O. Erickson became the postmaster and worked to get the name changed to Mora after the community of Mora in Sweden. Within a few years the post office was moved to Forks and settlers followed, and before long Mora started to look like the campground it is today.

The trail begins at the Mora Ranger Station following a fading path into the trees. Mossy hemlocks rise above an encroaching tangle of fern and salmonberry as you wander toward the river. After a few minutes of walking, find yourself on an embankment catching glimpses of the Quillayute Slough a few dozen feet below. Continue onward and arrive at an unmarked junction around the half-mile mark. Veering right and downhill will lead you to a closer view of the river, while heading left will take you out to Mora Road and the Olympic National Park boundary. Take some time to explore both, then head back to the Mora Ranger Station. From here, consider walking the few hundred feet west along Mora Road to find the James Pond Nature Trail, which is little more than a path leading out to a view of the lily-covered James Pond.

Short and easily overlooked, these two campground trails are not a destination unto themselves. However, if you’re spending a day hiking Rialto Beach or camping at Mora Campground, these trails are worth a little extra effort to explore. Both trails provide easy access to quiet sections of lush Olympic rain forest. While the area is popular, these trails do not see a great deal of traffic, giving you plenty of opportunity to enjoy the silence.

To get to there, take the Bainbridge Island ferry to Bainbridge Island. From the terminal, follow SR 305 for 13 miles to SR 3 North. Follow SR 3 to the Hood Canal Bridge, taking a left over the bridge onto State Route 104. Follow SR 104 as it merges onto US 101 and continue 35 miles to Port Angeles taking a left on Lincoln Street, which becomes US 101. Continue for about 54 miles to the junction to La Push Road, also known as SR 110. Turn right and continue on SR 110 for 7.8 miles to Mora Road. Veer right and continue another 3.2 miles to the Mora Ranger Station and Campground. -Nathan

Print Google Directions >>

Quillayute River Slough

Ozette Triangle: Cape Alava - Sand Point Loop

Our Hiking Time: 5h 50m
Total Ascent: 350ft
Highest Point: 200ft
Total Distance: 10.8 miles
Location: N 48° 10.2833, W 124° 44.1666
Required Permit: National Park Pass
Difficulty: Moderate due to distance and rocky shoreline

Nathan's Photo
A few weeks ago we took a weekend to head out to the Olympic Peninsula to explore a few hikes along the Pacific Coast. One of those hikes was the very popular Lake Ozette Loop, also known as the Ozette Triangle. This classic hike travels through coastal forests and prairies before reaching a rocky beach filled with marine life and the lingering signs of the people that called this area home for hundreds of years.

Sometime before 1500, the Makah people established five large villages in the northwest corner of the Olympic Peninsula. The largest and most southern of these was named Hosett or Osett, situated near Lake Ozette. The village was sustained by resources from both the lake and the sea, and today’s trail between Lake Ozette and the beach follows roughly the same footpath used by villagers for generations. Hosett was thriving in 1790 when explorer Manuel Quimper named the rocks near the village Cape Punta de Hijosa. It was renamed Punta de Alava in 1794 in honor of Jose Manuel de Alava, who helped broker a peaceful solution to the conflicting claims of Spain and Great Britain over portions of the Pacific Northwest coast. Today the point is known as Cape Alava and has the distinction of being the westernmost point of the contiguous United States, inching out Cape Flattery by just 350 feet.

Europeans continued to settle in the area, and by 1855 the Treaty of Neah Bay was signed, establishing the Makah reservation. However, the Makah in Hosett refused to move to the reservation. To solve the problem, the Ozette Reservation was established in 1893, leading many to mistakenly believe there was a separate Ozette tribe. Around this time, the area around Lake Ozette supported a small Scandinavian population. In 1902, a homesteader named Lars Ahlstrom began working the land between Lake Ozette and the ocean in an area now known as Ahlstrom’s Prairie. In 1907 Peter Roose set up a homestead next to Ahlstrom, in what is now known as Roose’s Prairie. While most of the buildings the homesteaders constructed are gone, the Park Service does maintain a few buildings at the Peter Roose Homestead, now a National Historic site.

Over time those living on the Ozette Reservation slowly left, with the last leaving in 1937. Roose lived on his homestead until his death in 1944. Ahlstrom soldiered on until the early 1960s. In the meantime, the last “Ozette” with any claim to the reservation passed away in 1953 without any heirs, calling into question who owned the 791-acre Ozette Reservation. After long debate and confusion over whether the Ozette Tribe ever existed, the reservation was transferred to the Makah in 1970. Today the entire area is preserved by both the Park Service and the Makah Tribe.

The trail begins from the Lake Ozette Ranger Station, crossing over the Ozette River and entering a forest of wind-blown spruce and mossy cedar. Almost immediately the trail splits. The path to the left will take you out to Sand Point, while the trail to the right leads to Cape Alava. While either works, we recommend heading to the right as there is more to see along this route. The trail is fairly flat, though almost all of the of the trail is dominated by wooden boardwalks designed to keep you out of the mud and marsh. However, as this area gets a great deal of rain, keep in mind that the boardwalks are often quite slick.

After roughly two miles, the forest opens into Ahlstrom’s Prairie, a tree-lined expanse of marsh grasses and salal. Continue across the prairie, and just as you begin to re-enter the forest, keep an eye out for a well-trodden path leading off the boardwalk into a dense stand of trees to the right. A short distance from the main trail find the crumbling remains of a wooden outbuilding left by Ahlstrom. Once you’ve done a little poking around, press onward to the shore.

The trail soon deposits you on the beach. To check out Cape Alava, head north toward the large tree-covered seastack of Tskawahyah Island. Your route will lead you into the Ozette Reservation and past the dilapidated looking Makah Ranger Station. Depending on the tide, you can easily reach the westernmost point of the continental United States by heading to the far side of Tskawahyah Island. Reach it by clambering over the cannonball-shaped rocks, which have led many to refer to it as Cannonball Island. After you’ve done a little exploring, retrace your steps back to the trail and press southward toward Sand Point.

Depending on the tide, hike along the narrow strip of sand between the crashing waves and the headland, or venture onto the rocks to find pools teeming with crabs, anemones and starfish. After 1.2 miles reach the first headland. At higher tides, leave the beach and head onto a short trail over the bluff, which quickly returns you to the beach on the other side. The Wedding Rocks can be found in this area; a series of petroglyphs depicting a variety of images, including a wedding scene, all carved into the rock by the Makah hundreds of years ago. Push onward, crossing rocky, boulder-filled beaches and another headland before reaching the sandy shores near Sand Point. At 1.7 miles from the Wedding Rocks, arrive at the junction with the North Sand Point Trail just shy of Sand Point. If you’re up for a little extra trail time, head past the junction to the tip of Sand Point to catch a glimpse of coastline hidden behind the point. Either way, follow the North Sand Point Trail back into the woods as it makes a bee-line for the Ozette Ranger Station, crossing long stretches of the now-familiar boardwalk along the way.

Boasting dramatic seascapes that attract a wide variety of wildlife, the hike is a popular destination for hikers and backpackers. Permits are required to camp in one of the many campsites along the beach, which are often filled to capacity during the summer. While the hike to the beach is an easy trek with very little elevation change, reaching the trailhead involves quite a bit of effort. For that reason, we recommend you explore the full loop rather than leaving part of the trail for another day. At the same time, even if you only have time to do a portion of this hike, it’s well worth the effort to get there.

To get to there, take the Bainbridge Island ferry to Bainbridge Island. From the terminal, follow SR 305 for 13 miles to SR 3 North. Follow SR 3 to the Hood Canal Bridge, taking a left over the bridge onto State Route 104. Follow SR 104 as it merges onto US 101 and continue 35 miles to Port Angeles taking a left on Lincoln Street. Continue for about 43 miles to the junction with SR 113. Turn right and continue on SR 113 for a little over 20 miles as it changes into SR 112 and travels through Sekiu to reach the Hoko-Ozette Road. Turn left and follow the Hoko-Ozette Road for a little over 21 miles to the Ozette Ranger Station and the trailhead. - Nathan

Print Google Directions >>
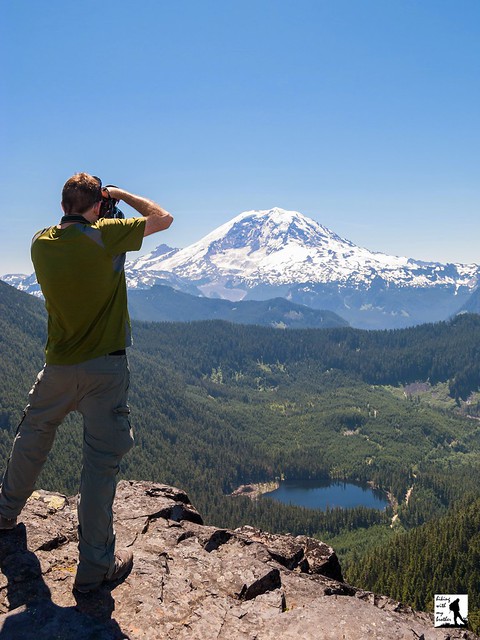
Cape Alava

Mima Falls Trailhead - Capitol State Forest

Our Hiking Time: 2h 30m
Total Ascent: 400ft
Highest Point: 600ft
Total Distance: 6.5 miles
Location: N 46° 54.666, W 123° 5.28
Required Permit: Discover Pass
Difficulty: Easy

Nathan's PhotoNot long ago we returned to Capitol State Forest to check out another of the working forest’s many trailheads. This time we headed to the Mima Falls Trailhead for a short trek out to the waterfall. While the falls are pleasant enough, the hike to reach them is not, as portions of this hike cut across large swaths of recently cleared forest and a nearby shooting range means you’ll never quite escape the sound of gunfire.


Mima Falls takes its name from the nearby Mima Mounds. “Mima” is a Native term meaning “a little further along.” Over the years, the Washington Department of Natural Resources (DNR) has worked with volunteers to build up the trail system in Capitol State Forest, expanding on the network of logging roads. It is likely that at least some portions of this trail are built on sections of former logging roads that once led to logging camps that supplied the sawmills in the lumber boom town of nearby Bordeaux. Established by the Bordeaux Brothers back in 1896, this area of the Black Hills were logged for over 40 years until the old growth timber ran out and Bordeaux became a ghost town in 1941. While Capitol State Forest has been a recreation destination for decades, the Mima Falls Trailhead and Campground was not built until 1973. In 2013 the DNR completed an overhaul of the Capitol State Forest Trail system that renamed most of the trails. Older guides will reference these outdated trail names.

The trail begins from the Mima Falls Trailhead, along the Mima Falls Trail East Trail. The route immediately passes through the Mima Falls Campground and enters a large area that was very recently logged. After a half mile, reach a junction with the Campground Trail. Veer left and continue through the fields of stumps and newly planted seedlings to the shelter of the forest. In another 1.5 miles, the trail splits into Mima Falls Trail West and the Mima Falls Tie Trail. Veer left over Mima Creek and reach the falls within a few tenths of a mile. The only views of this short cascade are from a rough side trail that parallels the waterfall. If you’re looking to extend your hike, a series of interconnected trails make it easy to put together a number of loops.  The Department of Natural Resources offers a decent map to help you navigate the trails.

If you’re only heading out to Mima Falls, this isn’t a hike we can recommend highly. While it’s certainly approachable for any hiker, the sounds of the neighboring Evergreen Sportsman Club can be a bit overwhelming. The range was operating long before the Mima Falls Trailhead was built, making this a less than ideal location for a trailhead. In addition, the recent logging activity has taken a lot of the beauty out of this hike. While this trailhead serves bikers well, it’s not the best for a hike. We recommend heading to the Falls Creek Trailhead or the Rock Candy Trailhead instead.

To get there, take I-5 South to Exit 95 the Littlerock/Maytown exit. Follow Maytown Road through Littlerock as it turns into 128th Street for 3.7 miles to a T-intersection. Head left onto Mima Road for 1.3 miles to Bordeaux Road. Take a right and in .7 miles turn right onto Marksman Road. Mima Falls Trailhead is at the end of the road on the left. -Nathan

Print Google Directions >>

Mima Falls

Summit Lake Loop Trail #1177

Our Hiking Time: 2h 45m
Total Ascent: 1300ft
Highest Point: 5800ft
Total Distance: 6.1 miles
Location: N 47° 2.3333 W 121° 50.1539
Required Permit: Northwest Forest Pass
Difficulty: Moderate

Nathan's PhotoAt the end of last summer we headed out toward the Carbon River entrance to Mt. Rainier National Park to do a little exploring in that area. One of the hikes we chose was Summit Lake, which is also one of the most popular. With big views of Mt. Rainier and a sizable alpine lake, it was easy to see why.

Summit Lake is a glacially carved alpine lake situated at the upper end of the Cayada Creek Valley just inside the Clearwater Wilderness. The Wilderness was established in 1984 and now protects over 14,000 acres of old growth forest and wildlife. Records are a bit sketchy, but it seems likely that the Summit Lake Trail was first blazed by the Forest Service when building the fire lookout that was once perched on nearby Bearhead Mountain. Summit Lake serves as a excellent water source in the summer months, and the lookouts stationed on Bearhead Mountain would have been drawn to the picturesque setting of the lakeshore. Today, visitors flock to the Summit Lake to take in that same alluring mixture of meadow, snowcapped mountain and alpine lake.

From the trailhead, the Summit Lake Trail #1177 begins by climbing up through a young forest still recovering from a recent harvest. Soon find yourself entering more mature stands of fir and hemlock as the trail swings into a long switchback up the mountainside. The trail here is fairly wide and well maintained, though there are plenty of roots to trip you up if you’re not paying attention. After about a mile of trail reach a junction with the Carbon River Trail #1179 and Twin Lake. A short unmarked trail leads out to lonely Twin Lake, which lacks both a twin and the impressive landscape waiting at Summit Lake.

Push on from the junction to one of the steeper sections of the hike, following the trial as it quickly ascends the ridgeline. The grade soon becomes more reasonable, giving you time to enjoy the wildflowers that often line the trail, as well as occasional pocket views of Lake Lily hiding on the other side of the ridge. Roughly 2.5 miles from the trailhead emerge from the woods into the grassy meadows surrounding Summit Lake. Ahead of you the rocky prominence of Summit Lake Peak rises directly behind the lake and as you reach the lakeshore, Mt. Rainier looms large to the south. Settle in to enjoy the lake or press onward for bigger views.

If you’re up for more, the trail splits into a loop, winding around the lake and up to the top of Summit Lake Peak. Either way you go, there is often wildlife found in the meadows, including bear, deer, marmot and elk. The trail to the top is more challenging than the trail to the lake; it’s rough, steep and narrow, but the rewards are worth the extra effort. From the top, the deep blue of Summit Lake competes with the white flanks of Mt. Rainier. The closest neighbors are Bearhead Mountain to the west and Pitcher Mountain to the east, with Coplay Lake filling a bowl just to the right of Bearhead. Beyond that, an ocean of mountaintops spreads out in every direction, with far too many peaks to name. When you’ve had your fill, continue down the trail and complete the loop.

This is a fairly popular trail in the summer months, and it's easy to see why. The wildflower-filled meadows around Summit Lake are sure to please any fan of an alpine lake, and the big views from the top of Summit Lake Peak are more than enough to satisfy a devoted peakbagger. While it does have some elevation, most hikers will find this trail fairly accessible. And, with campsites available around the lake and more to explore along the Carbon River Trail #1179 and the Bearhead Mountain Trail #1179.1, this hike also makes for a decent backpacking destination.

To get there, take I-5 South to I-405. From I-405 take SR 167 south toward Auburn. In 20 miles take the SR 410 Exit toward Sumner/Yakima. Follow SR 410 for 12 miles to SR 165. Take a right and continue on SR 165 for about 10 miles through Wilkeson and Carbonado to the Carbon River Road/Mowich Lake Road junction. Veer left onto the Carbon River Road and follow for 7.5 miles to FR 7810, just before the Carbon River Ranger Station. Turn left onto the FR 7810 and continue 6.5 unpaved miles to the trailhead at the end of the road. –Nathan


Print Google Directions >>

Summit Lake

Falls View Canyon Trail #868

Our Hiking Time: 1h 10m
Total Ascent: 300ft
Highest Point: 400ft
Total Distance: 1.8 miles
Location: N 47° 47.3633, W 122° 55.7516
Required Permit: None
Difficulty: Easy

Nathan's PhotoThe Olympic Peninsula offers everything from sandy beaches to windswept peaks and there are all manner of hiking trails to access those destinations. Some of those trails are difficult to reach, while others can be found just off the highway. This hike is in the latter category. The trails at Falls View offer a rhododendron-lined tour of a river canyon and a front row seat to a waterfall tumbling down 200ft into the Big Quilcene River. As an added bonus, these short and easily accessible trails can be explored any time of year.

Falls View Campground is situated on a bluff above the Big Quilcene River and likely owes its existence to its namesake waterfall. We weren’t able to dig up much in the way of the history behind the building of this campground, although we did find that the area is sometimes referred to as Fallsview in older guides and reference books. For the record, US Board of Geographic Names lists the official name of the campground as “Falls View.” While the falls themselves have been christened Falls View Falls or sometimes Campground Falls, the stream that creates the cascade has gone unnamed.

This hike is actually two separate trails, the Falls View Loop Trail #848 and the Falls View Canyon Trail #868. Both trails begin from the campground. The Falls View Loop trail clocks in at about a tenth of a mile, and leads out to a viewpoint overlooking Falls View Falls before looping back to the parking area. Take a few minutes to wander down this trail to get an idea of the canyon you will soon be descending into. Once you return to the trailhead, head toward the Falls View Canyon Trail, which quickly switchbacks down to the riverside to a view of the base of the falls.

From the canyon floor the trail wanders through a young forest of fir and alder rising out of a thick underlayer of fern and salal. The roar of the river is never far as you progress along the narrow trail, which splits after about three-quarters of a mile.  Head right and continue onward to the far reaches of the trail to find a calm section of the Big Quilcene River.  Here the water pools at the end of a series of rapids, and the shore provides plenty of room to stretch out and enjoy the river. Once you’re done exploring the rocks, return to the trail and follow it as it loops back toward the campground. This section of trail  is a little further away from the river, and it passes quickly. Before you know it you’ll reconnect with the trail and the river and find yourself climbing up the canyon wall to the trailhead.

While this pleasant river walk isn’t the most spectacular trail in the Olympic National Park, it does manage to pack both panoramic views of a big waterfall and access to a rushing river filled with moss-covered boulders into less than 2 miles of trail. This makes it a great addition to a day of short hikes or a nice way to stretch your legs while traveling on to your final destination. There is a bit of a climb into and out of the canyon, but hikers of all ages should be able to tackle these trails without a lot of difficulty. Falls View Falls is somewhat seasonal, and is best viewed in the winter and spring when waters are at their highest. In warmer years, the falls can dry up completely. If you’re going in the winter, the campground may be closed - simply park outside the gates and hike the short distance to the trailhead.

To get there, take I-5 south through Tacoma to Exit 132B SR 16 toward Bremerton. Continue on SR 16 for 27 miles to merge with SR 3 North. Follow SR 3 to the Hood Canal Bridge, taking a left over the bridge onto State Route 104. Follow SR 104 as it merges onto US 101 and continue 13.4 miles to Falls View Campground. Turn right and find the trailhead in the day use area of the campground. -Nathan

Print Google Directions >>
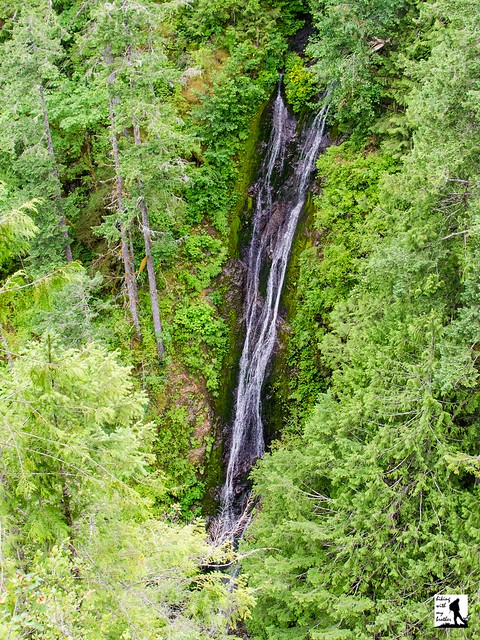
Falls View Falls

Steam Donkey Trail - Dosewallips State Park

Our Hiking Time: 1h 15m
Total Ascent: 450ft
Highest Point: 500ft
Total Distance: 3.0 miles
Location: N 47° 41.3820, W 122° 54.1860
Required Permit: Discover Pass
Difficulty: Easy

Nathan's Photo
A few months ago we spent a weekend exploring a number of hikes along the eastern shores of the Olympic Peninsula. We managed to fit in a wide variety of destinations that included everything from mountaintops to leisurely forest walks. Among those forest walks was the Steam Donkey Loop Trail, quietly tucked into the woods surrounding Dosewallips State Park.

Before Europeans made it to the Puget Sound, Native American tribes lived and traded along Hood Canal and the rivers that flow into it, including the Dosewallips River. The name is derived from the Twana word “dos-wail-opsh,” in reference to a legendary chief who was transformed by The Great Changer into a mountain near the head of the river.

Back around the turn of the last century, the nearby town of Brinnon was quickly becoming a bustling logging community. In 1903, James Izett purchased his first timber claim in the Dosewallips River Valley, and quickly began construction of the first logging railroad south of the Dosewallips. The Izett Logging Company eventually built five miles of railroad to help haul timber down to Hood Canal where logs would be lashed together and floated down to lumber mills in booms. During this era, loggers used large steam engines - often called steam donkeys - to help pull logs and machinery up and down mountainsides. In 1910 wildfires ravaged one of the Izett logging camps, destroying two steam donkeys and a great deal of timber. Just three years later, James Izett passed away and the company was quickly sold off. The railroad was eventually removed, and today the railroad grade is still in use as part of the Dosewallips State Park trail network.

The hike begins at the Dosewallips State Park entrance booth. If you’re not camping in the park, ask the ranger where you can park to hike the trail. Usually there will be open spots right behind the booth. Once parked, follow a rough path near the booth to the Maple Valley Trailhead.  Here the actual trail begins and the path quickly enters a mixed second generation forest and soon dampens any nearby sounds from the campground. Almost immediately the Dosewallips River appears through breaks in the treeline as you glide through stands moss-heavy alders, maples and cedars. Continue following the river to a junction with the Rhody Cut-off, a shortcut that skips most of the hike and connects to the far side of the Steam Donkey Loop. Keep to the right and soon find yourself at the first of many bridges over Phantom Creek.

From Phantom Creek climb up through fields of sword fern and vine maple toward the park boundary. The trail levels out and passes by a partially cleared area that was logged a few years ago before turning sharply to the left and shortly arriving at a fire road. Cross it to connect with the Steam Donkey Loop Trail.  From here, the trail climbs slightly through the quiet forest, crossing the Phantom Creek twice before veering to the left and descending back toward the campground. On your descent pass the junction with the Izett Railroad Grade and later a junction signed "Railroad Grade Circa 1901" take a moment here to find the nearby  historical marker and look for rusted pieces of the area’s railroad history. Continue following the trail back down to the campground. The trail drops you back on the main park road. Head left back to the park entry booth.

If you’re not camping at Dosewallips State Park, this trail is better as an addition to a day of hiking in the area rather than the only hike you do. However, it works well in the winter when other hikes are less accessible and is ideal for younger hikers, as side trails and shortcuts provide ample opportunities to shorten the hike if needed. Although the park is quite popular, the trails get less traffic than expected, lending a feeling of the trail being more wild than it is. With 425 acres to explore, Dosewallips State Park is well worth a visit. Next time you’re in the area, give this “hidden” hike a try.

To get there, take I-5 south through Tacoma to Exit 132B SR 16 toward Bremerton. Continue on SR 16 for 27 miles to merge with SR 3 North. Follow SR 3 to the Hood Canal Bridge, taking a left over the bridge onto State Route 104. Follow SR 104 as it merges onto US 101 and continue 22 miles through Quilcene to Dosewallips State Park. -Nathan

Print Google Directions >>

Steam Donkey

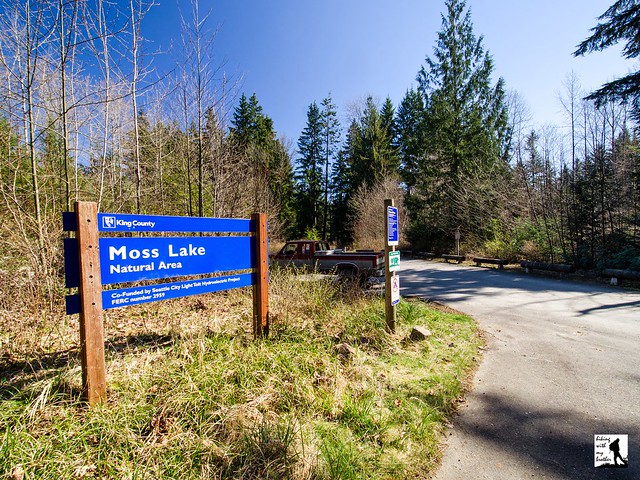
Moss Lake Natural Area

Our Hiking Time: 1h 30m
Total Ascent: 100ft
Highest Point: 600ft
Total Distance: 3.7 miles
Location: N 47° 41.5860, W 121° 51.0300
Required Permit: None
Difficulty: Easy

Nathan's Photo
A few months ago we took some time to trek through the Moss Lake Natural Area, one of many designated Natural Areas in King County. Although the hiking is limited to a single trail, the low elevation of Moss Lake lets you  make a quick escape into the woods at any time of year.

Located between Carnation and Duvall, the 372-acre Moss Lake Natural area is relatively new, with the last portions of the park purchased in 2002. The area is named for the sphagnum peat bog that surrounds Moss Lake. The lake itself is very shallow, not more than 20 feet deep, and is thought to be mostly man-made, a legacy of the peat that was excavated from the bog early in the 20th century. That peat moss was sold and likely found its way into local gardens and planting beds. A moss-drying plant was constructed in the 1920s, but quickly burned down leaving the area untouched until the mid-1950s when preparations began to setup a peat mining operation which never fully materialized. By the 1980s little remained of the past mining activity beyond a sunken peat dredge and a few cabled logs. King County bought most of the land in 1990, seeking to protect one of the only peat bogs in the county. By 2002 the last parcels were secured and the area was developed for recreational use.

The trail begins from the parking lot and quickly leads you through the wetlands to the shores of Moss Lake. About half the natural area is wetlands, home to a variety of animals including bald eagles, beavers and pileated woodpeckers. It’s not uncommon to see a great deal of wildlife from the marshy shores, so spend some time quietly enjoying the lake. When you've had your fill, continue onward through brushy wetlands along trails lined with salmonberry and sword fern. Before long the trail begins to climb, entering into a mixed forest of second-growth alder and hemlock that provides a nice contrast to the wetlands below.  Where the trail splits you can choose either direction of the loop to tackle first.  Either way you go, you'll eventually encounter the gated edge of the Moss Lake Preserve, as shown on the Moss Lake Trail Map.  Beyond is a maze of forest roads that wander through forests owned by Hancock Forest Management.  Hancock has imposed fees for hikers to access some of their other holdings in Washington State, but it's not clear that a permit is required here.  We recommend you skip the gate and keep this hike short and continue following the short loop within the Natural Area.

This little hike works well for a quick hike or if you’re looking for a causal hike with friends or little ones. Although short, Moss Lake manages to pack a lot of variety into a small amount of space, quickly taking you from marshy lakeshores to forested wetlands and up into second growth forest. There’s enough elevation to make the hike interesting, and because Moss Lake is relatively unknown, you’re unlikely to run into too many other people on the trail. Next time you’re looking for something a little different, give Moss Lake Natural Area a try.

To get there, take SR 520 out to its end and continue straight on Avondale Road. After a mile veer right onto Novelty Hill Road. Continue on Novelty Hill Road until it ends at a T-intersection with Snoqualmie Valley Road. Take a left and almost immediately take a right onto 124th Street. 124th connects with SR 203, also known as the Fall City Duvall Road. Take a right and continue for 3.8 miles to Stillwater Hill Road. Take a left and follow the road as it becomes Kelly Road. At just under 2 miles, veer right onto Lake Joy Road. Stay on this road for 2.5 miles as it curves around Lake Joy to Moss Lake Road. Take a left onto Moss Lake Road and find the Moss Lake Natural Area parking lot in a half-mile. -Nathan

Print Google Directions >>

Moss Lake Preserve

Staircase Rapids Loop #112

Our Hiking Time: 2h
Total Ascent: 100ft
Highest Point: 900ft
Total Distance: 2 miles
Location: N 47° 31.4460, W 123° 20.5140
Required Permit: National Park Pass
Difficulty: Easy


Nathan's Photo
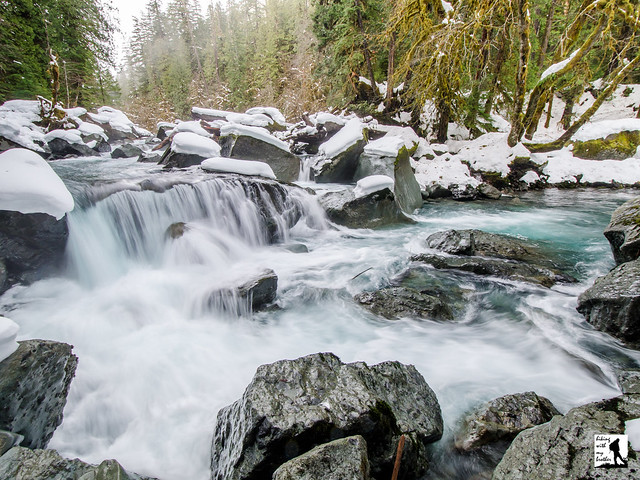
A few weeks ago we rang in the New Year with a trip out to the Olympic Peninsula to tour one of its most popular trails: Staircase Rapids. Located near Lake Cushman, this nearly flat riverwalk has attracted hikers for over a century. With blue skies above Seattle, we grabbed our snowshoes and started the long trek out to the North Fork Skokomish River.

This truly is a hike for all seasons. Accessible all year, this loop works for a quick snowshoe or a short summer hike. Because the distance and elevation are fairly minimal, this hike works well for young hikers and first time snowshoers. This is also a very popular destination with many trails linking to other nearby destinations, so expect a little company as you head out to Staircase. There’s less traffic in the winter, so if you’re looking for an introductory snowshoe, Staircase Rapids is a good bet.

There's a lot more to the Staircase Rapids, and you can learn all about it in our book, Hiking Through History Washington.  You'll find a trail map, route descriptions, history, and more for this and many more hikes throughout the State.  Help support hikingwithmybrother.com and the work we do by picking up a copy!

To get there, take I-5 south to Olympia to Exit 104 toward Aberdeen and Port Angeles. Follow US 101 along Hood Canal just over 35 miles through Shelton to Hoodsport. Turn left onto Lake Cushman Road/State Route 119 and follow for a little over 9 miles to a T-intersection. Head left onto Forest Road 24. Continue for about 6 miles to the Staircase Ranger Station and the parking lot. Note that FR 24’s pavement turns to gravel after the first 2 miles. -Nathan

Print Google Directions >>
Staircase Rapids

Kachess Ridge Beacon Trail #1315

Our Hiking Time: 3h 45m
Total Ascent: 2200ft
Highest Point: 4600ft
Total Distance: 4.7 miles
Location: N 47° 16.9380, W 121° 10.6500
Required Permit: None.
Difficulty: Hard

Nathan's Photo
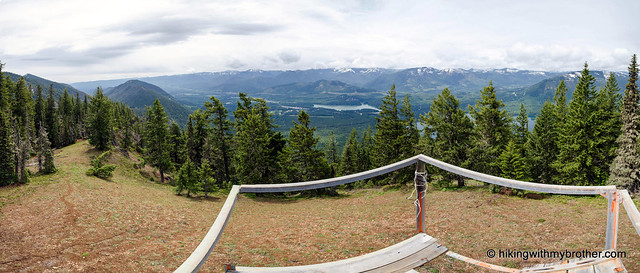
Sometimes it seems that the more hiking we do, the more trails we discover. For all the trail miles we’ve put into the I-90 corridor, there are always more trails on our list to hike. Recently we had the chance explore Kachess Ridge, a somewhat lesser-known trail that scales one of the many ridges surrounding Lake Kachess.


kachess ridge beacon hikingwithmybrotherKachess Ridge has a great deal to offer – it is easily accessible from the freeway, but surprisingly few hikers are to be found along the trail. And, because it is east of the Pass, it is an ideal early season hike. A word of caution however; the spring route up the ridge is steep and challenging, so we don’t recommend it for the inexperienced. Either approach makes for a hard hike, but we think the views are worth the extra effort.

There's a lot more to Kachess Ridge Beacon, and you can learn all about it in our book, Hiking Through History Washington.  You'll find a trail map, route descriptions, history, and more for this and many more hikes throughout the State. Help support hikingwithmybrother.com and the work we do by picking up a copy!


To get there, take I-90 to Exit 70. Take a left over the freeway and turn left onto West Sparks Road. Continue for a half-mile to FR 4818 (signed Kachess Dam Road) and take a right. Follow FR 4818 for a mile to an unmarked road on the right. Follow this road for a half-mile to the small parking area at the trailhead. -Nathan

Kachess Ridge Beacon

Mount Rose Trail #814

Our Hiking Time: 5h 15m
Total Ascent: 3500ft
Highest Point: 4300ft
Total Distance: 6.5 miles
Location: N 47° 30.3420, W 123° 17.3460
Required Permit: None
Difficulty: Hard

Nathan's Photo
A few weeks ago we headed back to the Olympic Peninsula to continue our exploration of the Mount Skokomish Wilderness. Last summer, our trek up to the Lake of Angels gave us a taste of the northern reaches of the Wilderness. This year, we decided to check out the southern portion of the wilderness by taking on Mt. Ellinor’s neglected neighbor Mt. Rose. We were hoping for more of the stunning vistas we found on the way to the Lake of Angels, and Mt. Rose did not disappoint.

This is not an easy hike. Like most of the hikes in the Mount Skokomish Wilderness, the grade is steep and offers little respite along the way. However, thanks to a dedicated brigade of trail volunteers, this trail remains relatively clear of blowdowns and other trail damage. The group also continues to re-route the trail in an attempt to smooth out some of the steepest sections. Mt. Rose also makes an excellent alternative to Mt. Ellinor, as it receives a fraction of the traffic and offers a nearly identical experience. This hike is perfect for those looking for a challenge with rewarding views, searching for a new conditioning route, or heading to Mt. Ellinor and deciding they want something a little different.

There's a lot more to the Mt. Rose Trail, and you can learn all about it in our book, Hiking Through History Washington.  You'll find a trail map, route descriptions, history, and more for this and many more hikes throughout the State.  Help support hikingwithmybrother.com and the work we do by picking up a copy!

To get there, take I-5 south to Olympia to Exit 104 toward Aberdeen and Port Angeles. Follow US 101 along Hood Canal just over 35 miles through Shelton to Hoodsport. Turn left onto Lake Cushman Road/State Route 119 and follow for a little over 9 miles to a T-intersection. Head left onto Forest Road 24. Continue for just under 3 miles to the signed driveway of the trailhead parking lot. -Nathan

Print Google Directions >>

Mt. Rose

Wilderness Peak Loop - Cougar Mountain

Our Hiking Time: 2h
Total Ascent: 1200ft
Highest Point: 1600ft
Total Distance: 3.5 miles
Location: N 47° 31.1880, W 122° 5.6100
Required Permit: None
Difficulty: Moderate

Nathan's PhotoAlthough we’ve explored much of Cougar Mountain, we’d yet to climb its highest peak and tour the somewhat lesser-traveled south-eastern portion of the park. A few weeks ago we finally found some time to head back into the Issaquah Alps and head up Wilderness Peak for a short hike a little closer to home.

wilderness peak cougar mountain hikingwithmybrotherWe’ve covered much of Cougar Mountain’s past on previous hikes. From the early coal mining days to the area’s more recent military history, the nearly 30-year-old park contains and preserves a rich cultural legacy. However, Wilderness Peak is conspicuously absent from this saga. Our only guess is that this section of forest really was something of a wilderness at one time – at least compared to the nearby coal mining operations. Wilderness Peak is made of different rock than other portions of Cougar Mountain, so there was little to lure the miners away from the rich coal seams that ran below the peak. And while some portions of the park were logged in the 1920s and 1940s, other sections were never logged at all, including areas near the top of Wilderness Peak.

The trail begins at the Wilderness Peak Trailhead, and combines the Wilderness Creek, Wilderness Peak, and Wilderness Cliffs trails into a short loop through Cougar’s lush mixed forest. Begin by heading uphill and almost immediately crossing Wilderness Creek, which will be your companion for the next mile or so. Gently switchback through a sea of sword fern and salal for about a half-mile under a canopy of alder and maple to find the first junction. Here, a small bridge crosses the creek and the Wilderness Creek Trail continues to the left while Wilderness Cliffs Trail branches right. Either trail will get you to the top, but because the Cliffs Trail is significantly steeper, most folks head left onto the Wilderness Peak Trail.

wilderness peak cougar mountain hikingwithmybrotherAs you head left, you’ll pass through The Boulders, a collection of moss-covered glacial erratics deposited millennia ago by retreating glaciers. As you climb up the creek valley, more and more surfaces are covered with moss and fern. At the same time the forest increasingly yields to larger numbers of cedar and fir. Soon you’ll find yourself crossing boggy areas on narrow boardwalks before climbing out of the creek valley up to Shy Bear Pass where a number of trails intersect and connect up with the rest of the Cougar Mountain trail system. From here you can follow the Shy Bear Trail into the center of the park, or take a quick jaunt out to Long View Peak. While the area is well-signed, if you're looking to do a little extra roaming, you may want to take along a map.

We veered to the right onto Wilderness Peak Trail, which glides fairly easily to your destination. A short spur leads out to Cougar’s highest pinnacle. There are no views here, just the quiet of heavy forest, a sturdy bench and a summit register. Take a moment to write a little something in the register, then head back to the main trail and take the Wilderness Cliffs Trail down to complete the loop. One word of caution as you near the bottom: there is a very tempting trail junction that continues downhill. Resist the urge to follow it and head back to the Wilderness Creek Trail and the creek crossing.

wilderness peak cougar mountain hikingwithmybrother
This is a great hike for an afternoon or post-work tromp through the forest. While not incredibly steep, it is a little bit of a work out through Cougar’s varied landscapes – everything from bogs to old growth. This loop is also hiker exclusive, so you’re unlikely to encounter any horses, which may be important to some dog owners. What this hike lacks in views it makes up for in landscape and solitude, as you can expect a little less traffic in this section of the park. If you haven’t made it out to this end of Cougar Mountain yet, consider a trek up to Wilderness Peak in the coming weeks.

To get there, take I-90 to Exit 15 and head right onto Highway 900, also known as Renton-Issaquah Road. Continue for a little over three miles to the signed Cougar Mountain Wilderness Creek Trailhead on your right. The driveway is easy to miss – keep an eye out for a paved road heading uphill. Park in the small parking lot and head up. -Nathan

Print Google Directions >>

Wilderness Peak
Copyright 2008-2016 - hikingwithmybrother.com
hikingwithmybrother@gmail.com