about us | links | permit info
Subscribe to Hiking With My Brother Email Subscribe Follow Hiking With My Brother on Facebook Follow Hiking With My Brother on Twitter Hiking With My Brother Picasa Hiking With My Brother YouTube

CCC Trail - Eastern Trailhead

Our Hiking Time: 3h 30m
Total Ascent: 500ft
Highest Point: 1500ft
Total Distance: 8.2 miles
Location: N 47° 30.9600, W 121° 36.7680
Required Permit: None
Difficulty: Easy

Nathan's PhotoEarlier this year we hiked the first half of the then snow-bound CCC Road. This week, with a slowly recovering sprained ankle to tend to, we explored the remaining portions of a road that once served as the main artery for accessing the timber and mineral interests in the Middle Fork Snoqualmie Valley.

The Civilian Conservation Corps built the CCC Road in 1939, putting young unmarried men to work doing public good during the Great Depression. Eighty years later, the road is still in good shape, thanks to the Forest Service and a small army of volunteers keeping nature at bay.

CCC road trail hikingwithmybrother
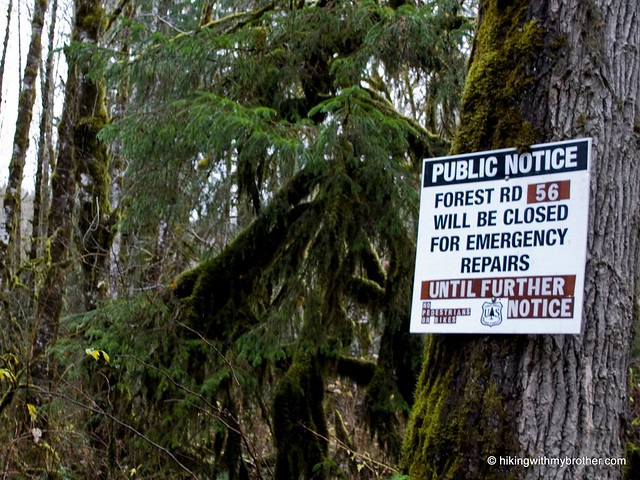
Washouts on Forest Road 56 blocked direct access to the easternmost entrance to the CCC Road, so we quickly decided to make a short loop out of the hike. Our recent trek up Bessemer Mountain took us up the Big Blowout Creek entrance to the CCC trail, so we saved it for the end of our hike and instead explored further down FR 56 on foot. This portion of FR 56 hugs the Middle Fork Snoqualmie River, lending easy access to a number of angling sites, some of which are a happy trail jaunt through scrub and rocks to reach the riverside. Eventually one arrives at the trailhead, where the CCC Road intersects with its modern replacement, FR 56. Somewhat overgrown and unmarked, the trailhead is easily marked with what Manning creatively refers to as “Tall Moss Cliff”, which is, unsurprisingly, a tallish mossy cliff-face. Hook left and dive into the trail.

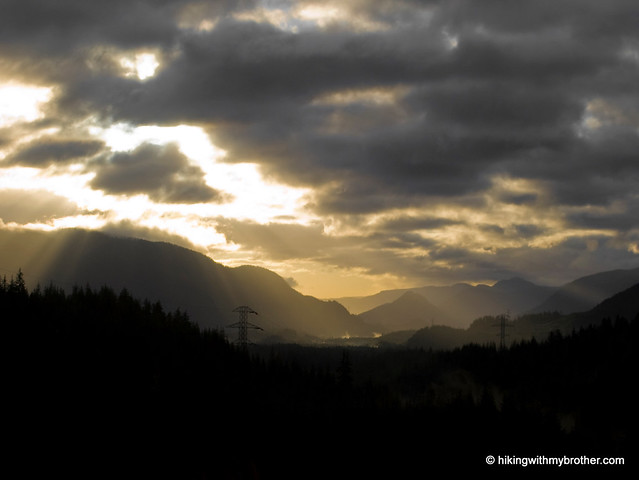
The western portion of the trail mirrors much of the east – heavily deciduous, filled with alders and vine maples, sword ferns and salmonberry. Streams and rivulets cut across the trail, at times with such ferocity that they have obliterated large chunks of the former road, forcing the hiker to pick their way across a rubble field of talus and fallen timber. Small breaks in the foliage afford occasion views of the valley below, but the majority of the hike is shrouded beneath the second-generation forests that line the trail. The trail meanders a bit before connecting up with CCC road trail hikingwithmybrotherthe logging roads on Bessemer, which will lead you back down the FR 56.

The CCC Road is not a backbreaker, it is not a full of amazing views, and it is not going to lead you to secluded groves or hidden meadows. Still, the old road is a nice introduction to the less-traveled Middle Fork area that is fairly easy to access.

To get there, take I-90 to exit 34 and take a left onto 468th Ave. Follow the road past the truck stop for about a half-mile until you reach SE Middle Fork Road, also known as Forest Road 56. The road has a few twists and turns, but continue on until the asphalt ends at Mailbox Peak Trailhead. Press on for about six miles to Tall Moss Cliff on the left, 9.7 miles from I-90. -Nathan

CCC Trail - Eastern Trailhead

Winter Hiking Tips

Nathan's PhotoA sprained ankle forced us to skip our hike this week. Still, we thought it would be a good idea to map out some of the things that were on our mind as the winter hiking and snowshoeing season begins. Drawing on lessons learned last year, we've put together the following tips.


1. Always bring your gear. Even if you don’t plan on much snow, even if the day is perfect and sunny, even if you are only planning on going two miles, throw all your gear into the car. In fact, just leave your snowshoes in the car for the season. Weather changes quickly and you never know the conditions on the trail. It is best to bring everything you’ve got to the trailhead and make a decision from there. You can always leave things in the car.

2. Check the weather. Just before you leave, double check the weather conditions in the area you are going to. Knowing what’s happening right now might cause you to choose a different hike and you’ll save a lot of time going directly to your revised destination.

3. Check the avalanche report. Unless you’re positive that there is no chance of an avalanche along you’re hiking route, you need to take the time to check the avalanche conditions. Get in the habit of checking the report for each hike you take. The local ranger station is a good place to start.

4. Make sure the trail is flagged or bring a GPS. Snow can make things extremely confusing. Make sure the route you’ve chosen is tagged or flagged in some way or check to see if it’s been recently groomed. Generally, if it’s not a popular snowshoe route, it’s unlikely to be marked. For those hikes, bring along your GPS. It’s very easy to get turned around and lost when the snow makes everything look like the trail. We had this happen to us around Melakwa Lake last year.

5. Have a backup plan. Winter weather can cause all sorts of problems that might bar access to your trailhead. Storms can wash out roads, winds can topple trees, and snows can be so deep as to make a road impassable. Any or all of these might prompt a road closure. Having a backup hike in mind saves a lot of time and keeps the frustration levels to a minimum.

6. Bring your emergency gear. It almost goes without saying, but bring your hand warmers, emergency blankets, whistles and extra food. Weather really does change extremely quickly, going from pleasant to blizzard in the span of an hour. Couple that with the ease of losing the trail and wandering through snowbound forests, and you’ve got a recipe for a scary situation. So even if you’re doing a short snowshoe just a few miles from civilization, bring the gear anyway.

7. Tell someone where you’re going and when you expect to be back. This is a good way to make sure that if something happens someone knows where to look for you. Cell phones don’t always work and this can be made worse by weather.

8. Hike smart: if the weather changes or conditions worse beyond what you are prepared for, turn around. No matter how close you are to your goal, avoid the temptation to press on, your goal will still be there to try for again another time. We probably should have done this on East Tiger Mountain.

Mirror, Cottonwood, and Twilight Lakes

Our Hiking Time: 3h 15m
Total Ascent: 1250ft (650ft in; 600ft out)
Highest Point: 4200ft
Total Distance: 5 miles
Location: N 47° 20.6640, W 121° 26.2320
Required Permit: Northwest Forest Pass
Difficulty: Easy

Nathan's PhotoIt’s difficult to spend much time tromping through the woods without running across some body of water dubbed Mirror Lake. We saw the waters of a Mirror Lake en route to the top of Silver Peak and made a mental note to explore its shores in the near future. This week was the perfect opportunity to take a short trip over the Pass to check it out.

The Mirror Lake Trail #1302 begins off Forest Road 5810, momentarily cotton wood lake mirror lake hike hikingwithmybrothertraversing the lingering scars of logging activities circa the 1970s. Shortly however, respite is found in the quiet embrace of forests of fir and pine. The trail is well trodden and easy to follow; however, there are no formal bridges over any of the streams or creeks you encounter. This should not pose much of a problem during the drier months, but rains and snowmelt can make for swollen streams that are tricky to navigate. Creative use of rocks and fallen snags will convey you across, but might make things complicated for young hikers.

Placid Cottonwood Lake is your first destination, replete with campsites for PCT travelers along shores surrounded by the ridges of Tinkham Peak. A nice stopping point perhaps, but Mirror Lake lies less than a mile beyond and easily outclasses Cottonwood Lake. Continue on past the junction leading up to Tinkham and Silver Peaks and down to the lake. Aptly named, the crags of Tinkham are reflected on the glassy surface of Mirror Lake. Find your own little nook within the trees to soak in an alpine setting. Wander to the end of the lake to find a makeshift beach and perhaps the best vantage point for appreciating the view and having a snack.

From here you can call it a day or press on to Twilight Lake and Yakima Pass. One word of caution: once beyond the immediate vicinity of Mirror Lake, the terrain becomes undeniably mirror lake falls mirror lake hike hikingwithmybrotherugly. Unapologetically logged, the clear-cut landscape feels used up. You’ll quickly encounter the unofficially named Mirror Lake Falls offering a cheerful break to the otherwise dreary scene. Without too much fanfare, you’ll arrive at Twilight Lake and Yakima Pass. Small and surrounded by marsh, the lake itself is a bit of a letdown after Mirror, and if this is as far as you’re going, you may want to save yourself the trip.

It may not look like much now, but Yakima Pass was once a busy thoroughfare. In addition to Snoqualmie Pass, Yakima Pass was heavily utilized by Native Americans as a means of crossing the Cascades. Snoqualmie was mainly used for foot traffic, while Yakima, with lighter snow accumulations, was preferred for horse traffic. As Europeans made their way west, Yakima Pass was a popular trade route for the Hudson Bay Company and early explorers. Until 1856 both passes were often referred to as “Snoqualmie Pass,” causing a great deal of confusion for those attempting to find a rail route through the mountains. In 1853 the area was surveyed by George McClellan of McClellan Butte fame, who deemed the real Snoqualmie Pass “impassable” and recommended Yakima Pass as an option. The next year in 1854, Albert Tinkham went through Yakima Pass as well, never finding the lower Snoqualmie pass, but did enough work in the area to have a mountain named after him. It wasn’t until 1856 that J.H.H. VanBokkelen managed to locate and survey the pass we use today.

An extensive trip down Forest Roads to get to the Mirror Lake trailhead makes a hike solely to the lake more trouble than it’s worth. One appeal would be the easy mirror lake mirror lake hike hikingwithmybrotheraccess for little ones to see and experience the feeling of remoteness that Mirror Lake manages to convey, but the difficult fording of a couple of streams might preclude getting the tykes all the way to Mirror. For most hikers, we recommend including this on a trip up to Silver Peak or a longer trip out to Stampede Pass because it’s not so spectacular as to warrant the miles of potholes for its own sake.

To get there, take I-90 to Exit 62 and head right. You’ll pass over the Yakima River and at just over a mile from I-90 take a right on Forest Road 5480. Continue down the road following signs directing you toward Lost Lake and trail #1302. The road will take you up and around Lost Lake and past various hunters’ huts before turning extremely rough about seven miles from the freeway. There are a couple of turnouts to park at here. The trail begins a 1/2 mile further up the road. - Nathan

Mirror, Cottonwood, & Twilight Lakes
Copyright 2008-2016 - hikingwithmybrother.com
hikingwithmybrother@gmail.com