about us | links | permit info
Subscribe to Hiking With My Brother Email Subscribe Follow Hiking With My Brother on Facebook Follow Hiking With My Brother on Twitter Hiking With My Brother Picasa Hiking With My Brother YouTube
Showing posts with label issaquah alps. Show all posts

Grand Ridge Trail - High Point Trailhead

Our Hiking Time: 2h
Total Ascent: 900ft
Highest Point: 900ft
Total Distance: 5.25 miles
Location: N 47° 31.9140, W 121° 58.8540
Required Permit: None
Difficulty: Easy

Nathan's PhotoThis week we stumbled onto Grand Ridge, a portion of the Issaquah Highlands new to us. We’ve spent countless hours on Tiger Mountain never suspecting almost 10 miles of trail were hidden on the other side of I-90. When the morning brought more rain, we decided it was a good day for a short hike and headed out to Grand Ridge to see what we’d been missing.

grand ridge hikingwithmybrotherGrand Ridge is perhaps most famous for the coal mine that operated on and off from the early 1900s through the 1950s. The last of Issaquah’s mines to close down, the Grand Ridge mine was filled in and developers soon began to stake out claims. Fortunately, King County was able to work out a deal in the 1990s that set aside four acres of land for every one acre developed. This 4:1 plan eventually yielded 1,400 acres that became the home of the Grand Ridge Trail System, built largely by the Washington Trail Association.

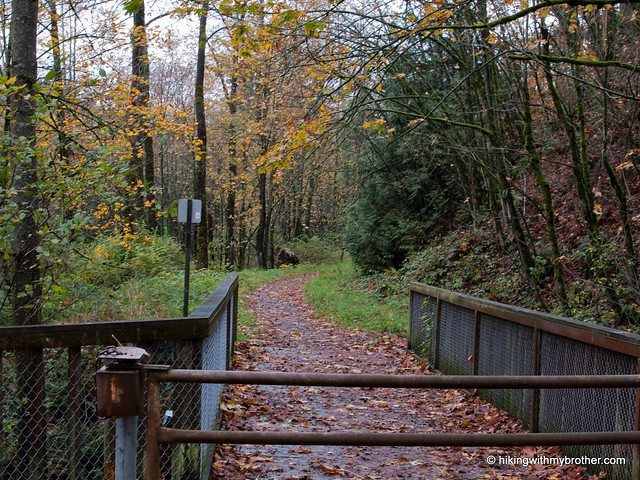
We started from the High Point Parking Area and followed the access road out to the High Point Trailhead, marked by a small trail map of Grand Ridge. Heading up from here will connect you to the short Coal Mine Loop that covers the lower section of Grand Ridge, and provides access to most of the trailheads in the area. Anyone who has spent time hiking around the Issaquah grand ridge hikingwithmybrotherAlps will feel right at home wandering through salal and sword fern. Although we chose not to head to the 1,422’ summit, it is accessible via an unmarked trail, which isn’t on King County’s map. Simply follow the Grand Ridge Trail toward the Mitchell Hill Connector Forest. Although there are no signs, this side trail is well-worn and should be obvious. If you hit the first log bridge, you’ve gone too far.

Grand Ridge is a great little alternative to the often-crowded Tiger Mountain. The surrounding forest is identical, though development occasionally intrudes into the forest scene. Like Tiger, the din of I-90 is almost inescapable, but it is nice to enjoy the mixed forest of maple and cedar without a lot of company. Check out Grand Ridge when you’re short on time and just want to take a walk in the woods without too much hassle.

To get there, take I-90 to Exit 20, and turn left at bottom of ramp. Pass underneath I-90 and find a gravel lot on the left just past the on-ramp. Park and follow the Issaquah–Preston rail trail to the trailhead. -Nathan
Grand Ridge - Highpoint Trailhead

Taylor Mountain Summit

Our Hiking Time: 4h 15m
Total Ascent: 1700ft
Highest Point: 2598ft
Total Distance: 8 miles
Location: N 47° 27.2760, W 121° 53.6820
Required Permit: Discover Pass
Difficulty: Moderate

Nathan's PhotoThe most frustrating thing about Taylor Mountain Forest was the lack of clear access to Taylor Mountain itself. The last time we visited, we assumed – perhaps naively – that if a mountain appears in the name of a park one could expect to find a trail leading to the summit. Just like nearby Tiger, Cougar and Squak. We learned the hard way that Taylor Mountain is outside the park boundaries and gave up thinking we could reach the top. Thankfully, a helpful reader recently sent us directions to the mountain. Determined to finish what we’d started a few years ago, we headed back to Taylor Mountain.

taylor mountain summit hikingwithmybrotherWe found very little information on Taylor Mountain itself, which is the primary reason it took us so long to find our way to the top. Most sources focus on the forest surrounding the park, an experiment in mixing logging and recreational land use that has lasted for nearly 15 years, with marginal success.

Access to the summit follows logging roads past a number of junctions. For the first quarter mile you will be on Forest Road 35900, before turning up 35920. At most of these, continuing to head uphill is the right way to go. The only exception is at roughly the one mile mark where Road 35920 heads downhill.

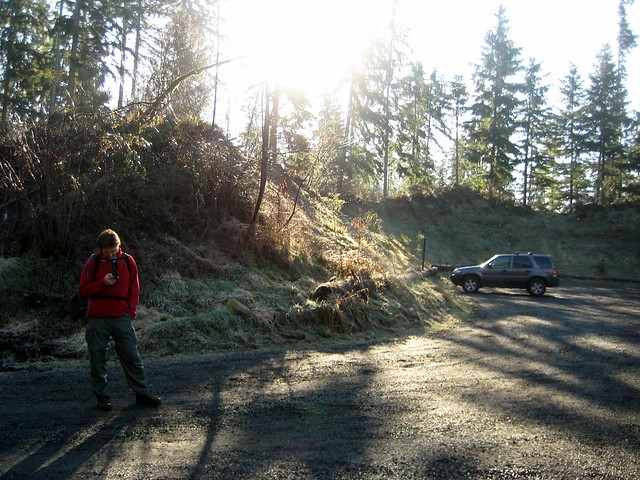
The trickiest part of this hike is getting to the trailhead. There is room for a few cars in front of the gate, but there are a few “No Parking” signs posted, so we opted to park in the nearby Tiger Mountain Summit lot. Unfortunately, parking here requires a quick dash across the highway to get back to the gate, which can be a bit of a hassle. Once you’re at the gate, it is fairly smooth sailing under the power lines and up the mountain side. Amble through alders and young hemlock already edging out the salal and salmon berry that took over after the area was logged. As you hike, keep an eye out for wildlife, we encountered more than we expected, including quite a few hummingbirds.

taylor mountain summit hikingwithmybrotherThis is not the best hike we’ve ever been on. We’re no strangers to walking along logging roads to get to where we are going, but the road to the top does not lend that feeling of getting out into nature that one usually hopes to find on the trail. The route goes through large swaths of recovering clear cuts and culminates in an alder covered summit that is light on views. Some interesting perspectives on Tiger Mountain and Highway 18 are about all you can expect out of this trip, though the network of logging roads are in good condition and could keep the mountain biking set interested for quite some time. And, if you’re looking for something quiet and very close to the city this might just fit the bill.

To get there, take I-90 to Exit 25 Highway 18 junction. Follow Highway 18 south for about 5 miles to the signed Tiger Summit Trailhead parking lot on your right. Park here. Access to Taylor Mountain is on the other side of Highway 18; you will need to cross and walk north a few hundred feet to blue-gated Road 35900. -Nathan

Taylor Mountain Summit

Coal Creek Falls - De Leo Wall Loop - Cougar Mountain

Our Hiking Time: 2h 30m
Total Ascent: 800ft
Highest Point: 1100ft
Total Distance: 5.5 miles
Location: N 47° 32.0760, W 122° 7.7220
Required Permit: None
Difficulty: Easy

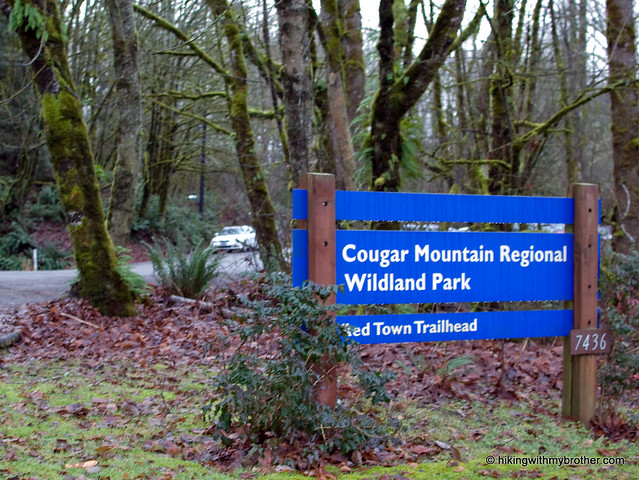
Nathan's PhotoLingering holiday obligations kept us from venturing too far from home this week. Instead, we headed out to Cougar Mountain and the Red Town Trailhead to tour a different portion of the sprawling park.

cougar mountain cold creek falls hikingwithmybrotherCougar Mountain’s friendly greenery gives little indication of the industrial history of the area. Back in 1863, coal was discovered on Cougar Mountain. Over the next 100 years, miners would pull 11 million tons of coal from the mountain before finally sealing the mines in 1963. All that coal prompted folks to dub the area "Newcastle Hills," after England's coal-rich city of Newcastle. Soon, Newcastle Hills coal drove the the creation of Seattle's first railroad, which hauled coal from Cougar Mountain out to Lake Washington and eventually Elliot Bay. Mining towns cropped up around shafts bored into the mountain. One of those settlements was Red Town, named for the color most of the buildings were painted. The current Red Town Trail largely follows what was then Hill Street, the town's main thoroughfare running past houses, schools and businesses. Most of these settlements faded away as the coal industry declined in the 1920s, and by the time World War II was over, neighbors sought to move beyond the area's mining past, and renamed it Cougar Mountain. Today, with a little effort, one can still find the rusting artifacts, lingering cement foundations, and abandoned equipment of those bygone industries. More likely than not, a friendly interpretative sign will be nearby to lend historical context to many of the lingering traces of Cougar Mountain's past.

With 36 miles of official trails and many more miles of “unofficial” or abandoned trails, there is a lot to see on Cougar Mountain. We mapped out a rough route taking us up to the De Leo Wall and past Coal Creek Falls, though it required hop-scotching between a surprising number of cougar mountain cold creek falls hikingwithmybrothertrails. Fortunately, trails are coded and well signed, keeping confusion down to a minimum.

We took the Wildside Trail towards De Leo Wall, a rocky outcropping that affords something of a view of the surrounding housing developments. Trails are well maintained by thousands of booted feet and an army of volunteers. Alders and hemlocks dominate the low forest riddled with streamlets and occasional bogs. On our way back down from the wall we hooked over to see the underwhelming Far Country Falls before pushing on to Coal Creek Falls. The Coal Creek Falls Trail is mild and contains few ups and downs, making it a perfect trail for the kids or trail running, both of which were in attendance on a rainy Sunday morning. The 25’ falls can make a good rest stop along the route or are a popular destination in and of themselves.

While not our usual high-adventure, Cougar Mountain does manage to have a little something tcougar mountain cold creek falls hikingwithmybrothero offer everyone – history, waterfalls, miles of trail, and accessibility for the whole family. Heck, there’s even a zoo. Proximity to the city means there will be a lot of folks to share the trail with, though it isn’t too difficult to head out to more remote parts of the park to find some peace and quiet.

To get there, take I-90 to Exit 13. Head right up the hill on Lakemont Boulevard just over three miles. Look for the entrance to the Red Town Trailhead on the left side of the road. - Nathan
< Cold Creek Falls - De Leo Wall

Squak Mountain - East Ridge to Phil's Creek

Our Hiking Time: 3h 40m
Total Ascent: 1000ft
Highest Point: 1560ft
Total Distance: 8 miles
Location: N 47° 30.6960, W 122° 1.8240
Required Permit: Discover Pass
Difficulty: Easy

Nathan's PhotoA few readers have written to us mentioning that we had given Squak Mountain short shrift with our single exposure to the tamest portions of the park on a rainy day. Finding ourselves in the mood for a short hike this week, we decided to give Squak another chance, albeit still on a very wet and rainy day. Ignoring the popular trailheads, we instead headed to an obscure entrance point off the Issaquah-Hobart Road. We hoped this would give us direct access to those “wild” portions of the park both Harvey Manning and our readers hinted at.

squak mountain east ridge phils creek hikingwithmybrotherThis area of the park does, in fact, have a different feel to it. Squak was never logged to the same degree that Tiger and Cougar have been, and while there is clear evidence of logging in the form of large decaying tree stumps, most of the park has been sheltered from the axe for quite some time. This is largely due to the explicit restrictions the Bullitt family placed on the use of the 590 acres they donated the State of Washington back in the 1970’s that became the heart of the now much larger Squak Mountain State Park. Logging and motorized vehicles are prohibited in most of the park, something of a contrast to the “working” forests of Tiger and Cougar.

We found ourselves hiking merrily along a snow-free path towards Phil’s Creek, the arbitrary destination we’d chosen out of a hat. With so many little side trails and loops to explore there squak mountain east ridge phils creek hikingwithmybrotherwas a lot of opportunity to change our minds if we didn’t like where we ended up. Despite the rain, the lushness of the woods in the springtime was a welcome experience. After weeks of snow and lifeless bramble, leaves are appearing and flowers are already budding. As we switchbacked up Squak on the East Ridge trail, we occasionally caught a foggy glimpse of the surrounding mountains through peek-a-boo portals in the forest wall. We found Phil’s Creek and followed it to the park boundary, enjoying a landscape that fluidly transitioned from dense second-generation firs and pines to marshy wetlands and stands of alder.

Lots of activity and trail improvement is currently underway, so expect to see some volunteers improving the path and repairing some of the washed-out and damaged sections of trail. We still found Squak to be a great choice for trail running or a casual stroll; we also discovered some of the many equestrian trails that the park also has to offer. Squak definitely had some more to offer us on a rainy day than we had given it credit for, and with over 1,500 squak mountain east ridge phils creek hikingwithmybrotheracres to tromp through, there’s still more to explore.

To get to the trailhead we used, take I-90 to Exit 17 and take a right on Front Street. After you pass through downtown Issaquah and just before Front Street becomes the Issaquah-Hobart Road, keep an eye out for Sycamore Drive on the left. Follow Sycamore Drive as it twists itself into Hillside Drive and finally Crystal Creek Circle. You’ll see a gravel path between the houses barred by a couple of wooden posts with white painted tops on your left. Park along the street and head up. - Nathan

Print Google Directions >>

Squak Mountain East Ridge

15 Mile Creek - Tiger Mountain

Our Hiking Time: 3h 40m
Total Ascent: 1600ft
Highest Point: 2100ft
Total Distance: 10.5 miles
Location: N 47° 29.5980, W 121° 58.3800
Required Permit: Discover Pass
Difficulty: Moderate

Nathan's PhotoAlthough we were once again derailed by snow levels, this time we were prepared with a decent fallback hike. We’ve spent a great deal of time climbing the peaks in the Tiger Mountain State Forest, but we had yet to explore the more remote areas hidden in the recesses of the 13,500 acre wood. We’d found a couple of trails online, plugged them into our GPS and decided on a circuitous route out to 15 Mile Creek hoping to run across the fabled “Grand Canyon” we’d heard mention of.

tiger mountain 15 mile creek hikingwithmybrotherTiger Mountain Forest is a “working forest” – timber continues to be carefully harvested from the slopes, and radio towers and power boxes are sprinkled along the side of roads and at the top of various peaks. This means the landscape is constantly changing, and you’re never exactly sure what is around the next bend. While our journey started off on the usual logging road, we quickly leapt onto the Iverson Railroad Trail and then took us through a wide rage of terrain. We tromped past a clear cut to enter a young forest of cedar and fir before pushing deeper into more mature stands. We eventually lost the sound of the highway and enjoyed the snowy surroundings.

The Iverson Trail dumped us onto a logging road that we took up to the Tiger Mountain Trail, which stretches from one end of the Forest to the other. A little over two miles in, we found ourselves on the Artifacts Trail and soon came upon the namesake. tiger mountain 15 mile creek hikingwithmybrotherAt the turn of the 20th century Tiger Mountain was covered in thick stands of old growth, a lumber opportunity that was soon tapped by local logging interests. Among many others, a company called Woods & Iverson set up a mill 1912 that eventually operated and maintained many miles of logging roads and railroad on Tiger Mountain. On February 23rd 1925, an overloaded train hauling debris lost control and jumped the track at Holder Creek, killing a member of the crew who was unable to get off the train in time. Most of the wreck -- which included the engine, a passenger coach, some flat beds and a tracklayer -- was salvaged from the site and the bridge that used to span the creek is long gone. Still, some twisted metal evidence remains, quietly being devoured next to Holder Creek. Rusted wheels sets and spring boxes are piled to one side of the trail, and a few yards further on mangled rails and the moss-covered remains of the tracklayer lean haphazardly against some trees. The thick canopy overhead works with the noise of the creek to give the area a close feel thick with the smell of forest and damp earth.

Short on time, we pressed on to 15 Mile Creek in earnest, which ended up tiger mountain 15 mile creek hikingwithmybrotherputting us back on the Tiger Mountain Trail. The path stayed mostly flat before starting a slight descent toward the next trail intersection, Hobart Grade, which itself took us steeply down the creek. Unfortunately for us, we had not specifically sought out the “Grand Canyon” in our trail hunting, and our route deposited us next to a less-exciting section of 15 Mile Creek. The site is still appealing, though with more time we would have explored the area a bit more, probably heading downstream toward the Grand Canyon Trail. More than once we got a little turned around and had to backtrack, so next time we’ll bring along this trusty map to help us along.

This expedition was a welcome return to what we think of as a traditional hike because for the first time in a while we left the logging roads for some actual trails. The path was gentle and well-maintained and had we been following a more traditional route, we would have never lost our way. This was a vast improvement over recent trek up East Tiger and was a great way to discover lesser-known areas of the park.

To get there, take I-90 to Exit 25 Highway 18 junction. Take Highway 18 south for about 5 miles to the Tiger Summit Trailhead parking lot which will appear on your right. - Nathan

Print Google Directions >>

15 Mile Creek

East Tiger Mountain

Our Hiking Time: 3h 20m
Total Ascent: 1600ft
Highest Point: 3000ft
Total Distance: 8 miles
Location: N 47° 29.2920, W 121° 56.8410
Required Permit: Discover Pass
Difficulty: Moderate

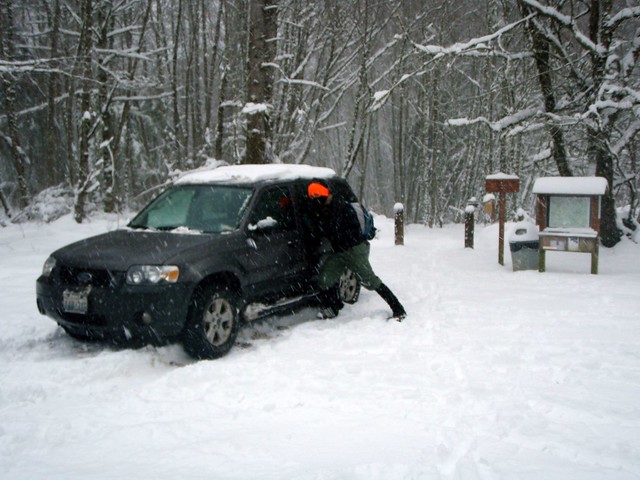
Nathan's PhotoWe’ve logged a lot of time on Tiger Mountain. Most of this has been up to West Tiger #3 via the Cable Line, but after hiking to Poo Poo Point we realized there was a lot of the mountain we’d yet to explore. With snow falling on the streets in Seattle, we thought something a little closer to home was the right choice, so we packed up and headed out the Highway 18 and East Tiger Mountain.


east tiger mountain hikingwithmybrotherThe roughly 14,000 acre Tiger Mountain State Forest was formed in 1981. Shortly thereafter, in 1989, the Tiger Mountain Natural Resource Conservation Area was formed, adding further protections to the 4,400 acres of the most popular recreation areas of Tiger Mountain. The Washington Department of Natural Resources (DNR) manages the mixed use of the forest, including the maintenance of approximately 70 miles of trails and roads.

The journey up East Tiger is entirely on gravel maintenance roads giving access to the various radio towers and antennas that reside at the summit. Most of these roads are built on the roadbeds of logging roads dating back to the 1920s. This means that while East Tiger is the tallest of the Tiger family of peaks, standing just over 3,000ft, its roads have a very mild grade, gently guiding you up the mountain. Occasional views of Taylor Mountain can be seen through the mixed second-generation forest that lines both sides of the road, though the real prize is the broad vista at the end of the hike, showcasing Mt. Rainier, valleys and the Puget Sound.

Or so we’re told. There were no views for us because the low-lying clouds and fog reduced visibility to a few hundred feet. As we gained elevation, our hike became more of a slog as we found ourselves sinking past our knees in the powdery snow. Upon reaching the summit, strong winds and increasing snow flurries made our stay very short.

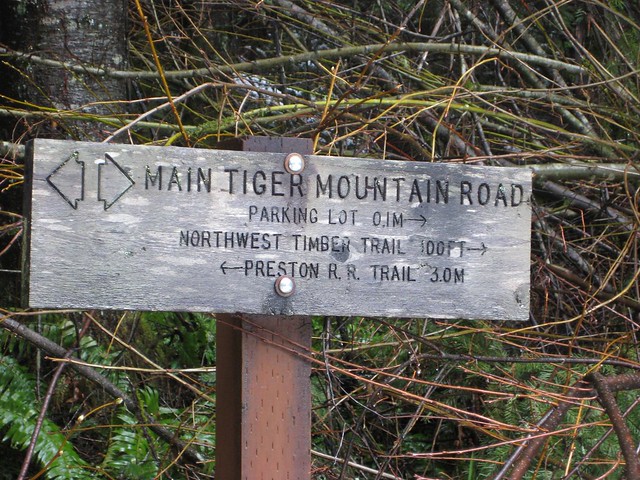
East Tiger is another great trail for snowshoeing, biking, or traileast tiger mountain hikingwithmybrother running with lots of room to share the road. At the 3 mile mark, the road intersects with the Main Tiger Mountain Road, giving access to other peaks and trails in the Tiger Mountain State Forest. The proximity to the city also makes this a great destination for a quick tromp through the woods while avoiding the crowds at West Tiger.

To get to East Tiger, take I-90 to Exit 25 Highway 18 junction. Take Highway 18 south for about 5 miles to the Tiger Summit Trailhead parking lot which will appear on your right. -Nathan

Print Google Directions >>

East Tiger Mountain

Poo Poo Point

Our Hiking Time: 1h 30m
Total Ascent: 1700ft
Highest Point: 1800ft
Total Distance: 4 miles
Location: N 47° 29.9730, W 122° 0.4870
Required Permit: Discover Pass
Difficulty: Moderate

Nathan's PhotoShort on time this week, we returned to Tiger Mountain to explore the curiously named Poo Poo Point. Years ago, Harvey Manning decided to christen the area in honor of the “poo poo” sound made by logging steam whistles. These same whistles presumably helped create the large open fields at the top. Today, these fields are used as a makeshift airport for both hang gliders and paragliders, managing to accommodate both launches and landings.

Traditionally, the Poo Poo Point Trail begins at the Issaquah High School and gently meanders its way 4 ½ miles up to the top. Lacking the time for a 9-mile excursion, we opted to take the moretiger mountain poo poo point hikingwithmybrother direct Chirico Trail to our destination, located a few miles down the road from the high school at the paraglider landing field.

The short hike up the side of Tiger was reminiscent of the Cable Line: a narrow trail blazing its way to the top as quickly as possible. Despite the drizzle, we were joined by many a hiker and more than a few canine companions as we switchbacked through the young forest. We passed many lesser-used trails branching off; some reconnected back up with the main thoroughfare, while others disappeared intriguingly off into the distance. Feeling adventurous, we took one of these paths on our way back down. Unfortunately, our explorations spit us out miles from the parking lot, forcing us on an unpleasant walk down the busy Issaquah-Hobart Road to get back to the car.

The two landing fields offer great views of Squak, Cougar, and Lake Sammamish to the northwest, and Mt. Rainer to the southeast. Take some time to marvel at the Astroturf runway and what it would mean to take a running leap into the air from here. Though moderately steep, this trail is short enough to coax the whole family up, though the narrow trail often becomes slippery with mud after prolonged rain.

To get there, take I-90 to Exit 17 and hang a right on Front Street.tiger mountain poo poo point hikingwithmybrother Front will take you through historic Issaquah before changing into the Issaquah-Hobart Road. Continue for about five miles until you see a large grassy field and a parking lot on your left. This is the paraglide landing area. Park - trail begins on the other side of the field. - Nathan

Print Google Directions >>

Poo Poo Point

Taylor Mountain Forest

Our Hiking Time: 4h 30m
Total Ascent: 2086 ft
Highest Point: 1500ft
Total Distance: 11.8 miles
Location: N 47° 25.9380, W 121° 58.2720
Required Permit: None
Difficulty: Easy

Nathan's PhotoFor a variety of reasons, we found ourselves heading out to explore the Taylor Mountain Forest. At the time of printing Manning had little concrete to say about the area, noting that there was enough trail that one could stroll for an hour or a day. Now that we're seasoned in reading between Manning's lines, we took the time to print a trail map on our way out the door, knowing that there was a good chance things would not taylor mountain forest hikingwithmybrotherbe well signed.

The Taylor Mountain Forest was acquired by King County in 1997 and since that time a small army of volunteers has steadily worked to improve the 1,822-acre site. It was only in 2007 that the current parking lot and trailhead were built to service equestrians, hikers and mountain bikers. The area was heavily logged in the mid-1970s and all the trails are built around an extensive network of logging roads. The Forest is something of an experiment in mixed land use; public use trails and roads skirt the private holdings at its heart, as well as the Cedar River Watershed to the south.

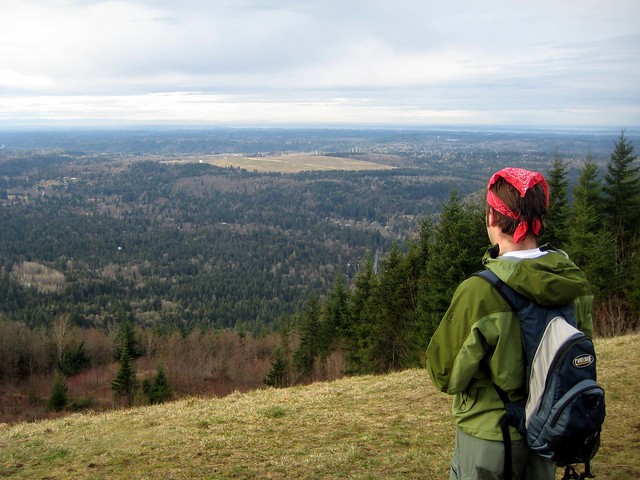
From the parking lot, we embarked up the logging road, map and GPS in hand and a route in mind. As we suspected, this area is only sporadically signed – most trails are unnamed and not all roads and trails were marked on our map. It was about a mile and a half down the road when we came to our first trail, which we eagerly took, anxious to get off a road and onto something that felt more like a hike. This trail taylor mountain forest hikingwithmybrotherwinds up to the top of a grassy hill still recovering from the chainsaw to yield an expansive view of the valley, with Mt. Rainier in the distance and Tiger Mountain just across the highway.

Beyond this view we fumbled and meandered through a series of trails in an attempt to follow our planned route through the Forest. Alternating between the wide and well-maintained roads and the narrow newly-forged trails was a new hiking experience and added an interesting element to our trek. We managed to get turned around a couple of times, but ran into a number of characters, from a lone property owner clearing brush to groups of horseback riders plodding down muddy trails, who were various levels of helpful. Our travels took us through marsh and deciduous new growth, past streams and ponds, and up through more mature pines and firs.

Taylor Mountain Forest is still a work in progress and we found it a little frustrating to navigate. We highly recommend bringing along a map and plenty of patience - we certainly neededtaylor mountain forest hikingwithmybrother the latter when Jer realized he’d left his sunglasses miles back where we had stopped for lunch. We’d written them off as a casualty until the lack of signed trails forced us to backtrack in a way that, by sheer luck, delivered us back to the glasses – a saving grace for being forced to retrace our steps. Additionally, while you can eventually catch a glimpse of Taylor Mountain, the peak itself is private, and there is no real access to its heights. Still, the site has a lot to offer – it’s out of the way and quiet, with lots of space for trail-running, taking the dogs out for some exercise, and enjoying the varied landscape.

To get there, take I-90 to the Highway 18 Interchange, Exit 25. Take a right and head down the highway to the Issaquah-Hobart Road Exit. From here, take a left across the overpass toward Hobart and in less than a quarter mile the signed gravel parking lot will be on your left. -Nathan

Print Google Directions >>

Taylor Mountain

Cougar Mountain - Anti-Aircraft Peak

Our Hiking Time: 1h 40m
Total Ascent: 600ft
Highest Point: 1400ft
Total Distance: 3 miles
Location: N 47° 31.2500, W 122° 5.4833
Required Permit: None
Difficulty: Easy

tiger mountain hikingwithmybrotherNathan's PhotoDespite greater Seattle being pretty much snowed in, and I-90 closed past North Bend, and fresh snow beginning to fall, we decided to go for a quick hike anyway. Still, this severely limited our options. We chose Cougar Mountain because we were familiar with parts of it already and knew the 8 inches of snow would make the hike that much more fun. Plus it would round out the Cougar-Squak-Tiger trifecta for us. Major roads were not too bad and we managed to make it to the Anti-Aircraft Peak Trailhead with only a few questionable moments. We positioned the car so we wouldn’t get stuck, geared up, and took a study of the free trail maps before setting off.

The peak is named in honor Cougar Mountain's military legacy. Following World War II, 90mm anti-aircraft guns were installed in 1953 to guard Puget Sound until they were replaced from 1957-1964 by a Nike Ajax Missile Defense System. The installation languished until 1983 when King County acquired it from the military and began developing a regional park to preserve Cougar Mountain's cultural and historic heritage. Envisioned by Harvey Manning and first proposed in 1979, the Cougar Mountain Regional Park concept eventually managed to block planned residential development in the park and gain enough voter support to pass a bond measure. Today the park is the largest “urban wildland” in the United States with over 3,000 acres of forest riddled with 36 miles of trails.
tiger mountain hikingwithmybrother
We took to the trail and tromped down the Tibbetts Marsh trail toward the Fantastic Erratic, a short mile and a half away. The trails are wide and very well used and maintained, taking you over streams, beside gullies, and through a mixed forest of alders and evergreens. The network of trails is sprawling but well signed. If you’re unfamiliar with the 45 trail names that appear on these signs, however, be sure to take a map to help reorient you when needed. Trails are also helpfully named with what side of the park they are on they are at as the first letter, (N)orth, (S)outh, (E)ast, (W)est and (C)enter.

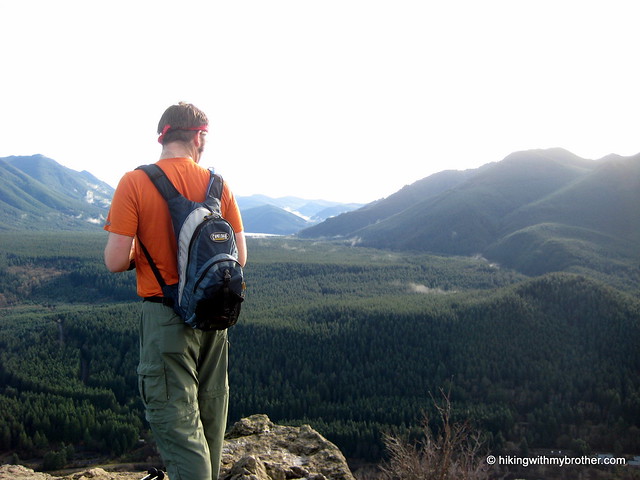
The Fantastic Erratic was much less fantastic under a layer of snow, but the trek down to the basin where it resides was worth it - especially after Jer took a tumble or three off the trail and the Erratic itself. Not only did the snow keep most people away, but provided that close, tiger mountain hikingwithmybrotherinsulated feel, making it seem like were snowshoeing deep in the Cascades instead of within a few miles of sprawling housing developments. We did not meet up with anyone else on the trail, though the fresh tracks we encountered let us know we were not entirely alone. Having started at the top, our way back was almost entirely uphill, made more slightly more difficult by the icy crust that had formed over the snow clawing at our boots and gaiters.

Overall, the trails are easy – great for the family, pets, or trail running – though from our own experience and from everything we’ve read, this is a very popular destination, so expect some company on your forays. The Anti-Aircraft Trailhead can be accessed via I-90 Exit 13. Take a left up Lakemont Boulevard following for roughly 3 miles before taking a left onto Cougar Mountain Way. Meander through the housing developments, continuing to head uphill and Cougar Mountain Way will change into Cougar Mountain Drive and terminate in the trail head parking lot. - Nathan
Print Google Directions >>

Cougar Mountain

Rattlesnake Ledge and Rattlesnake Mountain Trail

Our Hiking Time: 4h 30m
Total Ascent: 2600ft
Highest Point: 3500ft
Total Distance: 10 miles
Location: N 47° 27.5000, W 121° 48.3667
Required Permit: Discover Pass
Difficulty: Moderate

Nathan's PhotoThis week we had some unfinished business to attend to with the Rattlesnake Mountain Trail. Months ago, Rattlesnake Ledge was a good warm up during our Rainier training, but as the weather heated up, the amount of traffic increased exponentially. This created the difficulty of navigating between folks with large packs, which prompted us to forgo this hike in favor of the Cable Line. On one of our last climbs up to the Ledge we pushed past the crowds and further down the Rattlesnake Mountain Trail, quickly encountering icy snowpack that we were fairly unprepared to navigate. After meandering through trails and logging roads, rattlesnake mountain rattlesnake ledge hikingwithmybrotherwe were forced to turn around before reaching the next waypoint on the trail and assumed that we had somehow lost the trail.

We returned this week interested in finishing what we had started earlier in the year and shaking up our routine by doing a through-hike instead of a peak. We parked a car on the Snoqualmie Point end of the trail, and then carpooled up to the Rattlesnake Recreation Area to get started.

On the whole the trail is well maintained and friendly. The short two mile jaunt up to the Ledge makes it an attractive and easily accessible hike for families and large groups, which can quickly clog the sometimes narrow trail. The signed Ledge provides a fairly impressive panorama over Rattlesnake Lake, with Mt. Si, Mailbox Peak, and Mt. Washington dominating the view to the north. From here you can see two more outcroppings perched higher on the mountain which can be easily accessed by continuing up the trail. rattlesnake mountain rattlesnake ledge hikingwithmybrotherThe final ledge gives the greatest vantage point and most western view, with tiny trails carved into the scrub for the more adventurous scramblers to clamber around on.

The trail continues up through increasingly dense forest; at times sunlight is largely blocked out and footsteps lost in browned pine needless and the smell of humus. At about three miles, the trail begins to open up and intersect with a series of logging roads in various states of use and abandon. The trail is well signed and we had no trouble making our way to East Peak and its resident tower and vistas. The forest is young here, still not fully recovered from the timber harvest decades earlier. A mix of Noble firs and pines gives way to cedars and eventually alders, all no more than 30 years old. Trees continue to get younger as the trail progresses until you finally reach very recent cuts. Roughly the last two miles of the trail winds through recent select cut patches, with only a few trees left standing to foster an eventual rebirth.

rattlesnake mountain rattlesnake ledge hikingwithmybrotherEast Peak marks the end of the elevation gain at 3500’, and the rest of the trek was mostly a gentle downhill. Several other viewpoints await the hiker from here; Windy’s Point, Grand Prospect, and Stan’s Overlook are signed stopping points along the route to Snoqualmie Point, all offering expansive views to the north, eventually including views of Mr. Baker, Russian Butte and Mt. Teneriffe. Moderate in difficulty only because of the initial short bouts of steep grade going up to the ledge, this route is a great casual hike through the woods if you’re short on time but want to get some miles in.

From the number of hikers we passed coming from the opposite direction, Snoqualmie Point seems to be the more popular starting point of this trail; however, we’re recommending you start early at Rattlesnake Lake and avoid the crowds and the longer incline. Snoqualmie Point is easily accessed via Exit 27 off I-90 coming from the city. Take a right and follow the road for a ¼ mile until you hit the trailhead. Unfortunately there’s no onramp from Exit 27, so you’ll have to traverse North Bend to get back on I-90. To reach the Rattlesnake Recreation Area take Exit 32 off I-90 and a right on 436th Ave. SE. Follow the main road for a little over three miles before reaching the parking area. The trailhead begins on the opposite side of the lake, accessed via a service road opposite the lot. Park it and get going! - Nathan

Print Google Directions >>

Rattlesnake Mountain

Squak Mountain - Central Peak & Bullitt Chimney Trails

Our Hiking Time: 1h 45m
Total Ascent: 1300ft
Highest Point: 2000ft
Total Distance: 4.6 miles
Location: N 47° 28.908, W 122° 03.248
Required Permit: Discover Pass
Difficulty: Easy

Nathan's PhotoWe were short on time last Sunday, with a number of familial factors limiting the duration of our hike, so we took the opportunity to visit something closer to home. We’d often bypassed Squak in the past, preferring to push further out the I-90 corridor to places a bit more remote and potentially rugged. But, considering the number of times we’d been up and down Tiger, we thought a visit to Squak was long overdue.

squak mountain hikingwithmybrotherSquak Mountain is tucked between Tiger and Cougar Mountains, somehow dodging the feline-themed naming craze that struck the area back in the day. Back in 1972 the Bullitt family donated their one-time summer retreat of roughly 600 acres near the top of Squak to the State of Washington which has since managed to expand the boundaries of the park to encompass some 1,545 acres. There are several entrances to the park; we took one of the lesser known. I-90 to exit 17. Take Front Street N to W Sunset Way. Take a right and head straight, heading up Mt Park Blvd SW until taking a left on Mountainside Dr SW. Follow Mountainside around a curve or two before seeing a spur and some park signs just as Mountainside Dr continues a major switchback up Squak. Go ahead and park and pile out.

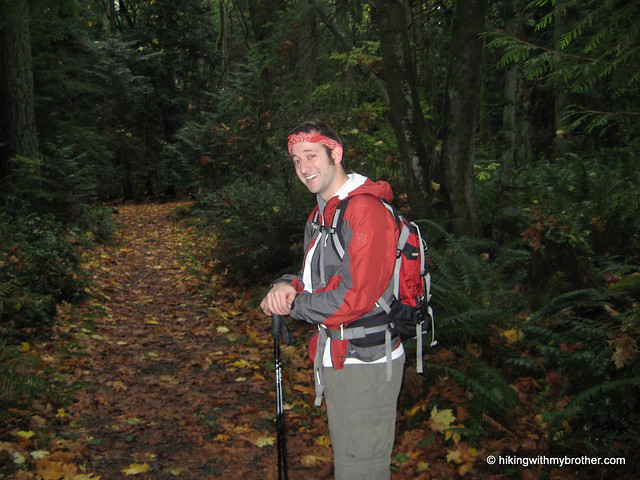
Arriving mid-drizzle we geared up and started off to conquer the nominal peak. We were, perhaps, over-prepared for the well maintained and gentle trail that greeted us. The primarily deciduous forest had already dropped the majority of their leaves and carpeted the trail in gold big leaf maple and brown alder. While the network of trails is fairly extensive, nearly every fork in the trail is well signed, making it unlikely that one could get too twisted around. The detailed map on at the trail head is worth a perusal before setting out, just to get a rough idea of where you’re going.

Our trek up to Central Peak followed the Bullitt Access trail, still fairly wide and graveled despite it being decades since a vehicle clunked its way up to the Bullitt summer cabin near the summit. squak mountain hikingwithmybrotherAfter a few junctions we took the Central Peak fork, where the trail became a little steeper and the vegetation shifted to a more familiar mix of ferns and Douglas fir. At about 1,700 feet, we were in the clouds, giving the trail an otherworldly feel that allowed us to pretend that we might be more than just a few miles outside of town, and that perhaps the occasional rumble was something other than rocks tumbling down the nearby quarry. Almost before we knew it arrived at the microwave towers that currently reside at the summit, along with the obligatory beige shacks, dreary chain link fencing and borderline hysterical over-signage. There’s no real view to speak of, though we supposed that on a clear day one could see Tiger and parts of Issaquah. We didn’t linger.

We took a slightly different route back to swing out and take a peek at the Bullitt Chimney, all that remains of the summer home that once stood here. The Chimney and cement foundation sit in a clearing along with a forlorn picnic table. Bullitt Chimney squak mountain hikingwithmybrother We assume that when a cabin stood here the residents hacked out some sort of view from the surrounding forest, felling trees to take in what could be a nice vista of Renton, Seattle, and the south end of the Sound. As it stands, the rejuvenated forest suffices.

The autumnal smell of damp rotting leaves returned as we descended – there were several opportunities to explore more branches of the trail network, however, we felt that we’d already captured the essence of the park. Squak is great for walking the dog or getting in some trail running close to home, and we would highly recommend bringing the family out for a stroll – nice, well maintained trails, lots of room, not too crowded, but easily accessible. It was not intense enough for our hiking needs, however, so save this one for the kids and look elsewhere if you're yearning for something of a challenge. -Nathan
Print Google Directions >>

Squak Mt Bullitt Chimney
Copyright 2008-2016 - hikingwithmybrother.com
hikingwithmybrother@gmail.com